How to Install Roofing Rubber Material: Complete EPDM Membrane Guide
Master flat roof installations with our step-by-step guide to installing roofing rubber material. Learn EPDM prep, adhesion, and seam splicing.

Understanding Roofing Rubber Material: Why EPDM Dominates Low-Slope Roofs
When contractors and homeowners search for a durable, cost-effective flat roof solution, EPDM (Ethylene Propylene Diene Monomer) consistently emerges as the premier roofing rubber material. Known for its exceptional UV resistance, flexibility in extreme temperature fluctuations, and 30-to-50-year lifespan, EPDM is the standard for residential garages, commercial low-slope buildings, and shed roofs.
While mechanically attached and ballasted systems exist, the fully adhered installation method provides the highest wind uplift resistance and the cleanest aesthetic. This guide details the exact protocols for installing a fully adhered 60-mil EPDM membrane, focusing on substrate preparation, adhesive application, and the critical seam-splicing techniques that prevent catastrophic water intrusion.
2026 EPDM Material Specs & Cost Snapshot
- Material Cost: $1.65 to $2.85 per square foot (60-mil unreinforced black EPDM).
- Adhesive Coverage: Solvent-based contact adhesives yield roughly 100-120 sq. ft. per gallon.
- Weight: ~0.35 lbs per square foot (eliminates the need for heavy structural reinforcement).
- Temperature Thresholds: Installation requires ambient and substrate temperatures above 45°F (7°C).
Pre-Installation: Substrate Compatibility and Deck Preparation
The most common cause of roofing rubber material failure is improper substrate preparation. EPDM adhesives require a porous, clean, and structurally sound surface. Before unrolling the membrane, verify your decking material against the compatibility matrix below.
| Substrate Type | Adhesion Rating | Required Preparation Protocol |
|---|---|---|
| 5/8' CDX Plywood | Excellent | Power sweep. Fill gaps >1/4' with polyurethane caulk. No primer required. |
| OSB (Oriented Strand Board) | Good (with caveats) | Must be sealed with a water-based primer to prevent resin bleed-through. |
| Polyiso Insulation | Excellent | Ensure facer is fiberglass, not foil. Sweep away manufacturing dust. |
| Existing Asphalt/BUR | Poor (Direct) | Requires a separation layer (e.g., 1/2' fiberboard or EPS) to prevent oil migration. |
According to guidelines published by the Single-Ply Roofing Industry (SPRI), any existing moisture trapped within the roof deck must be addressed before adhesion. Use a moisture meter to ensure wood substrates read below 18% moisture content; otherwise, the solvent-based adhesives will trap vapor, leading to blistering.
Step-by-Step Installation Flow
Phase 1: Positioning and Acclimation
EPDM expands and contracts with temperature. If you adhere the membrane while it is cold and tightly rolled, it will expand as it heats up, causing severe wrinkling and 'fishmouths' at the seams.
- Unroll the Membrane: Lay the roofing rubber material out over the roof deck, allowing a minimum 3-inch overhang on all perimeter edges.
- Acclimate: Let the rubber rest and relax for 30 to 45 minutes. In direct sunlight on a 75°F day, this allows the material to reach its natural dimensional stability.
- Align Seams: If using multiple sheets, ensure side laps overlap by a minimum of 3 inches and end laps overlap by 6 inches.
Phase 2: Applying the Bonding Adhesive
For fully adhered systems, you will use a contact adhesive (either water-based or solvent-based, depending on local VOC regulations).
- Fold Back: Fold the membrane back onto itself, exposing half of the roof deck.
- Apply Adhesive: Using a 3/8-inch nap roller, apply the adhesive evenly to both the substrate and the back of the EPDM. Avoid puddling.
- Observe Open Time: Wait for the adhesive to become 'touch-dry' (usually 15-30 minutes). It should not transfer to your knuckle when touched lightly, but should feel aggressively tacky.
- Roll Out: Carefully roll the membrane back into place. Use a stiff push-broom to sweep from the center outward, eliminating trapped air pockets.
- Repeat: Fold back the remaining half and repeat the process, overlapping the center line seamlessly.
Phase 3: Seam Splicing (The Critical Failure Point)
The field of an EPDM roof rarely fails; the seams do. Modern roofing rubber material systems rely on cured EPDM splice tape rather than liquid lap sealants.
Never stretch the membrane while applying seam tape. Stretching creates tension that will eventually pull the tape apart (bridging). If a wrinkle (fishmouth) occurs, slice it open with a hook blade, lay it flat, and patch it with a 4-inch piece of uncured EPDM flashing tape.
- Clean the Seam: Wipe the 3-inch overlap area with a dedicated seam cleaner or Splice Wash to remove manufacturing release agents.
- Apply Primer: Scrub the seam area with a specialized primer (e.g., QuickPrime Plus) using a scouring pad until the surface is uniformly dark and tacky.
- Apply Tape: Center the 3-inch or 6-inch cured EPDM splice tape over the lap. Peel the backing and press down firmly.
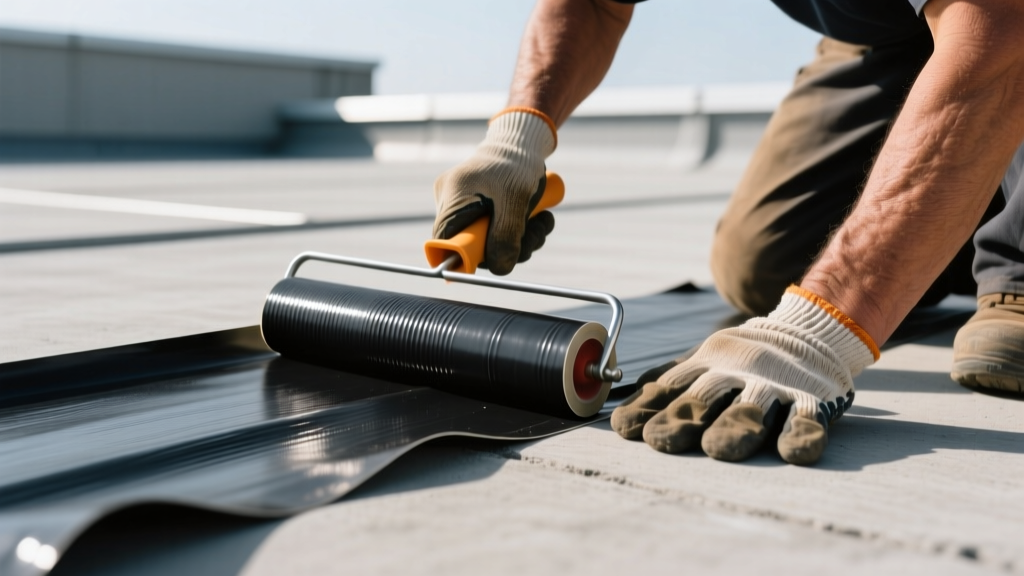
- Roll the Seam: This is non-negotiable. Use a 2-inch wide silicone seam roller. Apply roughly 75 lbs of downward pressure, rolling in one direction only to push air out. The seam should show a distinct 'bead' of adhesive squeezing out the edges, indicating proper molecular bonding.
Flashing, Penetrations, and Edge Details
Flat roofs are defined by their details. Standard cured EPDM cannot conform to tight inside corners or complex pipe penetrations. For these areas, you must use uncured EPDM flashing, which stretches and molds to 3D shapes.
- Pipe Boots: Use pre-molded EPDM pipe boots. Apply pourable sealer into the boot's pocket before sliding it over the PVC or cast-iron pipe, then clamp the base with a stainless steel hose clamp and seal the perimeter with uncured flashing tape.
- Inside/Outside Corners: Stretch uncured EPDM into the corner, ensuring no bridging. The material will vulcanize (cure) into its stretched shape within 48 hours of UV exposure.
- Perimeter Termination: The roofing rubber material must be terminated into a structural reglet or nailed off with a termination bar every 12 inches, sealed with a continuous bead of polyurethane lap sealant.
For buildings in high-heat climates, consider the thermal implications of black rubber. The U.S. Department of Energy's Cool Roofs guide notes that while black EPDM is highly durable, it can reach surface temperatures of 170°F in summer. If cooling costs are a primary concern, specify a white EPDM membrane or apply a silicone roof coating post-installation to increase solar reflectance.
Post-Installation Inspection Checklist
Before demobilizing, conduct a rigorous quality assurance walkthrough:
- The 'Sweep' Test: Walk the entire roof with a stiff broom. Any hollow sounds indicate un-bonded adhesive pockets that require a slit-and-patch repair.
- Seam Probe: Use a blunt seam probe (or a dull putty knife) to run along every inch of spliced tape. If the probe catches or lifts the edge, the seam must be cleaned, re-primed, and covered with a 4-inch patch.
- Edge Metal Check: Verify that all drip edges and termination bars are fastened into solid wood or masonry, never just into insulation or OSB edges.
Expert FAQs on Rubber Roofing Adhesives
Can I install roofing rubber material over an existing torch-down roof?
Not directly. The asphalt oils in modified bitumen and torch-down roofs will migrate through the EPDM, breaking down the rubber's chemical structure and causing it to turn to mush. You must install a separation barrier, such as a 1/2-inch high-density EPS insulation board or a fiberglass-faced polyiso layer, mechanically fastened to the deck before adhering the EPDM.
Water-based vs. Solvent-based adhesives: Which should I choose?
Solvent-based contact adhesives offer a faster grab and perform better in marginal temperatures (down to 40°F). However, they emit high VOCs and are restricted in states like California. Water-based adhesives (like acrylic bonding adhesives) are eco-friendly and easier to clean up, but they require strict adherence to the 'open time' window and cannot be applied if freezing temperatures are expected within 24 hours.
Written by
Marcus ChenMarcus Chen is a licensed structural engineer (PE) and building materials analyst with over 12 years of experience across residential, commercial, and industrial construction. He holds a Master of Science in Civil Engineering from UC Berkeley and spent six years at Thornton Tomasetti before transitioning to independent consulting and technical writing. Marcus specializes in material selection for seismic-prone regions, concrete reinforcement strategies, and lifecycle cost analysis. His work has been cited by the American Concrete Institute (ACI) and the Structural Engineers Association of California (SEAOC). When he is not on a job site or at his desk, you will find him hiking the Sierra Nevada or restoring a 1920s craftsman bungalow in Oakland, CA.
More from Marcus Chen
View all
Construction Cost
How Much Did the Eiffel Tower Cost to Build?
How much did the Eiffel Tower cost to build in 1889? We adjust for inflation and compare its budget to modern skyscraper construction.
Aug 4, 2026

Fire Resistance
What Is a Fire Resistant Material? Testing & Certification Guide
Discover what is a fire resistant material through ASTM and UL testing. Learn how fire ratings, certifications, and assemblies work in construction.
Aug 4, 2026

Construction Cost
How Much Did the Burj Khalifa Cost to Build?
How much did the Burj Khalifa cost to build? We break down the $1.5B project and extract 5 money-saving strategies for your next build.
Jul 30, 2026