Membrane Roofing Material Installation: TPO Adhered Guide
Learn the exact steps for fully adhered TPO membrane roofing material installation, including adhesive rates, heat-welding temps, and edge detailing.

Material and Tool Manifest for Fully Adhered TPO
Installing a fully adhered thermoplastic polyolefin (TPO) membrane roofing material requires precise product selection to ensure long-term watertight integrity and wind uplift resistance. Unlike mechanically attached systems, fully adhered roofs distribute wind loads evenly across the substrate, making them ideal for high-wind regions and buildings with strict aesthetic requirements where visible fastener plates are unacceptable.
Core Material Specifications
- Membrane: 60-mil reinforced TPO (e.g., Elevate UltraPly TPO or Carlisle Sure-Weld). The polyester scrim reinforcement provides dimensional stability and puncture resistance.
- Insulation: 2-inch to 4-inch polyisocyanurate (polyiso) boards with coated glass facers (CGF). CGF facers are mandatory for adhered systems to prevent the water-based adhesive from delaminating the facer.
- Adhesive: Low-VOC, water-based TPO bonding adhesive. Avoid solvent-based adhesives on polyiso, as they can degrade the foam core over time.
- Welding Equipment: Automatic hot-air welder (e.g., Leister Varimat V2) for field seams, and a handheld triac welder with a 2-inch silicone pressure roller for details and penetrations.
Substrate Preparation and Insulation Layout
The longevity of any membrane roofing material is entirely dependent on the substrate beneath it. Before unrolling the membrane, the roof deck must be clean, dry, and structurally sound. Before laying insulation, verify if a vapor retarder is required by the building code or the project architect. In cold climates or buildings with high interior humidity (like swimming pools or commercial kitchens), a 6-mil polyethylene vapor retarder or a self-adhered modified bitumen vapor barrier must be installed directly over the steel or wood deck to prevent interstitial condensation within the polyiso insulation.
Do not install insulation or adhesive if the ambient temperature is below 40°F (4°C) or if frost is present. Furthermore, the moisture content of wood decks must be below 20%, and concrete decks must be fully cured and dry. Applying water-based adhesive over a damp substrate will trap moisture, leading to adhesive failure and membrane blistering.
Insulation Fastening Protocol
Even in a fully adhered membrane system, the insulation boards must be mechanically fastened to the deck. According to the National Roofing Contractors Association (NRCA) guidelines, insulation joints must be staggered by at least 50% in both directions to prevent continuous thermal bridges and adhesive seepage into the joints.
For a standard FM 1-90 wind uplift rating, fastener density increases at the roof perimeter and corners. In the field, use 5 fasteners and plates per 4x8 foot board. In the perimeter, increase to 8 fasteners, and in the corners, use 12 fasteners per board. Always consult the specific project's wind uplift design, which must comply with Single-Ply Roofing Industry (SPRI) and ANSI/SPRI WD-1 standards.
Applying the Membrane Roofing Material
The fully adhered installation method relies on continuous ribbons of adhesive to bond the TPO membrane to the polyiso facer. Precision in adhesive application and timing is the most critical variable in this process.
Step 1: Positioning and Folding
Roll out the TPO membrane and allow it to relax for 30 minutes to release manufacturing tension and eliminate wrinkles. Fold the membrane back on itself longitudinally, exposing exactly half of the insulation substrate. Ensure the fold is straight and does not crease the material.
Step 2: Adhesive Application
Using a 3/4-inch nap roller or a specialized adhesive pump, apply the water-based TPO bonding adhesive in 12-inch to 18-inch wide ribbons, spaced 12 inches on center (o.c.). The expected coverage rate is 125 to 150 square feet per gallon. Do not over-apply; pooling adhesive will remain liquid and fail to cure, eventually causing membrane ridging.
Step 3: The Knuckle Test and Embedment
Water-based adhesives require a 'flash time' to allow water evaporation before the membrane is embedded. This typically takes 15 to 45 minutes depending on humidity and temperature. Perform the knuckle test: press your bare knuckle into the adhesive. It should feel highly tacky and string slightly, but no adhesive should transfer to your skin. Once ready, carefully roll the membrane into the adhesive, using a heavy linoleum roller or a broom to press out air pockets and ensure 100% contact.
Heat-Welding Seams: Temperature and Speed Matrix
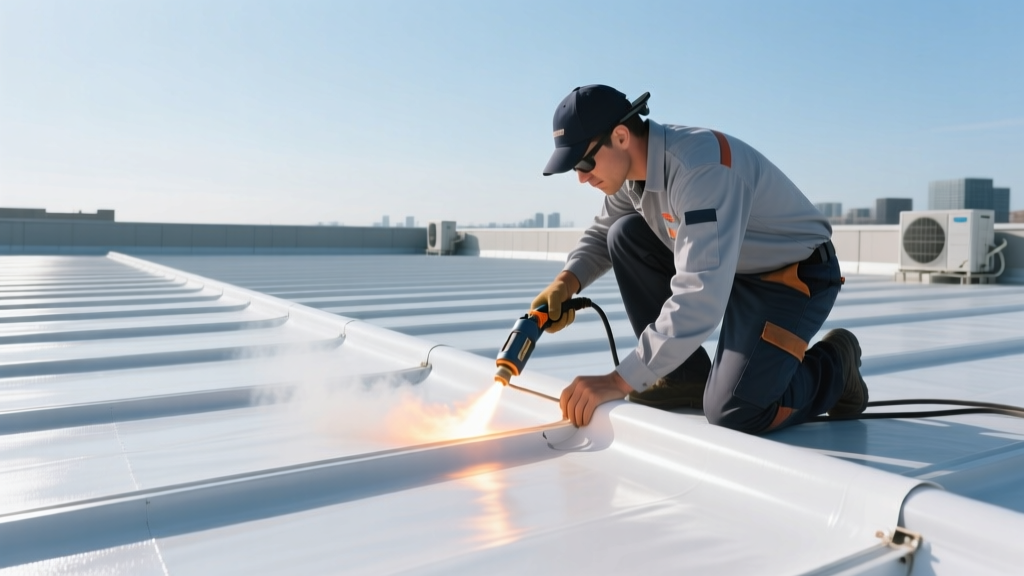
TPO membrane roofing material relies on thermal fusion to create monolithic, watertight seams. Field seams require a minimum 1.5-inch overlap, with a 1-inch continuous weld. The automatic welder's temperature and speed must be dynamically adjusted based on ambient conditions to prevent cold welds (which will peel) or burn-throughs (which destroy the scrim).
| Ambient Temperature | Welder Heat Setting | Travel Speed | Silicone Roller Pressure |
|---|---|---|---|
| 40°F - 55°F (Cold) | 1150°F - 1200°F | 8 - 10 FPM | High (Full Weight) |
| 56°F - 75°F (Moderate) | 1050°F - 1100°F | 12 - 15 FPM | Medium |
| 76°F - 95°F+ (Hot) | 950°F - 1000°F | 15 - 18 FPM | Light to Medium |
Note: FPM = Feet Per Minute. Always run a test weld on a scrap piece of membrane at the start of the day and after any 30-minute work stoppage to verify settings.
Flashing and Penetration Detailing
The majority of leaks in membrane roofing systems occur at penetrations and transitions. TPO requires specific detailing techniques that differ fundamentally from EPDM or PVC.
Pipe Boots and Pourable Sealer Pockets
For round penetrations under 6 inches in diameter, use pre-formed TPO pipe boots. The boot must be heat-welded to the field membrane using a handheld welder and a 2-inch silicone roller. For penetrations between 6 and 12 inches, or for irregular shapes, fabricate a TPO pan and use a pourable sealer pocket. Fill the pocket with a two-part polyurethane pourable sealer, ensuring it is pitched slightly to shed water away from the pipe.
Inside and Outside Corners
Inside and outside corners require specialized fabricated TPO corner pieces. Do not attempt to fold or crease the field membrane into a 90-degree angle, as this creates tension that will eventually pull away from the substrate. Instead, weld pre-formed TPO inside and outside corners to the field membrane, ensuring a minimum 2-inch overlap on all sides. The handheld welder must be kept in constant motion to avoid burning the material at the apex of the corner.
Wall Terminations
When the membrane transitions up a parapet wall or curb, it must be terminated securely. Install a 1/8-inch by 1-inch extruded aluminum termination bar, fastened to the substrate with masonry screws or wood screws at a maximum of 8 inches on center. The top edge of the termination bar must be sealed with a continuous bead of TPO lap sealant or a TPO-coated metal flashing strip welded directly over the bar.
Post-Installation Inspection Protocol
Quality assurance is non-negotiable. A properly installed membrane roofing material will fail prematurely if seam integrity is not verified before the crew demobilizes.
The Blunt Probe Test
Once all seams have cooled to ambient temperature, inspect 100% of the welds using a blunt cotter pin or a specialized TPO seam probe. Run the probe along the edge of every seam with moderate downward pressure. If the probe catches or slips into the seam edge, mark the area with a lumber crayon and immediately re-weld the defect using a handheld welder and a 4-inch TPO patch.
Destructive Peel Testing
At the start, middle, and end of each workday, perform a destructive field peel test. Cut a 2-inch wide by 6-inch long sample from a seam intersection. Using locking pliers, peel the top ply back at a 180-degree angle. A successful weld will result in a 'film tear'—meaning the TPO membrane itself stretches and tears before the welded seam separates. If the seam peels apart cleanly (an adhesive failure), the welder temperature or speed is incorrect, and all seams welded since the last successful test must be probed and re-welded.
Written by
James ThorntonJames Thornton is a construction industry veteran with 25 years of hands-on experience in wood framing, lumber grading, and residential building codes. He started as a framing carpenter in rural Oregon, earned his ICC Residential Building Inspector certification, and eventually became a senior plan reviewer for the City of Portland Bureau of Development Services. James holds a B.S. in Wood Science & Technology from Oregon State University and is a certified lumber grader through the West Coast Lumber Inspection Bureau (WCLIB). He has inspected over 3,000 residential construction sites and authored the city's internal guide on advanced framing techniques (2x6 at 24" O.C.). James lives in Bend, OR, where he builds custom timber-frame cabins and competes in lumberjack sports.
More from James Thornton
View all
Insulation
Best Home Insulation Materials: Complete 2026 Guide
Compare top home insulation materials for 2026. Find R-values, installed costs per square foot, and best uses for fiberglass, spray foam, and mineral wool.
Aug 4, 2026

Sustainable Building
Certify Your Green Building Material for LEED and WELL
Step-by-step guide to certifying a green building material for LEED v5 and WELL v2. Master EPDs, HPDs, and VOC limits for 2026 project specifications.
Aug 4, 2026

Stone & Masonry
Veneer Stacked Stone Panels: Interior Design & Style Showcase
Discover how veneer stacked stone panels transform interiors. Explore modern design profiles, material pairings, and technical installation specs.
Aug 4, 2026