Master Corrugated Roofing Materials Installation: A Pro Guide
Learn how to install corrugated roofing materials with our pro guide. Covers decking prep, fastener spacing, overlap rules, and flashing details.

Substrate Preparation and Underlayment Requirements
Proper installation of corrugated roofing materials begins long before the first panel is hoisted onto the roof. The substrate must be rigid, dry, and properly ventilated to prevent condensation buildup and structural deflection. For residential applications, a minimum of 1/2-inch CDX plywood or oriented strand board (OSB) is required. If utilizing an open batten system, 1x4 or 2x4 treated pine battens spaced at 24 inches on-center (O.C.) provide the necessary structural backing for wind uplift resistance.
Before laying panels, install a high-quality synthetic underlayment or ASTM D226 Type I asphalt felt. According to guidelines from the National Roofing Contractors Association (NRCA), synthetic underlayments are preferred for metal and polycarbonate roofs due to their higher tensile strength and resistance to tearing under foot traffic during installation. Always install a drip edge at the eaves and rakes before rolling out the underlayment to ensure water is directed into the gutters rather than wicking back under the roof edge.
Material Selection: Gauge, Coating, and Slope Minimums
Corrugated roofing materials are predominantly manufactured from Galvalume steel (aluminum-zinc alloy coated) or structural polycarbonate. The thickness, or gauge, dictates the purlin spacing and overall lifespan.
- 29-Gauge Galvalume: The residential standard. Yields a thickness of approximately 0.014 inches. Best suited for purlin spacing up to 24 inches O.C. Costs between $1.50 and $2.50 per square foot.
- 26-Gauge Galvalume: The commercial and high-wind standard. Yields a thickness of 0.018 inches. Allows for purlin spacing up to 36 inches O.C. and offers superior resistance to oil-canning. Costs between $2.25 and $3.50 per square foot.
- Polycarbonate (0.8mm - 1.2mm): Used for skylights and agricultural buildings. Requires strict adherence to thermal expansion protocols.
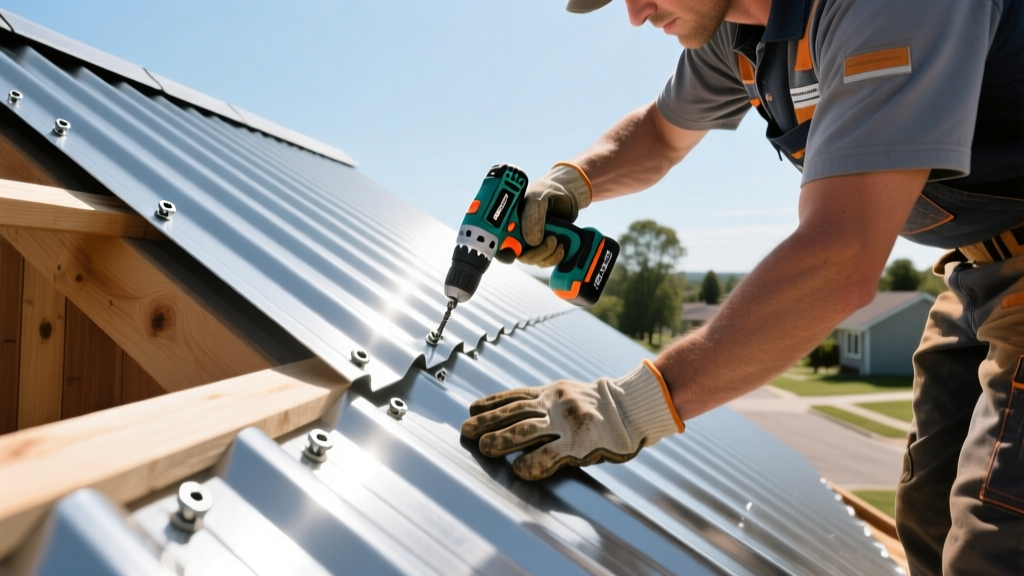
Step-by-Step Installation Sequence
Step 1: Establishing the Plumb Line
Never align the first panel to the eave or rake edge, as framing lumber is rarely perfectly square. Snap a chalk line 12 inches in from the rake edge and parallel to the ridge. This line serves as your master plumb guide. If the first panel is off by even 1/4 inch over a 20-foot run, the error will compound across the roof plane, resulting in misaligned ridge caps and exposed laps.
Step 2: Panel Alignment and Overlap Rules
Position the first panel so it overhangs the eave drip edge by exactly 1.5 to 2 inches. This specific overhang length ensures water drips clear of the fascia while maintaining enough bearing surface for the eave fasteners. When overlapping panels laterally, the standard requirement is 1.5 corrugations (one full valley and one full peak). This ensures the fastener on the overlapping panel bites through both sheets and into the structural substrate.
Step 3: End Laps and Sealant Placement
When a single panel cannot span from eave to ridge, an end lap is required. End laps must occur directly over a purlin or structural support. The minimum overlap for slopes 4:12 and greater is 6 inches; for 3:12 slopes, increase this to 8 inches. Apply a 3/8-inch bead of high-quality polyurethane or butyl roof sealant across the width of the lower panel, positioned 1 inch from the edge of the overlap, before securing the fasteners.
Fastening Matrix and Torque Specifications
Fastener selection and driving torque are the most common points of failure when installing corrugated roofing materials. Always use self-drilling TEK screws with a minimum 1/4-inch hex head and a bonded EPDM (ethylene propylene diene monomer) washer. The EPDM washer must be rated for UV exposure and extreme temperature fluctuations (-40°F to 250°F).
| Roof Zone | Fastener Specification | Spacing Pattern | Lap Requirement |
|---|---|---|---|
| Eaves & Rakes | #12 x 1' Hex Washer w/ EPDM | Every Corrugation Valley | N/A |
| Field (Interior) | #10 x 1' Pancake or Hex Head | Every 2nd Corrugation Valley | 1.5 Corrugations |
| End Laps | #12 x 1' Hex Washer w/ EPDM | Every Corrugation Valley | 6' Minimum Overlap |
| Side Laps (Top of Rib) | #12 x 3/4' Stitch Screw (Lap) | Every 24' O.C. along the rib | Stitch only (no substrate bite) |
Thermal Expansion and Cutting Protocols
The Metal Construction Association (MCA) emphasizes that thermal expansion must be accommodated during installation. Steel panels expand and contract approximately 1 inch per 100 feet for every 100°F temperature change. Polycarbonate panels expand at a significantly higher rate—up to 3mm per meter per 10°C. When installing polycarbonate corrugated roofing materials, you must pre-drill all fastener holes with a 1/8-inch oversized bit to allow the panel to slide laterally under the screw shaft without buckling.
Cutting Restrictions: Never use an abrasive angle grinder or friction blade to cut Galvalume panels. The extreme heat generated melts the zinc-aluminum coating, destroying the galvanic corrosion protection and leading to immediate rust at the cut edge. Instead, use electric metal shears, a nibbler, or a circular saw equipped with a cold-cutting carbide-tipped metal blade. Always sweep away metallic swarf (drilling dust) immediately, as embedded steel particles will rust and stain the roof surface within days.
Flashing, Ridges, and Penetrations
Water management at transitions requires specialized closures. Install closed-cell foam closure strips at the ridge cap and eave line. The foam must match the exact profile of the corrugated panel to block wind-driven rain, dust, and pests. Secure the ridge cap using #12 x 1.5-inch hex washer screws driven into the high ribs (peaks) of the panel, not the valleys. Driving screws into the valleys at the ridge compromises the primary water-shedding channel.
For pipe penetrations, utilize a flexible EPDM or silicone roof boot (e.g., Oatey Master Flash) rated for the specific exhaust temperature of the pipe. Slide the boot under the uphill shingle or panel lap, and over the downhill lap, sealing the top edge with a continuous bead of polyurethane sealant.
Troubleshooting Common Failure Modes
- Washer Blowout (Over-driving): If the EPDM washer is squeezed completely flat or the metal washer is visible, the screw is over-driven. This compromises the seal and strips the substrate threads. Adjust your drill's clutch setting (typically between 4 and 6 on a standard 20V cordless drill) until the washer just bulges slightly past the metal edge.
- Capillary Backflow: Water defying gravity and moving uphill under the lap. This occurs when side laps are too tight, or when debris blocks the corrugation valley. Ensure the 1.5 corrugation overlap is maintained and that the valley remains clear of sealant squeeze-out.
- Oil-Canning: Visible waviness or buckling in the flat areas of the metal panel. This is caused by fastening panels too tightly, restricting natural thermal movement, or installing over an uneven substrate. Fasteners should be snug, not torqued to the point of pulling the panel flat against an irregular deck.
Frequently Asked Questions
Can I install corrugated metal directly over existing shingles?
While local building codes sometimes permit this, it is highly discouraged. Installing directly over shingles traps moisture against the metal underside, accelerating corrosion. It also prevents the use of proper underlayment and makes it impossible to ensure a flat, plumb substrate. Always use 1x4 battens installed vertically and horizontally over the old roof to create a vented air gap and a true fastening plane.
How do I handle prevailing winds when planning the lap direction?
Always start installing panels on the side of the roof opposite the prevailing wind direction. This ensures that the wind blows over the overlapping edge rather than catching the exposed lip of the lap, which can cause uplift and drive rain underneath the panels.
Written by
David NakamuraDavid Nakamura is a licensed architect (AIA) and construction technology writer focused on sustainable building methods, mass timber engineering, and high-performance building envelopes. He holds a Master of Architecture from the University of Washington and is a certified Passive House Consultant (CPHC). David spent eight years at the Seattle firm Mithun, where he led the design of three LEED Platinum projects, before founding his own practice specializing in net-zero residential design. He serves on the editorial advisory board of GreenBuilder Magazine and has authored peer-reviewed papers on cross-laminated timber (CLT) connections for the Journal of Structural Engineering. In his spare time, David teaches woodworking at Pratt Fine Arts Center and kayaks the Puget Sound.
More from David Nakamura
View all
Construction Cost
Labor Cost to Build a Deck Per Sq Ft: 2026 Installation Guide
Discover the exact labor cost to build a deck per sq ft in 2026. This installation guide breaks down contractor rates, complexity factors, and hidden fees.
Aug 4, 2026

Construction Cost
How Much Does It Cost to Build a 3 Bedroom House? Financing Guide
Learn exactly how much it costs to build a 3 bedroom house and explore 2026 financing options, construction loan types, and budget frameworks for your build.
Aug 4, 2026

Construction Cost
Cost to Build a Tennis Court: 2026 Guide
How much does it cost to build a tennis court in 2026? Breakdowns for asphalt, concrete, and synthetic surfaces plus fencing and lighting.
Jul 30, 2026