Installing Different Types of Metal Roofing Material: A Guide
Master installing different types of metal roofing material. Learn fastener specs, thermal gaps, and seaming methods for steel, aluminum, and copper roofs.

Installing metal roofing requires adapting your fastening strategy, underlayment selection, and seaming techniques to the specific metallurgy and profile of the panels. The installation protocols for a 29-gauge corrugated steel agricultural roof differ vastly from those required for a 16-ounce copper architectural system. Misapplying fasteners or ignoring thermal expansion coefficients leads to catastrophic failures, including oil canning, galvanic corrosion, and fastener back-out. This guide details the exact installation parameters for the different types of metal roofing material used in residential and commercial applications.
The Material-to-Fastener Matrix
Before unloading panels, verify that your fasteners, clips, and underlayment match the specific metal type. Using incompatible metals causes rapid galvanic corrosion, while incorrect fastener lengths compromise the structural pull-out resistance.
| Material Type | Standard Gauge / Thickness | Fastener / Clip Requirement | Underlayment Specification |
|---|---|---|---|
| Corrugated Steel (Exposed) | 29 or 26 Gauge | #10 x 1' or 1-1/2' Pancake head w/ EPDM | 30lb Felt or Synthetic |
| Galvalume Standing Seam | 24 or 22 Gauge | Concealed floating clips (1' clearance) | High-Temp Synthetic + Eave Membrane |
| Aluminum Standing Seam | 0.032' or 0.040' Thickness | Stainless steel or aluminum floating clips | High-Temp Synthetic + Eave Membrane |
| Copper (Batten or Flat Lock) | 16 oz or 20 oz Cold-Rolled | Copper or 304/316 Stainless cleats | Red rosin paper + High-Temp Membrane |
| Zinc (Titanium Zinc) | 0.7mm or 0.8mm | Stainless steel cleats, ventilated air gap | Vapor-permeable membrane + Vent mat |
Exposed Fastener Systems: Corrugated and R-Panel Steel
Exposed fastener systems, commonly utilizing corrugated or R-panel profiles, rely on screws that penetrate directly through the metal face into the roof deck or purlins. While cost-effective, these systems are highly susceptible to installation errors regarding torque and placement.
Fastener Placement and Torque Specifics
For 26-gauge and 29-gauge steel panels installed over 1x4 wood purlins spaced 24 inches on center (O.C.), use #10 x 1-inch or 1-1/2-inch carbon steel screws with a pancake head and a minimum 0.25-inch thick EPDM washer. Drive fasteners into the flat of the panel, never the crest of the corrugation, to ensure the washer compresses fully against a rigid surface.
- End Laps: Maintain a minimum 12-inch end lap for roofs with a 3:12 pitch or greater, and a 24-inch end lap for lower pitches. Apply a 1/4-inch bead of butyl sealant between the laps before fastening.
- Side Laps: Overlap panels by exactly one and a half corrugations. Fasten through both layers at every purlin line.
- Torque Control: Set your drill clutch to deliver 12 to 15 inch-pounds of torque. The EPDM washer should bulge slightly past the edge of the metal washer head, but the metal washer itself must not bend or dish.
Overdriving exposed fasteners is the leading cause of leaks in corrugated metal roofs. Excessive torque compresses the EPDM washer until it extrudes completely, leaving the metal washer to cut into the panel coating. This exposes the raw steel substrate to moisture, initiating rust streaks within 12 to 18 months. Always use a depth-sensitive nose piece on your drill.
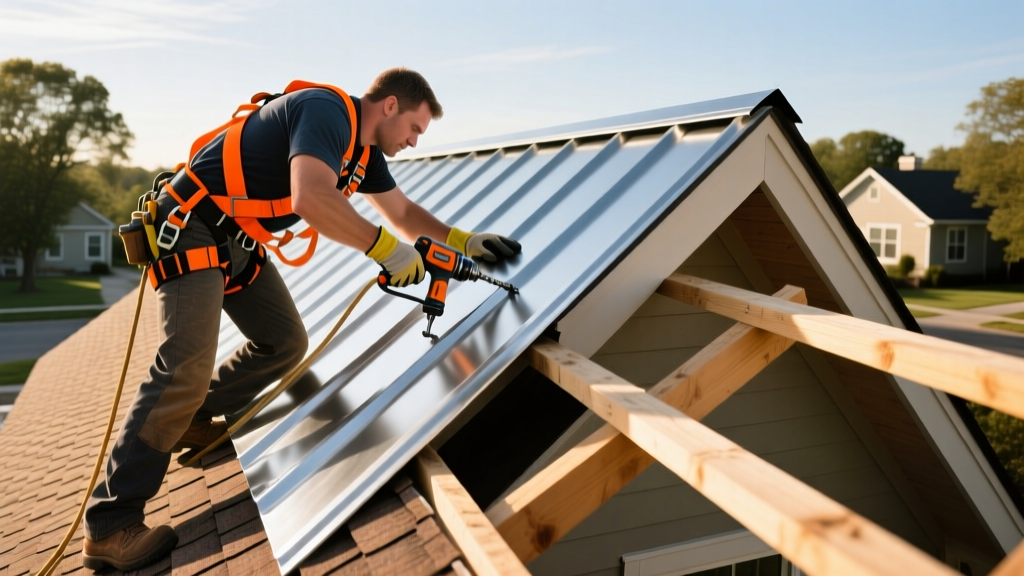
Concealed Fastener Systems: Standing Seam Installation
Standing seam roofs eliminate face-penetrations by utilizing concealed clips that attach to the deck, allowing the panel legs to snap or mechanically seam over the clip. This design accommodates the significant thermal expansion and contraction inherent to large metal planes.
Managing Thermal Expansion and Clip Alignment
Steel and aluminum panels expand and contract at different rates. A 100-foot run of 24-gauge Galvalume steel can experience up to 1.25 inches of thermal movement between winter and summer extremes. To accommodate this, floating clips must be installed with the clip base centered in the slotted hole, providing equal travel distance in both directions.
Space primary clips 24 inches O.C. along the purlins or decking. At the eave and ridge, use fixed (pinned) clips to establish a thermal anchor point, forcing the panel to expand away from the eave. Never pin a clip in the middle of a continuous panel run, as this will restrict movement and cause the panel to buckle or tear at the seams.
Mechanical vs. Snap-Lock Seaming
For residential applications, snap-lock panels (typically 1.5-inch seam height) are common. The female leg of the panel simply snaps over the male leg. However, for commercial applications or roof pitches below 3:12, a mechanically seamed system (2-inch or 3-inch seam height) is required per the Metal Construction Association (MCA) Design Guides.
- Apply a continuous bead of factory-applied hot-melt sealant inside the seam capsule.
- Use a hand seamer to crimp the top 2 inches of the seam at every clip location to hold the panel in place.
- Run an electric mechanical seamer (single-pass for 90-degree seams, double-pass for 180-degree Pittsburgh seams) from the eave to the ridge in one continuous motion. Stopping and starting the seamer mid-run creates weak points and deforms the seam profile.
Soft Metals: Copper and Zinc Cleat Systems
Copper and zinc are soft, malleable metals that require entirely different handling than rigid steel or aluminum. These materials are typically formed on-site or fabricated into flat-lock panels, batten seam panels, or continuous standing seams.
Cleat Spacing and Galvanic Isolation
Soft metals cannot be screwed directly through the face. Instead, they are secured using cleats—small strips of metal nailed to the deck, which are then folded into the panel seams. For 16-ounce copper, use 2-inch wide copper or 304 stainless steel cleats. Space cleats a maximum of 12 inches O.C. along the seams, and 6 inches O.C. at the perimeters and corners where wind uplift forces are highest.
Never use galvanized steel nails or aluminum flashing in contact with copper or zinc. The dissimilar metals will create a galvanic cell in the presence of rainwater, destroying the fastener or flashing within a single season. Use solid copper, lead-coated copper, or 316 marine-grade stainless steel for all fasteners and accessories. Consult the National Roofing Contractors Association (NRCA) Technical Resources for detailed galvanic series charts.
Preventing Oil Canning in Soft Metals
Oil canning—the visible waviness or rippling in the flat areas of metal panels—is a primary aesthetic concern with copper and zinc. To mitigate this during installation:
- Decking Tolerance: Ensure the roof deck is perfectly planar. The maximum allowable deviation is 1/4 inch over a 10-foot span. Any dips or humps will telegraph through the soft metal.
- Striations and Pencil Ribs: Specify panels with stiffening ribs or striations rolled into the flat pan during manufacturing. This breaks up the visual plane and hides minor thermal distortions.
- Handling: Do not walk on the flat pans of copper or zinc roofs after installation. Use specialized roof ladders or foam-padded crawl boards that distribute weight across the seams and decking.
Underlayment and Decking Tolerances
The underlayment beneath metal roofing serves as a secondary water barrier and a slip sheet. Because metal panels conduct heat rapidly and can reach surface temperatures exceeding 180°F (82°C) in direct summer sunlight, standard asphalt-based underlayments will melt, adhere to the metal, and degrade prematurely.
High-Temp Membrane Requirements
For all standing seam, copper, and zinc installations, utilize a high-temperature ice and water protective membrane at the eaves, valleys, and penetrations. These modified bitumen membranes are engineered with polymer additives to withstand temperatures up to 240°F (115°C) without bleeding or losing adhesion. Over the remainder of the deck, install a high-tensile synthetic underlayment or a traditional red rosin slip sheet (for copper) to prevent the metal from bonding to the underlayment during thermal cycling. A bonded panel cannot expand, which will result in severe oil canning and fastener failure.
Written by
Marcus ChenMarcus Chen is a licensed structural engineer (PE) and building materials analyst with over 12 years of experience across residential, commercial, and industrial construction. He holds a Master of Science in Civil Engineering from UC Berkeley and spent six years at Thornton Tomasetti before transitioning to independent consulting and technical writing. Marcus specializes in material selection for seismic-prone regions, concrete reinforcement strategies, and lifecycle cost analysis. His work has been cited by the American Concrete Institute (ACI) and the Structural Engineers Association of California (SEAOC). When he is not on a job site or at his desk, you will find him hiking the Sierra Nevada or restoring a 1920s craftsman bungalow in Oakland, CA.
More from Marcus Chen
View all
Construction Cost
How Much Did the Eiffel Tower Cost to Build?
How much did the Eiffel Tower cost to build in 1889? We adjust for inflation and compare its budget to modern skyscraper construction.
Aug 4, 2026

Fire Resistance
What Is a Fire Resistant Material? Testing & Certification Guide
Discover what is a fire resistant material through ASTM and UL testing. Learn how fire ratings, certifications, and assemblies work in construction.
Aug 4, 2026

Construction Cost
How Much Did the Burj Khalifa Cost to Build?
How much did the Burj Khalifa cost to build? We break down the $1.5B project and extract 5 money-saving strategies for your next build.
Jul 30, 2026