Step-by-Step Installation for Any Low Slope Roofing Material
Learn how to properly install low slope roofing material. Compare TPO, EPDM, and Mod-Bit, with step-by-step deck prep, adhesive, and seam welding tips.

Defining the Low Slope Envelope
In roofing terminology, a low slope roof is defined as any roof system with a pitch ranging from 1/4:12 to 2:12 (and sometimes up to 3:12). At these gradients, water drainage relies entirely on continuous, watertight membrane systems rather than the overlapping, gravity-shedding mechanics of asphalt shingles or metal panels. Attempting to install standard three-tab or architectural shingles on a 2:12 pitch will immediately void manufacturer warranties and lead to capillary water intrusion within the first freeze-thaw cycle.
Selecting and installing the correct low slope roofing material requires strict adherence to manufacturer specifications for deck preparation, insulation tapering, and seam detailing. This guide breaks down the installation protocols for the two dominant single-ply membranes in 2026: Thermoplastic Polyolefin (TPO) and Ethylene Propylene Diene Monomer (EPDM).
Material Selection Matrix: TPO vs. EPDM vs. PVC
Before breaking ground on the installation, you must select the membrane that aligns with the building's thermal requirements, budget, and local climate. The EPA's Heat Island Reduction Initiative heavily recommends highly reflective membranes for low-slope applications in cooling-dominated climates to reduce HVAC loads.
| Material | Cost per Sq. Ft. (Installed) | Lifespan | Primary Installation Method | Best Application |
|---|---|---|---|---|
| TPO (60-mil) | $4.50 - $6.50 | 20-25 Years | Fully Adhered / Mechanically Attached | Residential additions, light commercial, high UV zones |
| EPDM (60-mil) | $3.50 - $5.50 | 25-30 Years | Fully Adhered / Ballasted | Budget projects, colder climates, DIY-friendly |
| PVC (50-mil) | $6.50 - $9.00 | 25-30 Years | Fully Adhered / Mechanically Attached | Roofs over restaurants (resists grease/oil exhaust) |
| Mod-Bit (APP/SBS) | $5.00 - $7.50 | 15-20 Years | Torch-Applied / Cold Adhesive | High puncture resistance needs, complex penetrations |
Phase 1: Deck Preparation and Tapering
The most common cause of premature membrane failure is ponding water. Most single-ply manufacturers stipulate that water must drain within 48 hours of precipitation to keep the warranty valid. If your structural deck is perfectly flat, you must create slope using tapered insulation.
The International Building Code (IBC) and the National Roofing Contractors Association (NRCA) both mandate a minimum design slope of 1/4 inch per foot (1/4:12) for low slope membrane roofs. Do not rely on structural deflection to create slope.
Insulation Fastening Protocol
For a fully adhered system, the insulation must be securely anchored to the structural deck (wood, concrete, or steel) before the membrane is glued down.
- Vapor Retarder: On concrete decks, install a self-adhering modified bitumen vapor retarder to prevent moisture drive from blisters the membrane.
- Base Layer: Lay down a flat base layer of 1/2-inch polyisocyanurate (polyiso) insulation to protect the vapor barrier and provide a thermal break.
- Tapered Layer: Install tapered polyiso boards (e.g., Johns Manville ENRGY 3 Tapered) in a grid pattern to direct water to scuppers or interior drains.
- Mechanical Attachment: Secure the insulation using galvanized steel plates and corrosion-resistant screws. For wind uplift resistance in coastal zones, follow FM Global 1-90 rating patterns, which typically require 12 to 16 fasteners per 4x8 foot board in the perimeter and corner zones.
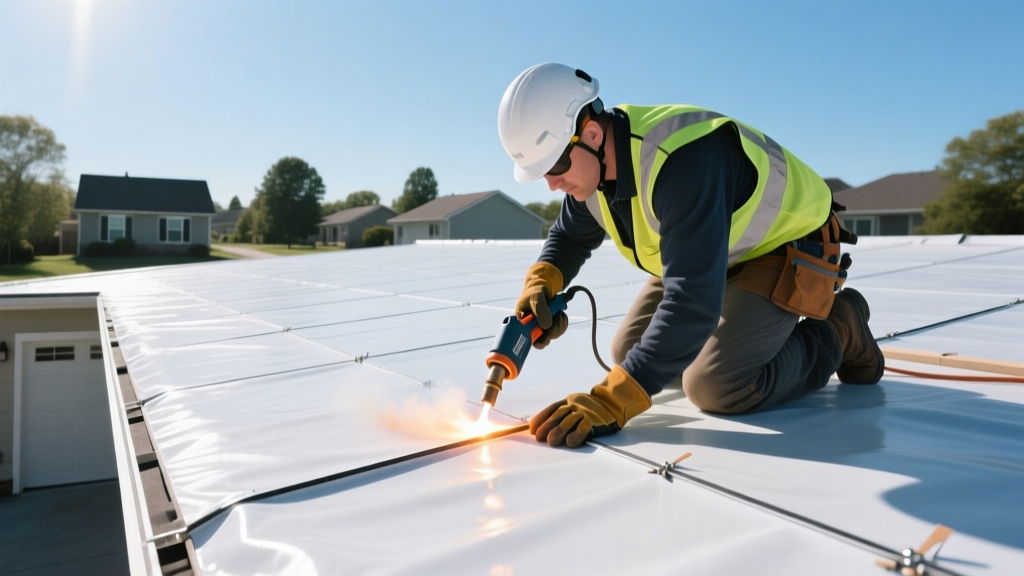
Phase 2: Fully Adhered TPO Installation
TPO is the industry standard for modern low slope roofing material installations due to its heat-weldable seams and high solar reflectance. A fully adhered system provides superior wind uplift resistance compared to mechanically attached TPO.
Step 1: Membrane Acclimation and Positioning
Unroll the TPO membrane (typically 10-foot or 12-foot wide rolls) and allow it to relax for at least 30 minutes. This releases manufacturing tension and prevents the membrane from shrinking back after adhesion, which can cause fishmouths at the seams. Position the sheets with a minimum 3-inch overlap at the side laps and 6-inch overlap at the end laps.
Step 2: Adhesive Application
Fold back half of the membrane sheet. Apply a low-VOC, water-based or solvent-based bonding adhesive to both the substrate (insulation cover board) and the back of the TPO membrane using a 3/8-inch nap roller. Crucial detail: Allow the adhesive to flash off (become tacky but not wet) before mating the surfaces. If you mate wet adhesive, trapped solvents will blister the membrane within weeks.
Step 3: Heat Welding the Seams
TPO seams are fused using hot air, creating a monolithic, watertight bond that is actually stronger than the membrane itself.
Expert Welding Parameters: Set your automatic hot-air welder (e.g., Leister VARIMAT V2) to a nozzle temperature between 950°F and 1100°F, depending on ambient temperature and wind speed. Maintain a travel speed of 10 to 15 feet per minute. Always perform test welds on a scrap piece every morning and after any weather change, probing the seam edge with a cotter pin to ensure no voids exist.
Phase 3: Fully Adhered EPDM Installation
If you are installing EPDM (commonly known as rubber roofing), the seam methodology changes entirely. EPDM cannot be heat-welded; it relies on chemical primers and butyl seam tapes.
- Adhesion: Use a uniform coat of EPDM bonding adhesive. Unlike TPO, EPDM adhesive is often applied only to the substrate, and the rubber is rolled into it while wet, depending on the specific manufacturer's guidelines.
- Priming Seams: Clean the seam overlap area with a dedicated seam cleaner (not standard mineral spirits, which leave an oily residue). Apply a uniform coat of QuickPrime Plus using a scrubbing pad until the surface is completely black and streak-free.
- Tape Application: Apply 3-inch or 6-inch uncured butyl rubber seam tape. Use a silicone hand roller to apply aggressive pressure, working from the center of the seam outward to push out trapped air. The tape must be rolled with at least 30 pounds of pressure to activate the chemical cross-linking.
Detailing Penetrations and Edge Terminations
The field of the roof rarely fails; failures occur at the details. How you handle pipes, HVAC curbs, and wall terminations dictates the lifespan of your low slope roofing material.
Inside and Outside Corners
For TPO, you must use pre-formed, factory-molded inside and outside corners. Attempting to fold and weld flat TPO sheet into a 90-degree corner will result in a weak point that will eventually crack. For EPDM, use uncured EPDM flashing tape, which can be stretched and molded by hand to conform to any complex geometry before it vulcanizes into a solid shape.
Termination Bars
Where the membrane meets a vertical wall (parapet or siding), it must be terminated securely. Fasten a galvanized or aluminum termination bar through the membrane into the wall framing every 8 inches. Seal the top edge of the termination bar with a continuous bead of polyurethane roofing sealant (such as Geocel ProFlex) and cover it with a metal counter-flashing to protect the sealant from UV degradation.
Critical Failure Modes to Avoid
Even with premium materials, specific installation errors will compromise the system. Watch for these edge cases:
- Plasticizer Migration (PVC only): If installing PVC directly over expanded polystyrene (EPS) or certain polyiso boards without a separation slip sheet, the plasticizers in the PVC will migrate into the insulation, causing the membrane to become brittle and shatter.
- EPDM Shrinkage: Mechanically attached or ballasted EPDM is prone to shrinking over time, which can pull the membrane away from flashings. Fully adhered EPDM mitigates this risk significantly.
- Wet Insulation: Never install single-ply membranes over damp polyiso or wood fiberboard. Trapped moisture will vaporize under the summer sun, creating massive blisters that break the adhesive bond.
By strictly adhering to tapering requirements, respecting adhesive flash-off times, and executing flawless seam welds or tape rolls, your low slope roof will easily achieve its maximum engineered lifespan.
Written by
David NakamuraDavid Nakamura is a licensed architect (AIA) and construction technology writer focused on sustainable building methods, mass timber engineering, and high-performance building envelopes. He holds a Master of Architecture from the University of Washington and is a certified Passive House Consultant (CPHC). David spent eight years at the Seattle firm Mithun, where he led the design of three LEED Platinum projects, before founding his own practice specializing in net-zero residential design. He serves on the editorial advisory board of GreenBuilder Magazine and has authored peer-reviewed papers on cross-laminated timber (CLT) connections for the Journal of Structural Engineering. In his spare time, David teaches woodworking at Pratt Fine Arts Center and kayaks the Puget Sound.
More from David Nakamura
View all
Construction Cost
Labor Cost to Build a Deck Per Sq Ft: 2026 Installation Guide
Discover the exact labor cost to build a deck per sq ft in 2026. This installation guide breaks down contractor rates, complexity factors, and hidden fees.
Aug 4, 2026

Construction Cost
How Much Does It Cost to Build a 3 Bedroom House? Financing Guide
Learn exactly how much it costs to build a 3 bedroom house and explore 2026 financing options, construction loan types, and budget frameworks for your build.
Aug 4, 2026

Construction Cost
Cost to Build a Tennis Court: 2026 Guide
How much does it cost to build a tennis court in 2026? Breakdowns for asphalt, concrete, and synthetic surfaces plus fencing and lighting.
Jul 30, 2026