How to Install Roll Roofing Material on Low-Slope Roofs
Learn how to install roll roofing material on low-slope structures. This step-by-step guide covers prep, nailing patterns, and sealing seams.

Understanding Roll Roofing Material Applications
Roll roofing material, technically classified as mineral-surfaced roll roofing (MSR), is an asphalt-based product reinforced with an organic or fiberglass mat and topped with ceramic granules. While it shares the same fundamental chemistry as standard asphalt shingles, it is manufactured in 36-inch-wide, 33-foot-long rolls covering roughly 100 square feet (one "square"). In 2026, MSR remains the most cost-effective roofing solution for low-slope utility buildings, sheds, garages, and workshops, provided the structure meets strict pitch requirements.
Unlike architectural shingles that rely on gravity and interlocking tabs to shed water, roll roofing material depends heavily on continuous adhesive seams and precise nailing patterns. According to the Asphalt Roofing Manufacturers Association (ARMA), improper seam sealing and inadequate fastener placement are the primary causes of premature failure in low-slope asphalt applications. This guide details the exact specifications, preparation protocols, and installation steps required to achieve a watertight, durable roof system.
Never install standard roll roofing material on a dead-flat roof or a slope less than 2:12 (2 inches of vertical rise for every 12 inches of horizontal run). On slopes below 2:12, water drains too slowly, leading to capillary action that will pull moisture up through the side laps and nail heads. For slopes between 1:12 and 2:12, you must use a double-coverage installation method or upgrade to a fully adhered modified bitumen (SBS/APP) membrane system.
Required Tools and Material Specifications
Success in roll roofing installation relies on using materials that meet current ASTM standards. Do not substitute standard construction adhesives or generic nails for roofing-specific products.
- Roll Roofing: ASTM D224 compliant mineral-surfaced roll roofing (e.g., GAF Liberty SBS or standard MSR fiberglass mat).
- Fasteners: 11-gauge galvanized roofing nails with 3/8-inch heads. Length must be sufficient to penetrate the wood decking by a minimum of 3/4 inch (typically 1-inch to 1.25-inch nails for 1/2-inch or 5/8-inch plywood/OSB).
- Lap Cement: ASTM D4586 compliant asphalt roof cement. Avoid plastic roof cements, which can degrade the asphalt binder in the roll material over time.
- Underlayment (Optional but Recommended): ASTM D226 Type I or II asphalt-saturated felt for double-coverage systems.
- Cutting Tools: Heavy-duty utility knife with hook blades (hook blades prevent slicing into the plywood decking beneath the material).
- Layout Tools: Chalk line, tape measure, and a straight-edge framing square.
Deck Preparation and Primer Application
The longevity of your roof is dictated by the substrate. The National Roofing Contractors Association (NRCA) mandates that all roof decking be clean, dry, and structurally sound before any asphalt product is applied.
1. Inspect and Secure the Decking
Walk the entire roof surface. Replace any delaminated, warped, or water-damaged OSB or plywood sheets. Secure all decking to the roof trusses using 8d ring-shank nails or structural screws, ensuring no panel edges are raised more than 1/16 inch. Sand down any raised seams to prevent the roll roofing from telegraphing imperfections.
2. Install Drip Edge Flashing
Install metal drip edge flashing along the eaves and rakes (gables). Secure the flashing with roofing nails spaced every 8 to 10 inches. Overlap drip edge joints by a minimum of 2 inches and seal the overlaps with a dab of lap cement.
3. Apply Primer (For Re-Roofing Scenarios)
If you are installing roll roofing material over an existing, aged asphalt surface (maximum one existing layer allowed), you must sweep the roof completely clean and apply an asphalt primer to ensure the new lap cement adheres properly. Allow the primer to cure until it is tack-free before proceeding.
Step-by-Step Installation Process
Step 1: Acclimating and Cutting the Rolls
This is the most frequently skipped step by DIYers, leading to severe buckling. Roll roofing material is tightly wound at the factory and retains "memory." If you unroll and nail it immediately, temperature fluctuations will cause the material to expand and contract, resulting in massive ridges and blisters.
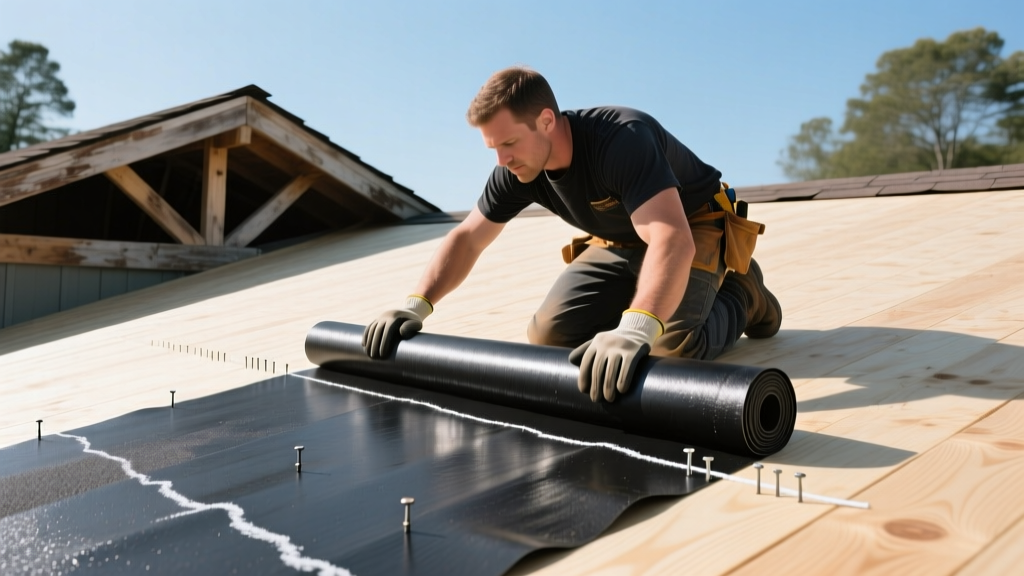
Cut your rolls into manageable 18-foot lengths. Unroll them flat on your driveway or a clean section of the roof in direct sunlight for 45 to 60 minutes. This relaxes the fiberglass or organic mat, allowing the material to lay perfectly flat before fastening.
Step 2: Positioning the First Course
Start at the lowest edge of the roof (the eave). Snap a chalk line exactly 35.5 inches up from the eave edge. This allows for a 1/4-inch overhang past the drip edge, ensuring water drips directly into the gutters rather than wicking back under the material. Lay your first roll flat, aligning the bottom edge with the chalk line. Keep the material pulled taut but do not stretch it.
Step 3: The Nailing Pattern
Fasten the bottom edge of the first course using two rows of nails. The first row should be placed 1 inch from the bottom edge, and the second row 2 inches from the bottom edge. Space the nails 6 inches apart in both rows. Drive the nails flush with the surface; do not overdrive them, as crushing the mat compromises the waterproofing layer.
Step 4: Applying Lap Cement and Sealing Overlaps
When you reach the end of a roll, or when starting the next horizontal course, you must create a watertight seal. For side laps (horizontal overlaps between courses), apply a continuous 2-inch-wide bead of ASTM D4586 asphalt lap cement to the underlying material before laying the overlapping course. Press the material firmly into the cement. For end laps (where two rolls meet on the same horizontal line), overlap the material by a minimum of 4 inches, apply a generous layer of cement, and nail the overlap every 2 inches.
Step 5: Concealing the Top Nail Row
When installing the second course, position it so that the top edge covers the top nail row of the first course. The standard exposure for a 36-inch roll is 34 inches, creating a 2-inch side lap. Apply lap cement in the 2-inch overlap zone before nailing the top edge of the second course. This ensures that no exposed nails remain on the main field of the roof, eliminating the most common entry points for leaks.
Troubleshooting Common Installation Failures
Even with careful installation, environmental factors and material defects can cause issues. Use this diagnostic matrix to identify and resolve common problems.
| Symptom | Root Cause | Corrective Action |
|---|---|---|
| Longitudinal ridges or buckling | Material was not acclimated before installation; nailed too tightly without allowing for thermal expansion. | Slit the ridge, apply lap cement underneath, and press flat. Add a few nails at the edges to secure. |
| Blisters in the field | Trapped moisture in the wood decking vaporizing under solar heat, or insufficient asphalt mopping. | Cut an X in the blister, allow moisture to escape, inject plastic roof cement, and nail down the flaps. |
| Seam lifting in high winds | Inadequate lap cement coverage or failure to embed the material fully into the adhesive. | Lift the seam, clean out debris, apply a fresh, thick layer of lap cement, and weigh down with bricks for 24 hours. |
| Premature granule loss | Repeated foot traffic or installing on a slope that is too flat, causing water pooling and mat degradation. | Apply a liquid elastomeric roof coating over the bare spots to restore UV protection and waterproofing. |
2026 Cost Analysis for a Standard 120-Square-Foot Shed
The following breakdown reflects average North American material pricing for 2026. Labor costs are excluded, as roll roofing is predominantly a DIY or handyman-installed product. Prices assume a standard 10x12 foot shed with a 3:12 pitch.
| Material | Quantity Required | Unit Cost | Total Cost |
|---|---|---|---|
| MSR Roll Roofing (90lb) | 1.5 Rolls (approx. 150 sq ft) | $55.00 / Roll | $82.50 |
| Asphalt Lap Cement (1 Gal) | 1 Gallon | $28.00 / Gal | $28.00 |
| 11-Gauge Galv. Nails (1lb box) | 1 Box | $14.50 / Box | $14.50 |
| Metal Drip Edge Flashing | 44 Linear Feet | $1.80 / Ft | $79.20 |
| Estimated Total Material Cost | $204.20 | ||
At roughly $1.70 per square foot for materials, roll roofing material remains significantly cheaper than asphalt shingles ($2.50 - $4.00 per sq ft) or standing seam metal ($8.00+ per sq ft), making it the undisputed budget champion for outbuildings.
Maintenance and Lifecycle Expectations
When installed correctly on an appropriate slope, a mineral-surfaced roll roof will provide 8 to 12 years of reliable service. To maximize this lifespan, perform an annual inspection in the spring. Clear all debris, particularly pine needles and leaves that trap moisture against the seams. Check all end laps and ridge caps for signs of cement drying or cracking, and reapply a fresh layer of lap cement if the seal appears compromised. Avoid walking on the roof during extreme heat, as the softened asphalt and granules are highly susceptible to scuffing and permanent displacement.
Written by
Marcus ChenMarcus Chen is a licensed structural engineer (PE) and building materials analyst with over 12 years of experience across residential, commercial, and industrial construction. He holds a Master of Science in Civil Engineering from UC Berkeley and spent six years at Thornton Tomasetti before transitioning to independent consulting and technical writing. Marcus specializes in material selection for seismic-prone regions, concrete reinforcement strategies, and lifecycle cost analysis. His work has been cited by the American Concrete Institute (ACI) and the Structural Engineers Association of California (SEAOC). When he is not on a job site or at his desk, you will find him hiking the Sierra Nevada or restoring a 1920s craftsman bungalow in Oakland, CA.
More from Marcus Chen
View all
Construction Cost
How Much Did the Eiffel Tower Cost to Build?
How much did the Eiffel Tower cost to build in 1889? We adjust for inflation and compare its budget to modern skyscraper construction.
Aug 4, 2026

Fire Resistance
What Is a Fire Resistant Material? Testing & Certification Guide
Discover what is a fire resistant material through ASTM and UL testing. Learn how fire ratings, certifications, and assemblies work in construction.
Aug 4, 2026

Construction Cost
How Much Did the Burj Khalifa Cost to Build?
How much did the Burj Khalifa cost to build? We break down the $1.5B project and extract 5 money-saving strategies for your next build.
Jul 30, 2026