Installing Cool Roofing Material: TPO Membrane Field Guide
Master cool roofing material installation with this field guide. Learn deck prep, TPO welding temperatures, and fastener patterns for optimal reflectivity.

Defining the Standard: What Makes a Roof 'Cool'?
Before unrolling a single sheet of membrane, contractors must understand the metrics that define a cool roof. The performance of any cool roofing material is measured by its Solar Reflectance Index (SRI), which combines solar reflectance and thermal emittance into a single value. According to the Cool Roof Rating Council (CRRC), a low-slope commercial roof must achieve an initial SRI of at least 82 and a three-year aged SRI of 64 to qualify for premium energy ratings. White 60-mil Thermoplastic Polyolefin (TPO) membranes typically boast an initial SRI of 104, making them the industry standard for flat and low-slope applications.
Substrate Preparation and Insulation Layout
The longevity of a mechanically attached TPO system relies entirely on the substrate beneath it. For commercial retrofits over steel decking, polyisocyanurate (polyiso) insulation boards are the standard. Polyiso provides an R-value of approximately R-5.6 per inch, but its installation sequence is critical to prevent thermal bridging and membrane stress.
Insulation Fastening Protocols
- Stagger the Joints: Install the first layer of polyiso (e.g., 2.0-inch thickness) and stagger the seams of the second layer (e.g., 1.5-inch thickness). This eliminates continuous vertical gaps where heat can escape and condensation can form.
- Fastener Density: For standard FM 1-60 wind uplift ratings, secure 4x8-foot boards with a minimum of 5 fasteners per board (one in each corner, one in the center). For FM 1-90 ratings in hurricane-prone zones, increase to 8-10 fasteners per board, utilizing 3-inch diameter metal stress plates.
- Pull-Out Testing: Before full-scale fastening, conduct field pull-out tests. Fasteners driven into structural steel must achieve a minimum withdrawal resistance of 300 lbs per fastener. If the deck is degraded, switch to structural screws with larger thread pitches or apply a liquid-applied vapor retarder directly to the deck.
Cool Roofing Material Matrix: TPO vs. PVC vs. Mod-Bit
While TPO dominates the market, selecting the exact cool roofing material requires matching the membrane chemistry to the building's operational environment. Below is a field-tested comparison of the top three low-slope cool roof systems.
| Material Type | Avg. Material Cost (per sq. ft.) | Seam Joining Method | Chemical & Grease Resistance | Best Application Scenario |
|---|---|---|---|---|
| 60-Mil TPO (e.g., GAF EverGuard, Carlisle Sure-Weld) | $1.50 - $2.25 | Hot Air Welding (950°F - 1150°F) | Low to Moderate | Standard commercial, retail, and office buildings. |
| 50-Mil PVC (e.g., Sarnafil, IB Roof) | $2.50 - $3.75 | Hot Air Welding or Solvent Welding | High (Resists oils and fats) | Restaurants, food processing, and chemical plants. |
| SBS Mod-Bit with Cool Granules | $2.00 - $3.00 | Torch-Applied or Cold Adhesive | Moderate | High-traffic roofs, complex geometries, and retrofits over existing asphalt. |
Step-by-Step Installation: Mechanically Attached 60-Mil TPO
Once the insulation is secured and covered with a slip sheet (if required by the manufacturer), the TPO membrane deployment begins. The following sequence assumes a mechanically attached system, which is the most common for large commercial footprints.
Step 1: Membrane Positioning and Relaxation
Roll out the TPO sheets (typically 10 or 12 feet wide by 100 feet long) perpendicular to the slope to facilitate water drainage. Critical Step: Allow the membrane to relax for 30 to 45 minutes before fastening or welding. TPO has significant 'roll memory'; if you weld it immediately after unrolling, the material will contract as it acclimates, causing wrinkles, fishmouths, and stressed seams that will eventually fail.
Step 2: Perimeter and Field Fastening
For mechanically attached systems, the membrane is secured using batten bars or specialized seam plates hidden beneath the overlapping sheet.
According to the Department of Energy's guidelines on cool roof assemblies, proper wind uplift resistance requires strict adherence to the manufacturer's fastener layout. A standard layout requires fasteners spaced 12 inches on-center (o.c.) in the field, 6 inches o.c. in the perimeter, and 4 inches o.c. in the corners.
Step 3: Heat Welding the Seams
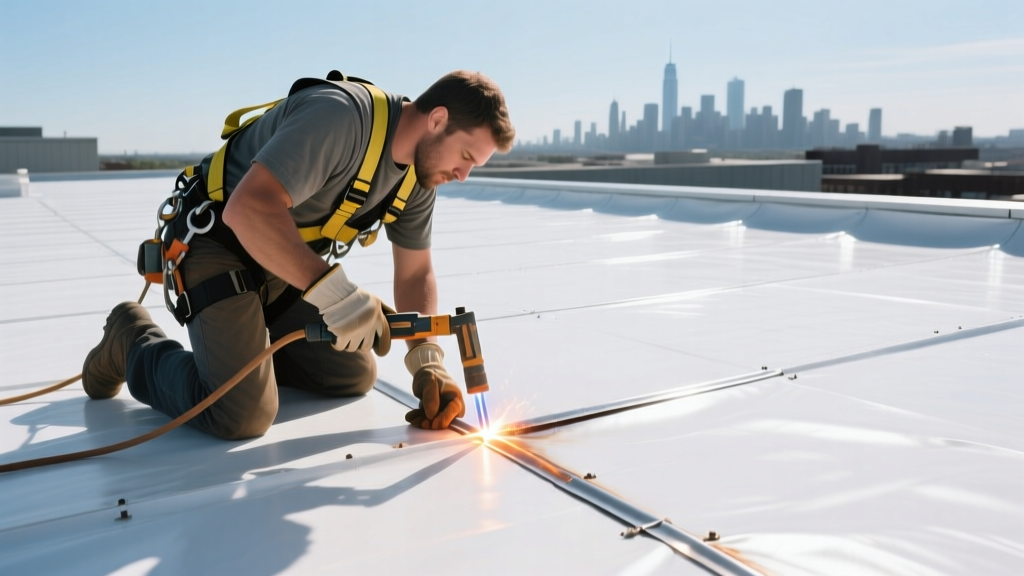
TPO seams are fused using hot air, not adhesives. An automatic robotic welder (such as a Leister Varimat) is used for long, straight runs, while a handheld welder is used for details and penetrations.
Welder Calibration: Set the automatic welder temperature between 1000°F and 1150°F, with a travel speed of 12 to 15 feet per minute. The exact settings depend on ambient temperature and wind speed. The goal is to melt the bottom ply of the top sheet and the top ply of the bottom sheet, fusing them into a single, monolithic layer without scorching the surface.
When ambient temperatures drop below 40°F (4°C), TPO becomes rigid and requires more thermal energy to fuse. If you do not reduce the welder speed or increase the temperature, you will create 'cold welds'—seams that appear fused on top but lack structural integrity underneath. Always perform test welds on scrap material every morning and after any significant temperature drop.
Penetrations, Flashing, and Edge Details
The field of the roof rarely fails; leaks occur at penetrations. Cool roofing materials require specific detailing to maintain watertight integrity and reflectivity at these vulnerable nodes.
- Pipe Boots: Use pre-formed TPO pipe boots that match the membrane thickness. Slip the boot over the pipe, weld the base flange to the field membrane, and secure the top with a stainless steel draw-band covered by a pourable polyurethane sealer or a TPO cap.
- Pitch Pans: For irregular penetrations or clustered conduits, use a TPO-coated metal pitch pan. Fill the pan with a two-part polyurethane sealant, and weld a TPO 'hat' over the top to protect the sealant from UV degradation.
- Inside and Outside Corners: Never attempt to fold or stretch TPO around 90-degree parapet corners. You must fabricate custom inside and outside corner patches, welding them meticulously to prevent tension tears. Hand-weld these details using a silicone roller to apply immediate, even pressure while the polymer is in its molten state.
Quality Assurance and Destructive Seam Testing
Installation is incomplete without rigorous quality control. The EPA's Energy Star Roof Products program emphasizes that long-term energy savings are only realized if the roof remains intact and reflective over its lifespan. A compromised seam leads to moisture intrusion, which saturates the polyiso insulation, destroying its R-value and adding dead weight to the deck.
The Probe Test and T-Peel Test
Once the seams have cooled (typically 30 minutes post-weld), a QA technician must walk the entire roof with a blunt-nosed seam probe. Apply moderate pressure along the edge of every welded seam. If the probe catches or slips into a void, mark the area for immediate re-welding.
Additionally, perform destructive T-peel tests at the start of the day, after every equipment change, and at the end of the day. Cut a 2-inch wide strip across a welded seam and pull the layers apart in a 'T' shape. A proper weld will result in 'film tear'—the membrane itself will rip before the seam separates. If the layers peel apart cleanly, the welder settings are incorrect, and all seams welded since the last passing test must be probed and re-welded.
Final Cleaning for Maximum Reflectivity
Before demobilizing, sweep the roof and remove all metal shavings, fastener screws, and debris. Leftover metal shavings will rust and stain the white TPO within weeks, permanently lowering the localized SRI and voiding the aesthetic warranties provided by manufacturers. A clean, bright white surface ensures the building immediately begins benefiting from reduced cooling loads and mitigated urban heat island effects.
Written by
Marcus ChenMarcus Chen is a licensed structural engineer (PE) and building materials analyst with over 12 years of experience across residential, commercial, and industrial construction. He holds a Master of Science in Civil Engineering from UC Berkeley and spent six years at Thornton Tomasetti before transitioning to independent consulting and technical writing. Marcus specializes in material selection for seismic-prone regions, concrete reinforcement strategies, and lifecycle cost analysis. His work has been cited by the American Concrete Institute (ACI) and the Structural Engineers Association of California (SEAOC). When he is not on a job site or at his desk, you will find him hiking the Sierra Nevada or restoring a 1920s craftsman bungalow in Oakland, CA.
More from Marcus Chen
View all
Construction Cost
How Much Did the Eiffel Tower Cost to Build?
How much did the Eiffel Tower cost to build in 1889? We adjust for inflation and compare its budget to modern skyscraper construction.
Aug 4, 2026

Fire Resistance
What Is a Fire Resistant Material? Testing & Certification Guide
Discover what is a fire resistant material through ASTM and UL testing. Learn how fire ratings, certifications, and assemblies work in construction.
Aug 4, 2026

Construction Cost
How Much Did the Burj Khalifa Cost to Build?
How much did the Burj Khalifa cost to build? We break down the $1.5B project and extract 5 money-saving strategies for your next build.
Jul 30, 2026