Installing Tin Roofing Materials: Step-by-Step Corrugated Panel Guide
Master the installation of tin roofing materials with this pro guide. Learn purlin spacing, fastener schedules, and corrugated panel layout techniques.

The 'Tin' Misconception: What You Are Actually Installing
Before driving the first screw, it is critical to clarify a pervasive industry misnomer. When contractors and homeowners refer to 'tin roofing materials' today, they are almost exclusively talking about Galvalume or galvanized corrugated steel. True tin-coated steel (terne) is a specialty historical restoration product. Modern corrugated panels are coated with an aluminum-zinc alloy (Galvalume, typically AZ50 or AZ55) or pure zinc (galvanized). This distinction matters immensely for installation because the protective coating dictates your cutting methods, fastener compatibility, and handling procedures.
According to the Metal Construction Association (MCA), improper handling of the Galvalume coating during installation is the leading cause of premature edge-creep corrosion. This guide focuses on the installation of 26-gauge and 29-gauge exposed-fastener corrugated panels, the most common 'tin' roofing materials used in residential and light commercial applications.
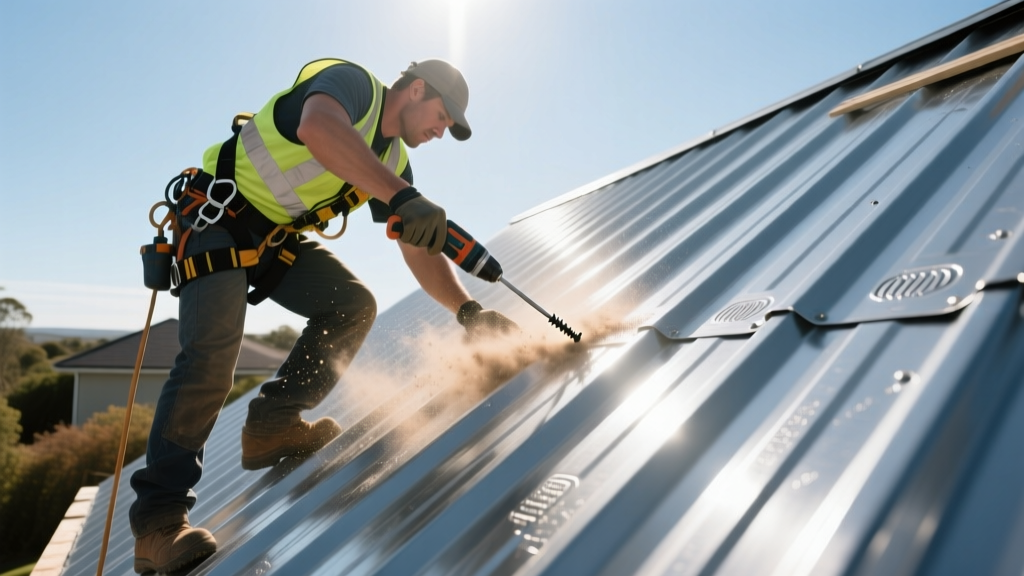
Do not use angle grinders, abrasive cutoff wheels, or reciprocating saws with friction blades to cut your panels. The intense heat generated melts and destroys the aluminum-zinc coating at the cut edge, exposing the bare steel substrate to rapid rusting. Always use electric nibblers, fine-tooth carbide-tipped circular saw blades (installed backward for a cleaner cut), or aviation snips for field cuts.
Substrate Preparation and Purlin Spacing Matrix
Corrugated panels require a solid, planar substrate. While some agricultural buildings install panels directly over open framing, residential and commercial building codes require a solid deck (minimum 5/8-inch CDX plywood or OSB) or a structural purlin system. If using a purlin system over rafters, spacing must be engineered for local snow and wind loads.
Below is the standard purlin spacing matrix for 24-inch on-center (o.c.) rafter spans, based on 2026 International Building Code (IBC) deflection limits (L/180).
| Panel Gauge | Ground Snow Load (psf) | Max Purlin Spacing | Fastener Penetration Requirement |
|---|---|---|---|
| 29-Gauge | Up to 30 psf | 24 inches o.c. | Minimum 1 inch into wood |
| 29-Gauge | 31 - 50 psf | 18 inches o.c. | Minimum 1 inch into wood |
| 26-Gauge | Up to 50 psf | 24 inches o.c. | Minimum 1 inch into wood |
| 26-Gauge | 51 - 70 psf | 18 inches o.c. | Minimum 1.25 inches into wood |
Underlayment and Venting Requirements
Install a high-tensile synthetic roof underlayment (e.g., Tyvek Protec or Grip-Rite) directly over the decking. In climates with freezing temperatures, apply a self-adhering ice and water shield along the eaves (minimum 24 inches past the interior exterior wall line). The National Roofing Contractors Association (NRCA) strongly recommends a minimum 1-inch ventilated air space between the insulation and the roof deck to prevent condensation on the underside of the metal panels, which can mimic a leak and rot the decking.
Step-by-Step Corrugated Panel Installation
Proper layout is the difference between a roof that looks professionally engineered and one that looks wavy and amateur. Do not rely on the fascia or eaves to square your panels.
- Snap the Base Chalk Line: Measure 18 inches up from the eave at both the left and right rake edges. Snap a chalk line between these points. This ensures your first panel overhangs the drip edge by exactly the required amount, regardless of minor framing imperfections.
- Install Drip Edge and Eave Flashing: Secure the drip edge over the underlayment at the eaves, but under the underlayment at the rakes. Apply a continuous 1/4-inch bead of butyl tape sealant along the top edge of the eave flashing before laying the first panel.
- Set the First Panel: Position the first corrugated panel so its bottom edge aligns perfectly with your chalk line. Ensure the panel is perfectly square to the rake edge. If the roof is slightly out of square, adjust the overhang at the rake edge gradually over the first three panels (no more than 1/8-inch per panel) to correct the alignment.
- Drive the First Fasteners: Secure the panel at the eaves, field, and ridge according to the fastener schedule below. Do not fully tighten the first few screws until the panel is verified square.
- Execute the Sidelap: Overlap the second panel over the first by exactly 1.5 corrugation ribs. For roofs with a pitch below 3:12, or in high-wind zones, apply a continuous bead of butyl tape between the overlapping ribs before fastening.
- Endlaps (Vertical Joints): When panels must be joined vertically, overlap them by a minimum of 6 inches (8 inches is preferred for low slopes). Always place the endlap directly over a purlin or solid decking, and secure with stitch screws.
Standard impact drivers will easily overdrive screws, crushing the neoprene washer and ruining the water seal. Use a 5/16-inch hex depth-sensitive nut setter (often called a 'roofing bit'). These tools have a spring-loaded collar that disengages the drive exactly when the neoprene washer is compressed to the perfect 'donut' shape without bulging out the sides.
The Exposed Fastener Schedule
Fastener selection and placement are non-negotiable for wind uplift resistance. Use only manufacturer-approved fasteners with a minimum 1000-hour salt-spray tested neoprene or EPDM washer. For wood substrates, use #14 x 2-inch woodgrip screws for the main panel, and #12 x 1-1/4-inch stitch screws for metal-to-metal sidelaps.
| Roof Zone | Fastener Type | Placement Pattern | Spacing Details |
|---|---|---|---|
| Eave / Base | #14 x 2' Woodgrip | Every Corrugation Valley | Drill into the flat pan, 1 inch from the bottom edge. |
| Field (Interior) | #14 x 2' Woodgrip | Every Other Corrugation Valley | Stagger the pattern on adjacent purlin rows. |
| Ridge / Peak | #14 x 2' Woodgrip | Every Corrugation Valley | Drive high on the panel rib, just below the ridge cap. |
| Sidelap (Stitch) | #12 x 1-1/4' Metal-to-Metal | Top of the Overlapping Rib | Space every 12 to 18 inches vertically along the seam. |
Flashing, Ridges, and Edge Details
The panels themselves shed 90% of the water; the flashings handle the critical 10%. Install a high-back ridge cap with a minimum 4-inch overlap on each side of the peak. Do not rely solely on the metal overlap for sealing. Install pre-formed closure strips (dense foam that matches the corrugation profile) beneath the ridge cap and at the eave edges. These strips block wind-driven rain, snow, and pests from entering the corrugation voids.
For sidewall flashing (where the metal roof meets a vertical wall), use a step-flashing technique or a continuous Z-channel counter-flashing reglet cut into the masonry or siding. Never simply caulk the joint between the roof panel and the wall; caulk will inevitably fail due to the thermal expansion and contraction of the metal panels.
Troubleshooting Common Installation Failures
Even experienced crews make mistakes when installing tin roofing materials. Review these common failure modes to ensure your roof lasts its full 40-to-60-year expected lifespan.
- Overdriven or Underdriven Screws: An overdriven screw crushes the EPDM washer, breaking the UV seal and causing a leak within two years. An underdriven screw leaves a gap for capillary water draw. If a screw is driven incorrectly, do not just tighten it; remove it completely and drive a new screw with a slightly larger diameter (e.g., upgrade from #14 to a #16 oversize repair screw) to ensure a tight bite in the wood.
- Thermal Binding: Metal expands and contracts significantly with temperature changes (up to 1 inch per 100 feet of panel length). While standing seam roofs handle this via floating clips, exposed fastener corrugated panels handle movement through the elasticity of the steel and the oversized washer holes. Never drive screws at an angle (skewed) to force the panel into place, as this binds the steel and will cause 'oil-canning' (visible rippling) on sunny days.
- Galvanic Corrosion from Dissimilar Metals: Never use copper flashing, lead pipes, or untreated steel fasteners in direct contact with Galvalume panels. Runoff from copper will rapidly destroy the zinc/aluminum coating. If you must transition to copper gutters, use a sacrificial anode or a heavy membrane separation layer.
For comprehensive data on managing condensation and thermal dynamics in metal roof assemblies, refer to the technical digests published by the Building Science Corporation. Proper installation of tin roofing materials is less about brute force and more about precision, material compatibility, and respecting the physics of steel. Follow this matrix, and your corrugated roof will perform flawlessly for decades.
Written by
Priya KapoorPriya Kapoor is a real estate market analyst and construction economics researcher with expertise in housing affordability, development feasibility, and infrastructure investment. She holds a Master of Regional Planning from Cornell University and previously worked as a senior analyst at CBRE's Investment Properties group, where she modeled returns for $4B in mixed-use development pipelines. Priya now runs an independent research practice advising developers, municipalities, and REITs on construction cost forecasting and market timing. She publishes the quarterly "BuildMat Market Pulse" report tracking material price indices across 12 commodity categories. Based in Austin, TX, Priya serves on the board of Habitat for Humanity Austin and is a marathon runner.
More from Priya Kapoor
View all
Construction Cost
Cost to Build a 1600 Sq Ft Home in 2026: Full Breakdown
Accurate 2026 cost to build a 1600 sq ft home—material, labor, and regional pricing breakdowns included. Plan your budget with real-time estimates.
Aug 11, 2026

Wood & Lumber
Name the Types of Wood for Pressure Treatment and Preservation
Learn how to name the types of wood best suited for pressure treatment. Compare species treatability, chemical retention levels, and 2026 preservation costs.
Aug 4, 2026

Stone & Masonry
Stone Veneer Suppliers Lindenhurst: 2026 Cost Analysis
Analyze 2026 stone veneer costs in Lindenhurst, NY. Compare local supplier pricing, delivery fees, and Suffolk County installation labor rates.
Aug 4, 2026