Lean To Roof Materials: The Definitive Selection Framework
Master the selection framework for lean to roof materials. Compare pitches, flashing protocols, and 2026 costs for metal, polycarbonate, and membranes.

The Structural Reality of Single-Pitch Designs
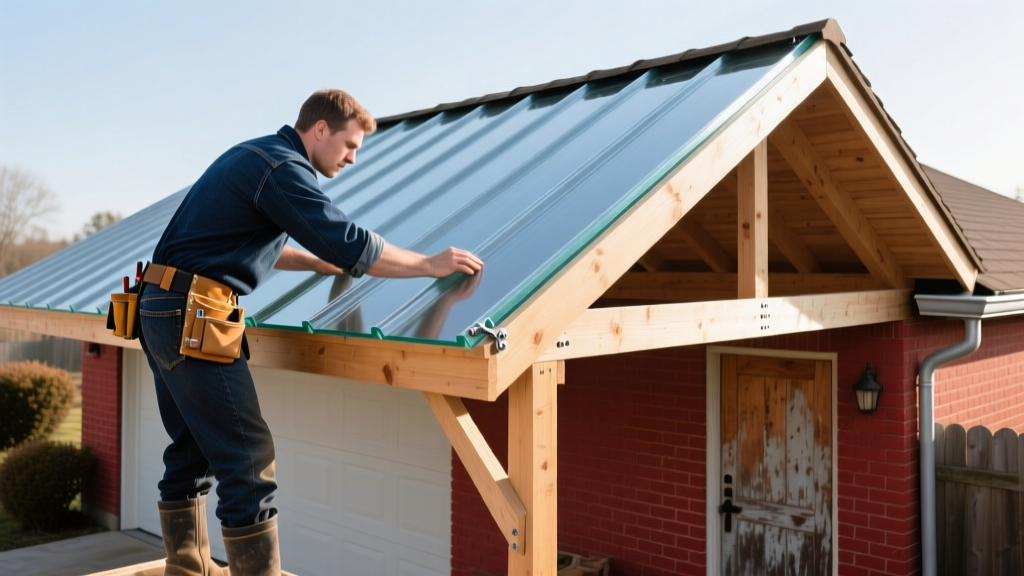
A lean-to roof (often called a shed roof) relies on a single sloping plane attached to a primary structure. While architecturally simple, this design concentrates 100% of water runoff onto a single eave and creates a critical vulnerability at the headwall intersection. When selecting lean to roof materials, the primary failure points are rarely in the field of the roof; they occur at the attachment ledger, the masonry or siding intersection, and the lower eave where water volume is highest.
This selection framework moves beyond basic aesthetic choices, focusing on pitch limitations, structural load transfer, and specific material behaviors under 2026 building code requirements. Whether you are framing a patio cover, a workshop addition, or an agricultural storage bay, the correct material is dictated by the slope and the attachment substrate.
The Pitch-to-Material Matrix
The roof pitch is the absolute governing factor for material selection. Lean-to structures frequently suffer from low-pitch constraints due to the height of the attachment point on the primary building. Installing a material below its minimum slope guarantee will result in capillary action (water wicking uphill under laps) and immediate warranty voidance.
| Material Class | Minimum Pitch | Underlayment / Sub-Roof Requirement | Water Shedding Profile |
|---|---|---|---|
| Standing Seam Metal (Mechanical) | 0.5:12 | Self-adhering ice & water shield or synthetic | Continuous concealed fastener, watertight seams |
| EPDM / TPO Membrane | 0.25:12 | 1/2" polyiso insulation or cover board over decking | Monolithic, fully adhered or ballasted |
| Corrugated / R-Panel Steel | 1:12 (with sealant) | Synthetic underlayment if over conditioned space | Lapped panels, exposed fasteners with neoprene |
| Polycarbonate Panels | 1:12 | Open purlin framing (no solid deck required) | Lapped corrugations, reliant on gravity |
| Asphalt Shingles (Architectural) | 2:12 | Double layer ice & water shield for 2:12 to 4:12 | Overlapping mat, high friction |
Source reference: Minimum slope guidelines align with the National Roofing Contractors Association (NRCA) Roofing Manual and manufacturer specifications for low-slope applications.
Wall Intersection & Flashing Protocols
The most common cause of lean-to roof failure is improper headwall flashing. Water driven up the single slope by wind, or ice damming at the ledger board, will bypass standard step flashing if not detailed correctly.
Masonry or Brick Attachment
If the lean-to attaches to a brick or block wall, do not simply caulk the top edge of the flashing to the masonry. Mortar joints degrade, and caulk will inevitably fail. The correct protocol requires cutting a 1/4-inch deep by 1/4-inch wide reglet joint into the masonry using a diamond blade grinder. Insert the hemmed edge of the aluminum or copper counter-flashing into the reglet and seal it with a high-grade polyurethane sealant, such as Master Builders NP1. This creates a mechanical lock that survives thermal expansion and structural settling.
Siding Attachment (Wood, Vinyl, or Fiber Cement)
For sided structures, the siding must be removed to a height of at least 8 inches above the ledger board. Install a self-adhering membrane (e.g., Grace Ice & Water Shield HT) extending up the wall sheathing and overlapping the roof underlayment. Re-install the siding with a 1/2-inch clearance above the roof surface to prevent wicking and rot, then apply a Z-flashing profile over the top edge of the siding.
Material Deep-Dive & 2026 Cost Baselines
Below is a technical breakdown of the three most common lean to roof materials, including specific product configurations and current material-only pricing.
1. Corrugated Polycarbonate (Patio & Light-Transmission Lean-Tos)
- Top Specification: Palram SunTuf or similar 8mm twin-wall or corrugated PVC/Poly carbonate.
- Material Cost: $1.80 – $3.20 per square foot.
- Installation Specifics: Polycarbonate expands and contracts significantly with temperature shifts. You must pre-drill fastener holes 1/8-inch larger than the screw shaft diameter. Use #12 x 1.5-inch screws with 1.5-inch neoprene washers. Never overtighten; the washer should touch the panel without compressing the polycarbonate.
- Failure Edge Case: Using standard metal-cutting blades to trim panels causes micro-fractures that lead to shattering under hail impact. Use a fine-tooth circular saw blade designed for plastics, and leave the protective purlin-side film on until the final panel is secured.
2. 26-Gauge R-Panel Steel (Workshop & Storage Lean-Tos)
- Top Specification: 26-gauge Galvalume R-Panel or Ag-Rib (avoid 29-gauge for spans over 24 inches or in high-wind zones).
- Material Cost: $2.20 – $3.80 per square foot.
- Installation Specifics: Fasten with #10 x 1-inch hex-head screws with EPDM washers. Place fasteners in the flat of the panel, not the high rib, for structural shear resistance.
- Failure Edge Case: Condensation. A metal lean-to attached to a heated building will sweat profusely on the interior panel surface during winter. Specify panels pre-treated with a factory-applied anti-condensation fleece membrane (e.g., DripStop) or apply closed-cell spray foam to the underside post-installation.
3. Modified Bitumen (SBS) (Low-Slope & Flat Lean-Tos)
- Top Specification: SBS (Styrene-Butadiene-Styrene) modified bitumen, torch-applied or cold-adhesive, over a 1/2-inch high-density polyiso cover board.
- Material Cost: $3.50 – $5.50 per square foot.
- Installation Specifics: Ideal for pitches between 0.5:12 and 2:12 where metal laps are risky. The granulated cap sheet provides UV protection and high puncture resistance from falling branches.
- Failure Edge Case: Ponding water at the lower eave due to slight framing deflection. Ensure the ledger board and supporting posts are sized to prevent mid-span sagging, which will degrade the bitumen membrane over time.
Load, Climate, & Airflow Variables
According to structural guidelines outlined in Penn State Extension's post-frame building design resources, single-slope roofs experience asymmetric wind loads. The windward edge of a lean-to acts as an airfoil, creating severe uplift forces at the eave and the rake edges.
Metal lean-to roofs shed snow suddenly and in massive sheets. If the lower eave of your lean-to is positioned over a doorway, walkway, or HVAC unit, you must install snow retention systems. For standing seam, use clamp-on snow guards (e.g., S-5! S-5-V brackets). For exposed fastener corrugated metal, use screw-down snow rails with EPDM sealing pads, staggered in a W-pattern across the lower third of the roof plane.
Furthermore, the Metal Construction Association (MCA) emphasizes that edge metal detailing (fascia and rake trim) must be secured with fasteners spaced no more than 12 inches on center to resist peeling during localized microbursts, a growing climate variable in many regions.
The Lean-To Decision Flowchart
Use this rapid decision matrix to finalize your material selection based on your specific project parameters:
- IF Pitch is less than 1:12 AND over conditioned space → SELECT EPDM/TPO Membrane or Mechanically Seamed Standing Seam.
- IF Pitch is 1:12 to 2:12 AND budget is constrained → SELECT Modified Bitumen or 26-Gauge R-Panel with butyl lap sealant.
- IF Structure is an unheated patio cover AND natural light is desired → SELECT 8mm Twin-Wall Polycarbonate with aluminum H-profiles.
- IF Pitch is greater than 3:12 AND matching the primary residence → SELECT Architectural Asphalt Shingles with synthetic underlayment.
Selecting the correct lean to roof materials requires respecting the physics of water drainage and structural load transfer. By matching the material's minimum pitch to your framing capabilities and executing the headwall flashing with mechanical precision, the single-slope addition will perform flawlessly for decades.
Written by
Elena RodriguezElena Rodriguez is a civil engineer and technical writer specializing in concrete technology, masonry systems, and ASTM/ACI compliance. She earned her B.S. in Civil Engineering from Texas A&M University and spent a decade at a materials testing laboratory, performing over 2,000 concrete compressive strength tests and masonry prism evaluations. Elena is an ACI-certified Field Testing Technician (Grade I) and a member of ASTM Committee C12 on Natural Building Stone. She currently consults on forensic engineering cases involving concrete failures and moisture intrusion. Based in San Antonio, TX, Elena is a proud member of the Society of Women Engineers (SWE) and coaches her daughter's FIRST Robotics team.
More from Elena Rodriguez
View all
Walls & Panels
Cost Analysis: Light Gauge Steel Framing Advantages and Disadvantages
Evaluate light gauge steel framing advantages and disadvantages through a strict cost analysis lens, comparing material, labor, and lifecycle expenses.
Aug 4, 2026

Walls & Panels
Gypsum Board Types: Exact Specifications, Thickness & Dimensions
Compare standard, Type X, and moisture-resistant gypsum board types. Get exact specifications, thicknesses, dimensions, and ASTM standards for your project.
Aug 4, 2026

Fire Resistance
Best Fire-Resistant Outdoor Decking Materials: 2026 Buyer Guide
Discover the best fire-resistant outdoor decking materials for 2026. Compare Class A PVC, aluminum, and hardwood options for WUI compliance and safety.
Aug 4, 2026