Vinyl Roofing Material Installation Guide for Flat Roofs
Master vinyl roofing material installation with this step-by-step guide. Learn hot-air welding, substrate prep, and fully adhered membrane techniques.

Understanding Vinyl (PVC) Roofing Membranes
Installing vinyl roofing material requires strict adherence to thermoplastic welding protocols and substrate compatibility rules. Unlike EPDM rubber, which relies on chemical adhesives or tape for seams, PVC membranes are fused together using hot air, creating a monolithic, watertight bond that is as strong as the membrane itself. This guide details the fully adhered installation method, which provides superior wind uplift resistance and prevents membrane billowing.
Pre-Installation: Substrate Compatibility and Deck Prep
The most critical failure point in vinyl roofing material installation is plasticizer migration. PVC membranes contain liquid plasticizers to maintain flexibility. If the membrane comes into direct contact with expanded polystyrene (EPS), extruded polystyrene (XPS), or asphalt-based substrates, the plasticizers will leach out of the vinyl and into the substrate. This causes the PVC to become brittle, shrink, and ultimately shatter within a few years.
Mandatory Separation Layers
- Polyiso Insulation: Use polyisocyanurate (polyiso) boards with a coated glass facer (CGF). Standard foil-faced polyiso is acceptable, but CGF provides a better bonding surface for adhesives.
- EPS/XPS Insulation: If rigid foam boards like EPS or XPS must be used, a minimum 4-ounce non-woven polyester separation mat or a layer of 1/2-inch high-density polyiso cover board must be installed between the foam and the vinyl membrane.
- Existing Asphalt Roofs: Install a minimum 43-inch wide glass-fiber reinforced base sheet or a specialized PVC separation fleece over the existing asphalt before adhering the new membrane.
For comprehensive substrate guidelines, always cross-reference the National Roofing Contractors Association (NRCA) single-ply roofing manuals, which dictate exact fastener patterns for the underlying insulation boards.
Step-by-Step Fully Adhered Installation Process
The fully adhered method bonds the vinyl roofing material directly to the substrate using a specialized water-based or solvent-based contact adhesive. This method is ideal for roofs with complex penetrations or where mechanical fasteners cannot penetrate the deck.
- Substrate Priming: Sweep the insulation or cover board completely clean of dust and debris. If using a water-based adhesive on a porous concrete deck or gypsum board, apply a manufacturer-approved primer and allow it to dry to the touch (typically 1-2 hours).
- Membrane Positioning: Unroll the PVC membrane and allow it to relax and acclimate to the ambient temperature for at least 30 minutes. This prevents thermal contraction after adhesion. Overlap adjacent sheets by a minimum of 2 inches.
- Adhesive Application: Fold the membrane back halfway. Apply the approved PVC bonding adhesive to both the substrate and the back of the membrane using a 1/4-inch nap roller or a 1/16-inch notched trowel. Maintain a coverage rate of approximately 1.5 gallons per 100 square feet.
- Flash-Off Time: Allow the adhesive to flash off until it is tacky but does not transfer to a dry knuckle. In 70°F weather, this takes 15 to 30 minutes. Skipping this step traps solvents, leading to blistering.
- Embedding and Rolling: Carefully roll the membrane into the wet adhesive. Immediately follow with a 75-pound to 100-pound weighted roller, rolling in a perpendicular direction to the membrane length to ensure full contact and eliminate air pockets.
Hot-Air Welding Parameters and Seam Execution
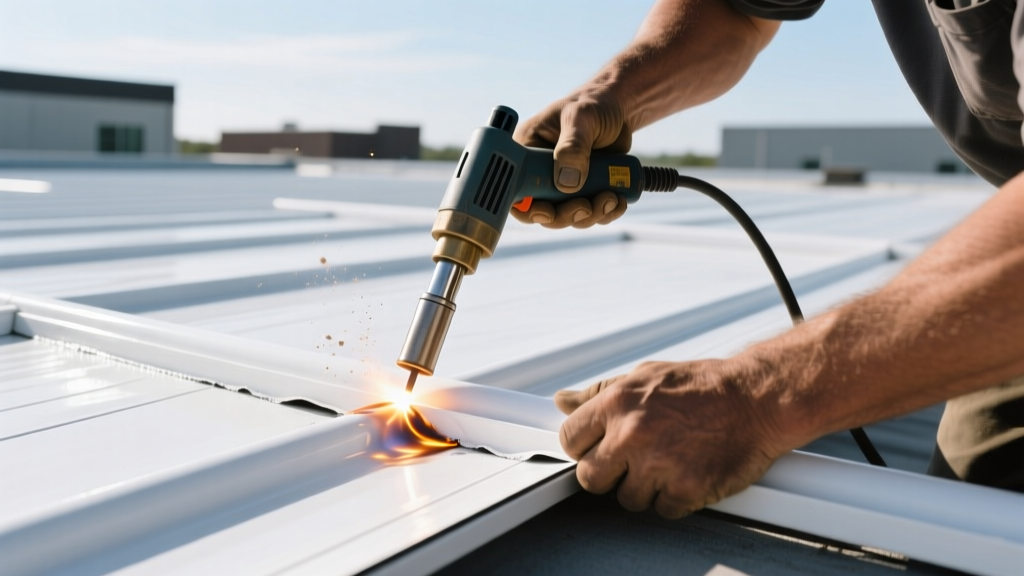
Seam welding is the defining characteristic of vinyl roofing material installation. The hot air melts the top surface of the bottom sheet and the bottom surface of the top sheet, fusing them into a single layer of PVC. According to the U.S. Department of Energy, properly welded white PVC membranes also maintain high solar reflectance, significantly reducing building cooling loads.
Welding requires an automatic robotic welder for long field seams and a handheld hot-air gun (e.g., Leister Triac) for details and penetrations. The exact temperature and speed depend heavily on ambient conditions.
| Ambient Temperature | Welder Nozzle Temp | Travel Speed | Pressure Roller Setting |
|---|---|---|---|
| 40°F - 55°F (Cold) | 1,050°F - 1,150°F | 8 - 10 ft/min | High (Max Compression) |
| 56°F - 75°F (Moderate) | 950°F - 1,050°F | 10 - 12 ft/min | Medium |
| 76°F - 95°F (Hot) | 850°F - 950°F | 12 - 15 ft/min | Low (Prevent Squeeze-out) |
Pro Tip: Always perform three test welds on scrap material at the start of the shift and after any significant weather change. Peel the test welds apart by hand; the membrane should tear (fuzz) before the weld breaks. If the weld peels cleanly apart, increase the temperature or decrease the speed.
2026 Material Specifications and Cost Breakdown
PVC membranes are manufactured in varying thicknesses, measured in mils (thousandths of an inch). While 45-mil was the historical standard, modern building codes and insurance requirements increasingly mandate 60-mil or 80-mil for enhanced puncture resistance and longevity.
| Membrane Thickness | Material Cost (per sq. ft.) | Installed Cost (per sq. ft.) | Best Application |
|---|---|---|---|
| 45-Mil PVC | $1.80 - $2.20 | $5.50 - $7.00 | Covered roofs, low-traffic sheds |
| 60-Mil PVC | $2.30 - $2.85 | $6.50 - $8.50 | Standard commercial, residential flat roofs |
| 80-Mil PVC | $3.10 - $3.90 | $8.00 - $10.50 | High-traffic decks, severe hail zones, greased roofs |
Common Installation Failures and Troubleshooting
Even experienced crews can encounter issues when installing vinyl roofing material. Recognizing these edge cases prevents costly callbacks and membrane failures.
1. Cold Welds and Voids
A cold weld occurs when the hot air fails to adequately melt the PVC surfaces before the pressure roller compresses them. These seams look intact but will separate under thermal stress. The Fix: Inspect every inch of the seam using a specialized blunt-tip seam probe. Apply 5 to 10 pounds of downward pressure while dragging the probe along the seam edge. If the probe catches in a void, mark it and repair it immediately using a handheld welder and a PVC patch extending 2 inches past the defect in all directions.
2. Fishmouths at T-Joints
Where three membrane sheets intersect (a T-joint), the overlapping sheet can wrinkle, creating a "fishmouth" that water will inevitably penetrate. The Fix: Before welding the main seam, use a handheld hot-air gun to gently heat and flatten the underlying intersection. Apply a bead of PVC lap sealant or a specialized PVC patch over the T-joint before running the automatic welder over the area.
3. Adhesive Blistering
Blisters form when trapped solvents from the contact adhesive expand under solar heat. This is almost always caused by insufficient flash-off time or applying adhesive too thickly. The Fix: If blisters appear within the first 48 hours, cut an X into the blister, allow the trapped gas to escape, inject a small amount of PVC lap adhesive under the flaps, and hot-air weld a 4-inch PVC patch over the repair.
By strictly controlling substrate compatibility, adhesive flash times, and hot-air welding temperatures, your vinyl roofing material installation will deliver a monolithic, highly reflective, and chemical-resistant roof system capable of lasting 25 to 30 years in the field.
Written by
James ThorntonJames Thornton is a construction industry veteran with 25 years of hands-on experience in wood framing, lumber grading, and residential building codes. He started as a framing carpenter in rural Oregon, earned his ICC Residential Building Inspector certification, and eventually became a senior plan reviewer for the City of Portland Bureau of Development Services. James holds a B.S. in Wood Science & Technology from Oregon State University and is a certified lumber grader through the West Coast Lumber Inspection Bureau (WCLIB). He has inspected over 3,000 residential construction sites and authored the city's internal guide on advanced framing techniques (2x6 at 24" O.C.). James lives in Bend, OR, where he builds custom timber-frame cabins and competes in lumberjack sports.
More from James Thornton
View all
Insulation
Best Home Insulation Materials: Complete 2026 Guide
Compare top home insulation materials for 2026. Find R-values, installed costs per square foot, and best uses for fiberglass, spray foam, and mineral wool.
Aug 4, 2026

Sustainable Building
Certify Your Green Building Material for LEED and WELL
Step-by-step guide to certifying a green building material for LEED v5 and WELL v2. Master EPDs, HPDs, and VOC limits for 2026 project specifications.
Aug 4, 2026

Stone & Masonry
Veneer Stacked Stone Panels: Interior Design & Style Showcase
Discover how veneer stacked stone panels transform interiors. Explore modern design profiles, material pairings, and technical installation specs.
Aug 4, 2026