Waterproof Mesh Material Guide: Reinforcing Liquid Membranes
Master waterproof mesh material selection for liquid membranes. Compare polyester, fiberglass, and polypropylene scrim for structural reinforcement.

The Mechanics of Scrim Reinforcement in Liquid Waterproofing
Liquid-applied waterproofing membranes—whether elastomeric roof coatings, polyurethane deck systems, or cementitious basement sealers—rely entirely on their continuous film thickness to prevent water ingress. However, when applied over structural joints, inside corners, or existing substrate cracks, the liquid film alone lacks the tensile strength to bridge dynamic movement. This is where a waterproof mesh material (often referred to as scrim or reinforcing fabric) becomes non-negotiable. The mesh acts as the structural rebar within the liquid matrix, absorbing tensile stress and distributing localized strain across a wider area, thereby preventing the membrane from splitting at stress concentration points.
According to the Whole Building Design Guide (WBDG), integrating reinforcing fabrics into fluid-applied systems is a critical requirement for maintaining envelope integrity at transitions and penetrations. Selecting the wrong mesh chemistry or weight, however, can lead to delamination, alkali degradation, or 'starved' fabric that compromises the entire waterproofing assembly.
Material Matrix: Polyester vs. Fiberglass vs. Polypropylene
Not all meshes are compatible with all liquid chemistries. The interaction between the fabric yarn and the liquid carrier (solvent, water, or cement) dictates the long-term performance of the system. Below is a technical comparison of the three primary waterproof mesh materials used in commercial and residential construction.
| Material | Tensile Strength | Elongation Capacity | Alkali Resistance | Optimal Liquid Pairing |
|---|---|---|---|---|
| Polyester (PET) | High (ASTM D5034) | High (15-30%) | Moderate | Elastomeric acrylics, polyurethanes, asphalt emulsions |
| Fiberglass (AR-Coated) | Very High | Low (3-5%) | High (if Zirconia coated) | Cementitious coatings, polymer-modified mortars |
| Polypropylene (PP) | Moderate | Moderate (10-15%) | Exceptional | Highly alkaline environments, specialized chemical sealants |
Critical Specifications: Weight, Weave, and Chemistry
Procuring a 'waterproof mesh material' without specifying weight and weave is a common error that leads to field failures. Manufacturers grade these fabrics by weight per square yard and thread count.
Understanding Mesh Weight (oz/yd²)
- Lightweight (2.0 - 3.5 oz/yd²): Used primarily for thin-film elastomeric roof coatings and interior liquid-applied shower pan membranes. It conforms easily to tight inside corners without buckling.
- Standard Weight (4.0 - 5.0 oz/yd²): The industry workhorse for detailing pipe penetrations, drains, and control joints in both roofing and below-grade applications. Provides an optimal balance of conformability and tensile bridging.
- Heavyweight (6.0 - 8.0+ oz/yd²): Reserved for heavy-duty traffic-bearing deck coatings, plaza deck waterproofing, and bridging wide structural cracks (up to 1/8 inch). Requires thicker base coats to fully encapsulate the yarns.
Alkali Resistance in Cementitious Systems
When reinforcing cementitious waterproofing slurries or polymer-modified mortars, standard fiberglass mesh will rapidly degrade due to the high pH (alkaline) environment of Portland cement. You must specify Alkali-Resistant (AR) fiberglass, which is manufactured with a zirconia dioxide coating. Standard E-glass fiberglass will lose up to 60% of its tensile strength within 12 months when embedded in unmodified cementitious matrices.
Step-by-Step Embedding Protocol for Liquid Membranes
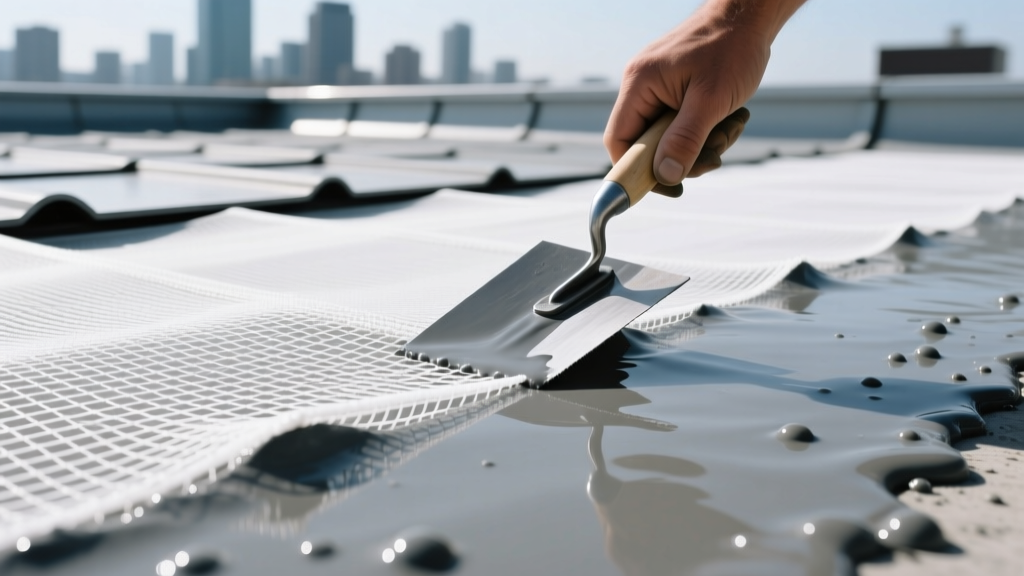
The 'wet-on-wet' embedding technique is the standard for ensuring full encapsulation of the waterproof mesh material. Failure to follow this sequence results in 'starved' mesh, where the fabric sits on top of the substrate rather than within the membrane.
- Surface Preparation: Ensure the substrate is clean, dry (or damp, depending on the specific liquid membrane spec), and free of dust. Prime if required by the manufacturer.
- Base Coat Application: Apply the first layer of the liquid membrane using a 3/16-inch V-notch trowel or a heavy-nap roller (3/4-inch). The base coat must be applied at a rate of 1.5 to 2.0 gallons per 100 square feet to provide enough material for the mesh to sink into.
- Mesh Placement: Immediately unroll the waterproof mesh material into the wet base coat. Do not wait for the base coat to skin over.
- Embedding and Bleed-Through: Using a flat trowel or a stiff bristle brush, press the mesh firmly into the liquid. You must see the liquid membrane 'bleed through' the weave of the mesh. If the mesh remains white or dry-looking, the base coat is too thin.
- Top Coat Application: While the base coat is still wet (or immediately after it cures, per manufacturer instructions), apply the top coat to fully encapsulate the fabric, achieving the specified total dry mil thickness.
When joining two rolls of mesh, maintain a minimum 2-inch side lap and a 4-inch end lap. Never butt the edges of the mesh together, as this creates a hinge point where the liquid membrane will inevitably split under thermal expansion.
Complex Detailing: Corners, Drains, and Penetrations
Flat field applications are straightforward, but waterproofing failures almost exclusively occur at transitions. When detailing 90-degree inside corners (such as where a parapet wall meets a roof deck), do not fold a single piece of mesh tightly into the corner. This creates a 'bridge' that traps air and prevents the liquid membrane from reaching the substrate.
Instead, use the two-piece cove method: run one piece of mesh up the vertical wall, stopping 1/2 inch short of the corner, and run a second piece across the horizontal deck, stopping 1/2 inch short of the corner. Fill the resulting 1-inch gap at the apex with a heavy bead of liquid membrane or a pre-formed butyl sealant tape, then cover with a third, wider strip of mesh centered directly over the corner.
Common Failure Modes and Diagnostic Troubleshooting
Even with the correct waterproof mesh material, poor execution leads to systemic failures. Recognize these edge cases during quality assurance inspections:
A fishmouth is a crescent-shaped wrinkle in the mesh that fails to adhere to the substrate. If left uncorrected, water will channel under the wrinkle and bypass the waterproofing layer. Fix: Slit the fishmouth down the center with a utility knife, press the flaps flat into the wet base coat, and apply a localized patch of mesh and liquid membrane over the repair.
If the mesh is visible through the cured top coat, the system is under-mil'd. The fabric is acting as a wick, drawing moisture laterally through capillary action. Fix: Apply an additional top coat immediately to achieve full encapsulation and hide the fabric pattern entirely.
Procurement and Cost Metrics (2026 Estimates)
Budgeting for reinforcing fabrics requires looking beyond the raw material cost to include the labor impact of detailing. The table below outlines current market rates for commercial-grade waterproof mesh materials.
| Mesh Type | Roll Size | Material Cost per Roll | Cost per Sq. Ft. | Labor Impact |
|---|---|---|---|---|
| 4 oz Polyester Scrim | 4' x 300' | $110 - $145 | $0.09 - $0.12 | Standard (Base) |
| 6 oz Polyester Heavy | 4' x 150' | $85 - $115 | $0.14 - $0.19 | +10% (Thicker base coat req.) |
| AR Fiberglass (4x4 weave) | 4' x 150' | $95 - $130 | $0.15 - $0.21 | Standard (Base) |
| Pre-formed Corner Boots | Pack of 50 | $120 - $160 | N/A (Unit priced) | -30% (Saves detailing time) |
For comprehensive envelope design, always consult the Department of Energy's Building Envelope guidelines to ensure your liquid-applied and reinforced assemblies meet local thermal and moisture control requirements. Specifying the exact weight, chemistry, and overlap dimensions of your waterproof mesh material in the project manual eliminates field substitutions and guarantees the structural integrity of the liquid membrane system.
Written by
Sarah WhitfieldSarah Whitfield is a chartered quantity surveyor (MRICS) and construction cost analyst with 15 years of experience in material pricing, procurement strategy, and project budgeting. She earned her degree in Construction Management from the University of Reading (UK) and has worked on projects ranging from $2M custom homes to $180M mixed-use developments across North America and Europe. Sarah currently leads cost estimating for BuildMat Insight, maintaining a proprietary database of 4,000+ material price points updated quarterly. She is a frequent contributor to RSMeans cost data panels and has presented at the International Cost Engineering Council (ICEC) congress. Based in Denver, CO, Sarah is an avid trail runner and volunteer mentor for Women in Construction.
More from Sarah Whitfield
View all
Wood & Lumber
What Are the Different Types of Wood? A Builder's Guide
Compare structural softwoods, finish hardwoods, and engineered lumber. Analyze Janka ratings, MOE values, and 2026 pricing for construction.
Aug 4, 2026

Walls & Panels
Steel Framing vs Wood Framing: Corrosion and Moisture Defense
Compare steel framing vs wood framing for moisture resistance. Learn about galvanized coatings, condensation risks, and corrosion protection strategies.
Jul 21, 2026

Stone & Masonry
How to Cut Stone Veneer: Wet Saw vs Grinder Comparison
Compare the best tools for cutting stone veneer. We review wet saws, angle grinders, and chop saws to help you achieve clean, chip-free cuts.
Jul 21, 2026