Application Techniques for Materials That Are Waterproof: A Pro Guide
Master application techniques for materials that are waterproof. Learn precise seam welding, liquid membrane thickness control, and bentonite panel installs.

The Gap Between Inherent Resistance and System Failure
Specifying materials that are waterproof is only the first step in building envelope protection. In laboratory settings, polyurethane coatings, PVC membranes, and bentonite clay panels exhibit zero water permeability. However, field performance relies entirely on application techniques. A microscopic pinhole in a liquid membrane, a cold weld in a thermoplastic sheet, or a compromised overlap in a clay panel will bypass the material's inherent resistance, leading to catastrophic moisture intrusion. This guide details the precise, field-tested application protocols required to transform inherently waterproof materials into continuous, fail-proof structural barriers.
Liquid-Applied Polyurethane: Precision Thickness and Moisture Control
Liquid-applied polyurethane forms a seamless, fully adhered elastomeric barrier. Its primary failure mode in the field is improper curing due to substrate moisture or inconsistent film thickness, which leads to blistering and tearing under structural movement.
Substrate Moisture Verification
Never apply polyurethane over a damp concrete substrate. Moisture vapor migrating through the concrete will become trapped beneath the impermeable membrane, vaporizing under solar heat and creating blisters. Before application, verify substrate dryness using a Tramex concrete moisture meter; readings must be below 4% CM (Carbide Method). For critical below-grade applications, conduct the ASTM D4263 plastic sheet test: tape a 16x16 inch clear plastic sheet to the concrete for 16 hours. If condensation forms underneath, the substrate requires further drying or a moisture-mitigating epoxy primer.
The Cross-Hatch Application Method
To achieve a uniform, pinhole-free barrier, apply the polyurethane using an airless sprayer equipped with a 0.031-inch tip at 3,000 PSI, followed immediately by back-rolling with a 3/8-inch nap roller. The target is 60 wet mils to achieve a 40 dry mil thickness. Apply the material in two distinct passes using a cross-hatch pattern: the first pass horizontally, the second pass vertically. This technique ensures complete coverage over substrate pores and aggregate protrusions, eliminating the micro-voids that occur with single-direction spraying.
Sheet Membranes (EPDM & PVC): Seam Welding and Adhesive Protocols
Sheet membranes provide consistent, factory-controlled thickness. Because the materials themselves are entirely impervious, the seams represent the sole vulnerability. According to technical guidelines from the National Roofing Contractors Association (NRCA), over 80% of single-ply membrane leaks originate at poorly executed seams.
| Feature | EPDM (Thermoset) | PVC (Thermoplastic) |
|---|---|---|
| Seam Method | Pressure-sensitive tape with primer | Hot-air thermal welding |
| Minimum Overlap | 3 inches (76 mm) | 1.5 inches (38 mm) weld zone |
| Field Verification | Blunt-nose probe test | Destructive peel test / Seam probe |
| Primary Failure Mode | Insufficient primer flash time | Cold welds or scorched membrane |
Hot-Air Welding Parameters for PVC
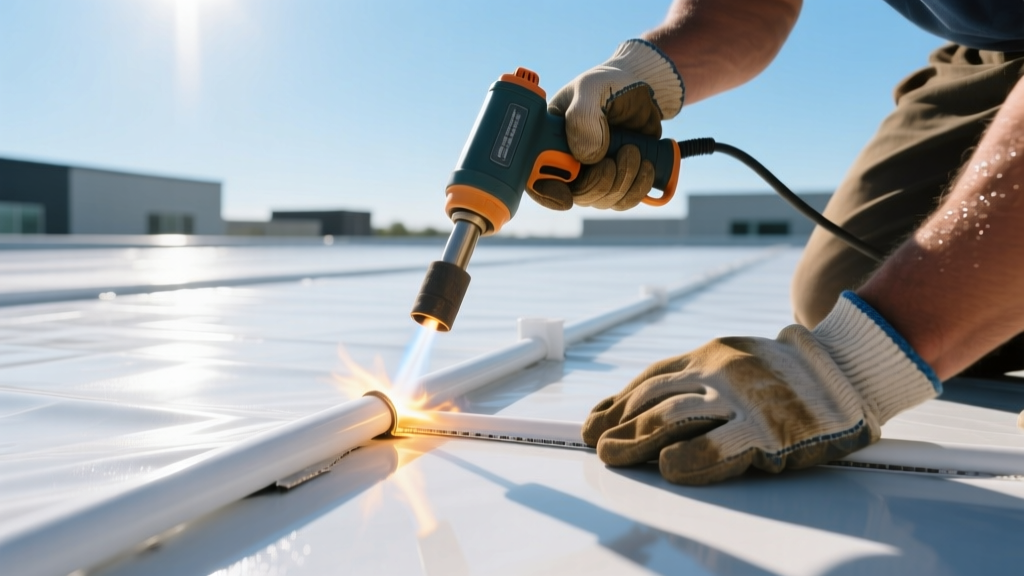
PVC membranes (such as Carlisle Sure-Weld or Sika Sarnafil) require precise thermal fusion. Set automatic welders to a temperature range of 950°F to 1,050°F (510°C to 565°C) with a travel speed of 10 to 15 feet per minute. Ambient temperature and wind speed dictate exact settings; higher wind speeds require higher temperatures and slower speeds to maintain the heat envelope. Hand-weld all penetrations and inside/outside corners using a hot-air gun and a silicone pressure roller, applying firm, continuous pressure while the polymer is in a semi-liquid state. Perform a destructive peel test on a scrap piece every morning and every 100 linear feet of field seaming to verify weld integrity.
Seam Tape Activation for EPDM
EPDM cannot be heat-welded. Instead, it relies on butyl or EPDM-based pressure-sensitive tapes. Clean the seam overlap area with a dedicated membrane cleaner to remove factory talc and field dirt. Apply a low-VOC primer (e.g., Elevate QuickPrime Plus) using a scrub pad. The critical step is the flash-off time: allow the primer to dry for 10 to 15 minutes until it is dry to the touch but still exhibits aggressive tack. Applying tape while the primer is wet will trap solvents, causing the tape to delaminate months later. Once the tape is applied, use a heavy steel seam roller to apply a minimum of 75 pounds of pressure across the entire overlap.
Bentonite Clay Panels: The Hydration and Overlap Strategy
Sodium bentonite clay panels are uniquely suited for below-grade, blind-side applications. The Whole Building Design Guide (WBDG) highlights bentonite's ability to self-seal minor punctures upon hydration. When exposed to water, sodium bentonite swells up to 15 times its dry volume, creating an impermeable gel barrier. However, improper overlap and premature hydration ruin the system.
- Substrate Preparation: Ensure the excavation soil retention system (lagging or shotcrete) is free of sharp protrusions greater than 1/4 inch. Bentonite panels can bridge minor voids but will tear if punctured during backfill.
- Panel Orientation and Fastening: Install panels horizontally. Secure them to the substrate using masonry nails and large-diameter washers every 12 inches on center. Do not overdrive the fasteners; the washer should sit flush without crushing the cardboard carrier.
- Overlap Execution: Maintain a strict 4-inch to 6-inch overlap at all horizontal and vertical joints. In the overlap zone, apply a continuous bead of bentonite waterstop or granular bentonite to ensure the gel barrier is continuous across the seam.
- Premature Hydration Protection: If rain is forecast before the concrete pour, cover the installed panels with 6-mil polyethylene sheeting. If bentonite hydrates and dries out repeatedly before being confined by the structural concrete, it loses its expansive swelling capacity, rendering it useless.
Troubleshooting Application Failures: A Diagnostic Matrix
When a waterproofing system fails, the root cause is almost always traceable to an application deviation. Use this diagnostic matrix to identify and rectify field errors.
| Observed Symptom | Root Application Cause | Required Field Fix |
|---|---|---|
| Blisters in liquid polyurethane | Trapped substrate moisture vaporizing | Cut blister, dry substrate with heat gun, re-prime, and patch with 60-mil liquid coat. |
| PVC seam peels apart easily | Cold weld (temp too low or speed too fast) | Strip the failed seam, clean with PVC cleaner, and re-weld using a hand-welder at 1050°F. |
| EPDM tape lifting at edges | Primer applied too thick or insufficient flash time | Inject EPDM lap sealant under the lifted edge and roll firmly. Do not use tape over tape. |
| Below-grade weeping at panel joints | Bentonite overlap less than 4 inches or no granular seal | Inject high-solids bentonite grout into the joint from the interior side if exterior access is lost. |
Environmental Constraints and Curing Timelines
The chemical and physical reactions that cure and set waterproof materials are highly sensitive to environmental conditions. Ignoring these thresholds guarantees system failure.
- Dew Point Calculations: Never apply liquid membranes or primers when the surface temperature is within 5°F (3°C) of the dew point. Condensation will form on the substrate, ruining adhesion. Use a digital psychrometer to verify the spread.
- Temperature Minimums: Most polyurethanes and EPDM primers require ambient and surface temperatures above 40°F (4°C) and rising. Below this threshold, the chemical cross-linking process stalls, leaving the membrane permanently tacky and vulnerable to tearing.
- Wind Limitations: Do not spray liquid membranes if sustained winds exceed 15 mph. Overspray not only wastes material but creates a hazardous, slippery film on adjacent building facades and scaffolding.
- UV Degradation Windows: While materials that are waterproof are designed to resist water, many liquid-applied aromatic polyurethanes are not UV stable. If the final topcoat or protection slab cannot be installed within 30 days of application, specify an aliphatic polyurethane or apply a temporary UV-blocking sacrificial coat to prevent surface chalking and degradation.
By strictly adhering to these material-specific application techniques, contractors ensure that the inherent waterproof properties of the specified products are fully realized in the field, delivering long-term, leak-free structural protection.
Written by
James ThorntonJames Thornton is a construction industry veteran with 25 years of hands-on experience in wood framing, lumber grading, and residential building codes. He started as a framing carpenter in rural Oregon, earned his ICC Residential Building Inspector certification, and eventually became a senior plan reviewer for the City of Portland Bureau of Development Services. James holds a B.S. in Wood Science & Technology from Oregon State University and is a certified lumber grader through the West Coast Lumber Inspection Bureau (WCLIB). He has inspected over 3,000 residential construction sites and authored the city's internal guide on advanced framing techniques (2x6 at 24" O.C.). James lives in Bend, OR, where he builds custom timber-frame cabins and competes in lumberjack sports.
More from James Thornton
View all
Insulation
Best Home Insulation Materials: Complete 2026 Guide
Compare top home insulation materials for 2026. Find R-values, installed costs per square foot, and best uses for fiberglass, spray foam, and mineral wool.
Aug 4, 2026

Sustainable Building
Certify Your Green Building Material for LEED and WELL
Step-by-step guide to certifying a green building material for LEED v5 and WELL v2. Master EPDs, HPDs, and VOC limits for 2026 project specifications.
Aug 4, 2026

Stone & Masonry
Veneer Stacked Stone Panels: Interior Design & Style Showcase
Discover how veneer stacked stone panels transform interiors. Explore modern design profiles, material pairings, and technical installation specs.
Aug 4, 2026