Troubleshooting Moisture Damage in Waterproof Flooring Options
Diagnose and fix subfloor moisture failures in waterproof flooring options. Expert troubleshooting for LVP, tile, and WPC adhesive breakdown and mold.

The 'Waterproof' Misconception: Topical vs. Subfloor Moisture
When contractors and homeowners select waterproof flooring options like Stone Plastic Composite (SPC), Wood Plastic Composite (WPC), or porcelain tile, they frequently conflate topical water resistance with subfloor moisture immunity. While an SPC plank will not swell if a pipe bursts above it, the installation system beneath it is highly vulnerable to Moisture Vapor Transmission (MVT) and hydrostatic pressure from the concrete slab. A floor is only as waterproof as its weakest structural link. This troubleshooting guide dissects the specific failure modes of modern waterproof flooring systems and provides exact, code-compliant remediation protocols.
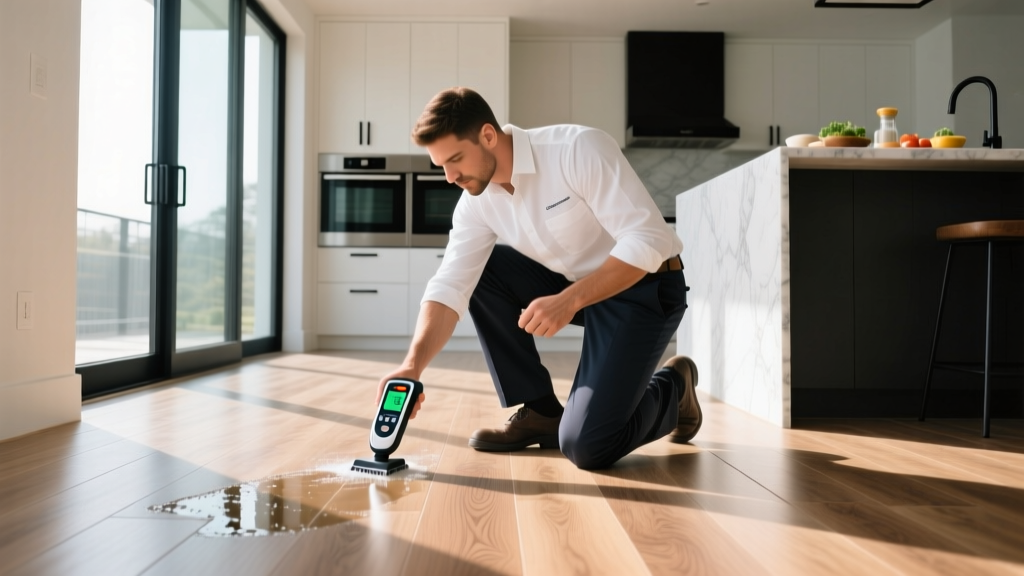
Symptom 1: Adhesive Breakdown and Plank Peaking in LVP/LVT
The Root Cause: Alkali-Silica Reaction and High MVT
Luxury Vinyl Plank (LVP) and Luxury Vinyl Tile (LVT) are dimensionally stable, but the pressure-sensitive acrylic adhesives used to bind them to concrete are not. When a concrete slab emits excessive moisture vapor, it carries alkaline salts (calcium, sodium, and potassium hydroxides) to the surface. As the water evaporates, these salts crystallize and create a highly alkaline environment (pH > 10). This triggers an alkali-silica reaction that chemically breaks down the acrylic adhesive, turning it into a brown, soapy sludge. The resulting loss of bond causes the LVP planks to peak, cup, or shift under foot traffic.
Diagnostic Protocol
Do not rely on surface-level pinless moisture meters for concrete diagnostics. You must quantify the internal relative humidity (RH) of the slab.
- Step 1: Perform ASTM F2170 in-situ RH testing. Drill holes to 40% of the slab's depth (if drying from one side) and insert calibrated RH probes. Leave them for 72 hours.
- Step 2: Test the surface pH using a distilled water slurry and a calibrated digital pH meter. Readings above 9 indicate active alkalinity that will destroy standard adhesives.
- Step 3: If RH exceeds 75% or pH exceeds 9, the slab requires chemical mitigation before any waterproof flooring options can be installed.
The Fix: Two-Part Epoxy Moisture Mitigation
Stop using standard acrylic adhesives over damp slabs. The permanent fix requires a 100% solids, two-part epoxy moisture vapor barrier, such as Mapei Primer MF or Bostik GreenForce. These epoxies penetrate the concrete capillaries and cure into an impermeable glass-like matrix.
Symptom 2: Efflorescence and Grout Crumbling in Ceramic Tile
The Root Cause: Hydrostatic Pressure and Soluble Salts
Ceramic and porcelain tiles are inherently impervious to water (absorption rate < 0.5%). However, the cementitious grout lines between them are porous. When a below-grade or on-grade concrete slab experiences hydrostatic pressure (water pushing up from the water table), it forces mineral-rich water through microscopic capillaries in the slab. The water travels through the thin-set mortar and exits through the grout lines. As it evaporates, it leaves behind white, crusty calcium carbonate or sodium sulfate deposits known as efflorescence. Over time, the crystallization pressure physically shatters the grout from the inside out.
The Fix: Uncoupling Membranes and Epoxy Grout
To troubleshoot and permanently resolve efflorescence in tile installations, you must decouple the tile from the slab and eliminate the porous exit points.
- Install an Uncoupling Membrane: Use a product like the Schluter-Ditra uncoupling membrane. The membrane's dovetail structure anchors to the slab while the top fleece absorbs the shear stresses caused by slab expansion and hydrostatic vapor, preventing the tile from cracking.
- Switch to Epoxy Grout: Replace standard cementitious grout with a high-performance epoxy grout like LATICRETE Spectralock PRO. Epoxy grout has a water absorption rate of less than 0.1%, effectively sealing the joints against vapor transmission and staining.
Moisture Tolerance Limits by Flooring Type
Not all waterproof flooring options handle subfloor moisture equally. Use this matrix to determine if your slab requires remediation before installation.
| Flooring Material | Max RH (ASTM F2170) | Max MVT (ASTM F1869) | Max pH Level |
|---|---|---|---|
| Glue-Down LVT / LVP | 75% - 80% | 3 - 5 lbs / 1000 sq ft | 9.0 |
| Floating SPC / WPC | 85% - 90% | 8 - 10 lbs / 1000 sq ft | 10.0 |
| Porcelain / Ceramic Tile | 95% | 12 lbs / 1000 sq ft | 11.0 |
| Sheet Vinyl (Fully Adhered) | 65% - 75% | 3 lbs / 1000 sq ft | 9.0 |
Symptom 3: Musty Odors and Mold Under WPC and Sheet Vinyl
The Root Cause: Organic Trapping and Topical Spills
While the core of WPC flooring is waterproof, many products come with a pre-attached cork or foam underlayment. Cork is an organic material. If a dishwasher leaks or a pet has an accident, topical water seeps through the microscopic gaps in the floating floor's click-lock system. Once trapped between the waterproof core and the subfloor, the moisture saturates the organic underlayment or the OSB/plywood subfloor beneath it. Because the waterproof flooring acts as a vapor retarder, the trapped moisture cannot evaporate upward, creating a perfect incubator for Stachybotrys (black mold).
Diagnostic and Remediation Steps
If you detect a musty odor or notice dark staining at the baseboards, follow EPA mold remediation guidelines immediately to prevent respiratory hazards.
- Thermal Imaging: Use an infrared camera (like a FLIR C5) to map the temperature differentials caused by trapped evaporative cooling beneath the planks. This pinpoints the exact leak source without removing the entire floor.
- Subfloor Replacement: Pull the affected waterproof planks. If the wood subfloor shows delamination or fungal growth, cut out the damaged OSB/plywood. Treat the joists with a borate-based fungicide like Concrobium Mold Control.
- Upgrade to Inorganic Materials: When reinstalling, select waterproof flooring options that do not feature pre-attached organic cork underlayments. Opt for SPC with an attached IXPE (cross-linked polyethylene) foam pad, which is 100% synthetic and mold-resistant. Alternatively, lay down a 6-mil polyethylene vapor barrier over the wood subfloor before installing the floating floor.
Cost Breakdown: Moisture Remediation vs. Total Replacement
Ignoring subfloor diagnostics to save money upfront inevitably leads to catastrophic failure. Below is the realistic cost comparison for a standard 1,000-square-foot commercial or residential slab.
| Intervention Type | Material Cost (per sq ft) | Labor Cost (per sq ft) | Total 1,000 sq ft Estimate |
|---|---|---|---|
| Pre-Install Epoxy Moisture Barrier (e.g., Mapei Primer MF) | $0.75 - $1.10 | $1.50 - $2.50 | $2,250 - $3,600 |
| Post-Failure Tear Out & Disposal | $0.15 (dump fees) | $2.00 - $3.50 | $2,150 - $3,650 |
| Slab Grinding & Alkali Neutralization | $0.40 | $2.50 - $4.00 | $2,900 - $4,400 |
| New Flooring Material & Re-Installation | $2.50 - $5.00 | $2.00 - $4.00 | $4,500 - $9,000 |
As the data illustrates, the cost of post-failure tear-out, slab remediation, and re-installation is roughly triple the cost of applying a two-part epoxy moisture barrier during the initial preparation phase. Proper diagnostics and chemical mitigation are not optional upgrades; they are structural necessities for the longevity of any waterproof flooring system.
Written by
Elena RodriguezElena Rodriguez is a civil engineer and technical writer specializing in concrete technology, masonry systems, and ASTM/ACI compliance. She earned her B.S. in Civil Engineering from Texas A&M University and spent a decade at a materials testing laboratory, performing over 2,000 concrete compressive strength tests and masonry prism evaluations. Elena is an ACI-certified Field Testing Technician (Grade I) and a member of ASTM Committee C12 on Natural Building Stone. She currently consults on forensic engineering cases involving concrete failures and moisture intrusion. Based in San Antonio, TX, Elena is a proud member of the Society of Women Engineers (SWE) and coaches her daughter's FIRST Robotics team.
More from Elena Rodriguez
View all
Walls & Panels
Cost Analysis: Light Gauge Steel Framing Advantages and Disadvantages
Evaluate light gauge steel framing advantages and disadvantages through a strict cost analysis lens, comparing material, labor, and lifecycle expenses.
Aug 4, 2026

Walls & Panels
Gypsum Board Types: Exact Specifications, Thickness & Dimensions
Compare standard, Type X, and moisture-resistant gypsum board types. Get exact specifications, thicknesses, dimensions, and ASTM standards for your project.
Aug 4, 2026

Fire Resistance
Best Fire-Resistant Outdoor Decking Materials: 2026 Buyer Guide
Discover the best fire-resistant outdoor decking materials for 2026. Compare Class A PVC, aluminum, and hardwood options for WUI compliance and safety.
Aug 4, 2026