Applying Liquid Waterproof Material: Surface Prep to Cure
Master the application of liquid polyurethane waterproof material. Learn substrate prep, mil thickness targets, detailing, and failure prevention.

The Physics of Adhesion: Why Surface Prep Dictates Success
The performance of any liquid-applied waterproof material relies entirely on the mechanical and chemical bond formed at the substrate interface. Polyurethane and elastomeric acrylic membranes do not bridge structural defects; they mirror them. If the concrete substrate is contaminated with laitance, curing compounds, or dust, the membrane will delaminate under hydrostatic pressure or thermal cycling.
For below-grade and plaza deck applications, the substrate must be prepared to a Concrete Surface Profile (CSP) of 2 to 3, as defined by the International Concrete Repair Institute (ICRI). This requires mechanical abrasion—typically shot blasting or heavy-duty diamond grinding. Acid etching is strictly prohibited for modern polyurethane systems, as residual salts neutralize the isocyanate components in the membrane, preventing proper cross-linking.
Step-by-Step Application Methodology
1. Priming and Outgassing Prevention
Concrete is a porous, breathable matrix. As ambient temperatures rise throughout the day, air trapped within the concrete pores expands and attempts to escape—a process known as outgassing. If a liquid waterproof material is applied during peak heat, the escaping air becomes trapped in the viscous membrane, creating permanent blisters.
- Timing: Apply the primer and base coat in the early morning or late afternoon when the substrate temperature is falling.
- Primer Selection: Use a low-viscosity, solvent-based polyurethane primer. This penetrates the capillary network of the concrete, sealing the pores and providing a high-tack surface for the main membrane.
- Cure Time: Allow the primer to flash off until it is tacky to the touch (typically 2 to 4 hours at 70°F/21°C). Do not let it cure to a hard, glossy finish, or intercoat adhesion will fail.
2. Detailing Penetrations and Inside Corners
Ninety percent of waterproofing failures occur at transitions, drains, and pipe penetrations. Liquid membranes alone lack the tensile strength to span moving joints or sharp 90-degree inside corners.
For all inside corners and pipe collars, apply a generous stripe coat of the waterproof material and immediately embed a 4-inch wide polyester reinforcing fabric (such as Sika Reemat Premium or Tremco Reinforcing Fleece). Use a stiff-bristled brush to work the material completely through the fabric weave, ensuring no air pockets remain. Allow this detail coat to cure for 12 hours before proceeding with the main field application. The Portland Cement Association emphasizes that treating cold joints and transitions as independent, reinforced assemblies is critical for long-term watertight integrity.
3. Main Field Application: Notching and Back-Rolling
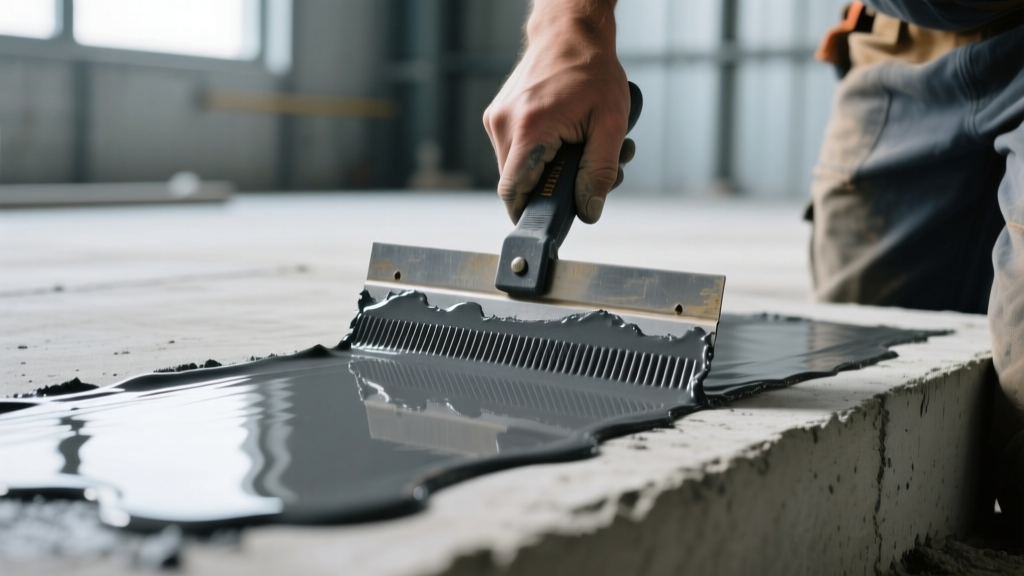
Pouring and spreading liquid waterproof material with a flat squeegee leads to inconsistent thickness. The industry standard for achieving precise wet mil thickness is the notched squeegee and back-roll method.
- Notch Application: Use a 1/8" x 1/8" x 1/8" square-notch squeegee to spread the material. The teeth of the squeegee meter the exact volume of material onto the substrate.
- Immediate Back-Rolling: Within 5 minutes of squeegeeing, a second technician must back-roll the material using a 3/8" nap lint-free woven roller (mohair or high-density foam). Do not use standard knit polyester rollers, as they shed lint and introduce air bubbles.
- Technique: Roll in a single direction to push the material deep into the concrete pores and collapse the ridges left by the squeegee. This eliminates pinholes and ensures a uniform, monolithic film.
Wet Mil vs. Dry Mil: The Measurement Matrix
Applying the correct thickness is non-negotiable. Applying the material too thin compromises hydrostatic resistance; applying it too thick traps solvents and causes wrinkling or prolonged curing. Contractors must measure wet mil thickness during application using a wet mil gauge, understanding the material's volume solids percentage to predict the final dry mil thickness.
| Membrane Type | Volume Solids | Target Wet Mil | Target Dry Mil | Coverage (per Gallon) |
|---|---|---|---|---|
| Aromatic Polyurethane (Base) | 85% | 60 mils | 51 mils | 22 sq. ft. |
| Aliphatic Polyurethane (Topcoat) | 70% | 20 mils | 14 mils | 65 sq. ft. |
| Elastomeric Acrylic (Above-Grade) | 55% | 32 mils | 18 mils | 50 sq. ft. |
Troubleshooting Common Application Failures
Blistering and Outgassing
Symptom: Dome-shaped bubbles appear across the membrane surface 12 to 24 hours after application.
Cause: The material was applied during rising substrate temperatures, or the concrete MVER was too high, forcing moisture vapor through the curing membrane.
Fix: Slice the blisters with a utility knife, allow the trapped gas/moisture to escape, prime the exposed concrete, and patch with a trowel-grade polyurethane mastic before applying a new topcoat.
Pinholes
Symptom: Tiny, crater-like holes visible in the cured film, often concentrated over rough or broom-finished concrete.
Cause: Failure to back-roll immediately after squeegeeing, or using a roller with too short a nap to push the material into the microscopic valleys of the substrate.
Fix: Lightly sand the affected area to break the surface tension, vacuum thoroughly, and apply a tightly rolled pinhole-sealer coat thinned with 5% manufacturer-approved solvent.
Intercoat Delamination
Symptom: The top layer of the waterproof material peels away from the base layer in sheets.
Cause: Exceeding the manufacturer's maximum recoat window. Polyurethanes cure to a highly cross-linked, chemically inert state. If the base coat cures for more than 72 hours before the topcoat is applied, chemical adhesion is impossible.
Fix: Mechanically abrade the base coat with a 60-grit diamond screen to restore a physical profile, solvent-wipe with xylene to remove dust, and apply the topcoat immediately.
Curing Protocols and Environmental Constraints
Moisture-cured polyurethane waterproof materials react with ambient humidity to form their polymer matrix. While this allows them to cure in cold temperatures, it introduces specific environmental constraints.
- Humidity Extremes: If relative humidity exceeds 85%, the surface of the membrane may react too quickly with atmospheric moisture, forming a skin that traps unreacted solvents below. This results in a tacky, uncured underlayer. In high-humidity environments, apply the material in thinner lifts (multiple coats) rather than one heavy coat.
- Temperature Floors: Do not apply when the ambient or substrate temperature is below 40°F (4°C). At low temperatures, the viscosity of the liquid increases dramatically, making it nearly impossible to achieve proper wetting and penetration into the concrete pores.
- Rain Washout: Most liquid membranes require 4 to 6 hours to reach a tack-free state. If rain occurs during this window, the water will physically displace the uncured material, creating craters and washouts. Always monitor dew points and precipitation forecasts, ensuring the substrate temperature remains at least 5°F above the dew point to prevent condensation from forming under the membrane during the critical flash-off period.
Mastering the application of liquid waterproof material requires strict adherence to substrate preparation, precise mil-thickness control, and an understanding of the chemical curing process. By treating detailing, priming, and environmental constraints as critical path items rather than optional steps, contractors can deliver monolithic, defect-free waterproofing assemblies that perform for decades.
Written by
Sarah WhitfieldSarah Whitfield is a chartered quantity surveyor (MRICS) and construction cost analyst with 15 years of experience in material pricing, procurement strategy, and project budgeting. She earned her degree in Construction Management from the University of Reading (UK) and has worked on projects ranging from $2M custom homes to $180M mixed-use developments across North America and Europe. Sarah currently leads cost estimating for BuildMat Insight, maintaining a proprietary database of 4,000+ material price points updated quarterly. She is a frequent contributor to RSMeans cost data panels and has presented at the International Cost Engineering Council (ICEC) congress. Based in Denver, CO, Sarah is an avid trail runner and volunteer mentor for Women in Construction.
More from Sarah Whitfield
View all
Wood & Lumber
What Are the Different Types of Wood? A Builder's Guide
Compare structural softwoods, finish hardwoods, and engineered lumber. Analyze Janka ratings, MOE values, and 2026 pricing for construction.
Aug 4, 2026

Walls & Panels
Steel Framing vs Wood Framing: Corrosion and Moisture Defense
Compare steel framing vs wood framing for moisture resistance. Learn about galvanized coatings, condensation risks, and corrosion protection strategies.
Jul 21, 2026

Stone & Masonry
How to Cut Stone Veneer: Wet Saw vs Grinder Comparison
Compare the best tools for cutting stone veneer. We review wet saws, angle grinders, and chop saws to help you achieve clean, chip-free cuts.
Jul 21, 2026