Application Techniques for Liquid and Sheet Waterproof Materials
Master the application techniques for liquid and sheet waterproof materials. Learn substrate prep, mil thickness, and seam sealing for lasting protection.

The Science of Substrate Preparation
The longevity of any waterproofing system is dictated entirely by the substrate it bonds to. Before unrolling a single sheet or opening a pail of liquid resin, the concrete or masonry surface must be mechanically profiled and moisture-tested. Relying on visual inspection is a critical error; concrete that appears dry on the surface often harbors destructive moisture vapor deep within its capillary network.
For liquid-applied polyurethanes and epoxies, the International Concrete Repair Institute (ICRI) mandates a Concrete Surface Profile (CSP) between 3 and 5. This level of roughness is achieved through closed-loop shot blasting or heavy-duty scarifying. Acid etching is strictly prohibited in modern professional applications, as it leaves residual salts that trigger osmotic blistering when trapped beneath impermeable membranes.
Moisture verification must follow ASTM F2170 moisture testing guidelines, utilizing in-situ relative humidity probes drilled to 40% of the slab depth. Readings must remain below 75% RH. Alternatively, calcium chloride tests (ASTM F1869) must show emission rates of less than 3 lbs per 1,000 square feet per 24 hours. Additionally, the substrate temperature must be at least 5°F above the calculated dew point to prevent micro-condensation during the exothermic curing phase.
Liquid-Applied Waterproof Materials: Mil Thickness and Curing
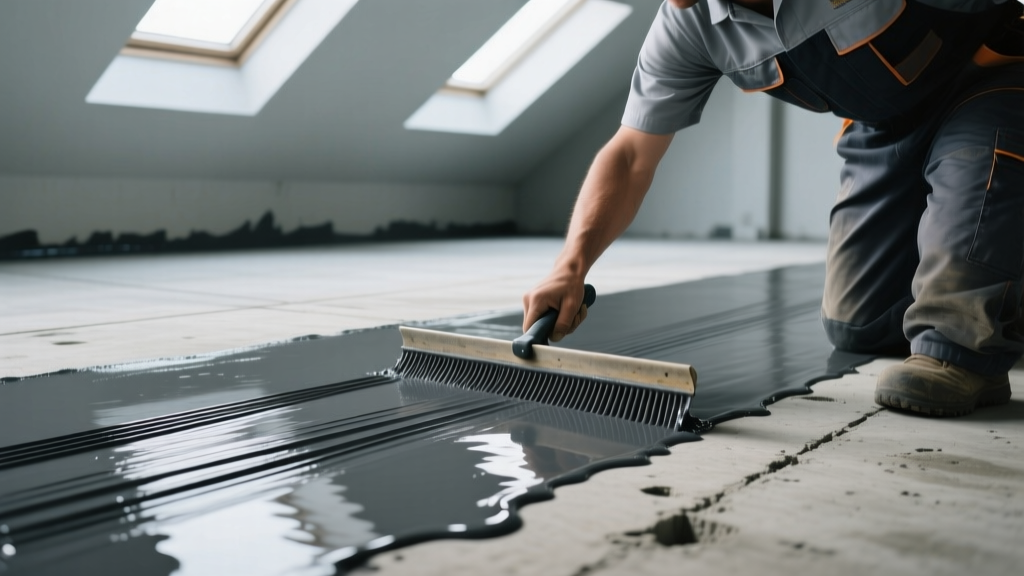
Liquid-applied membranes—such as polyurethanes, polymethyl methacrylates (PMMA), and advanced acrylics—offer seamless protection, but their performance hinges on precise thickness control. The industry-standard application technique is the "notched squeegee and back-roll" method. The notched squeegee meters the exact volume of material onto the deck, while the immediate back-rolling with a 3/8-inch nap roller breaks the liquid's surface tension, forces the resin into the concrete's pores, and eliminates ridges.
Understanding the difference between wet mils and dry mils is non-negotiable. A material applied at 60 wet mils may cure down to 30 dry mils depending on its solids content. Applying material too thickly in a single pass traps solvents, leading to a tacky, uncured core, while applying it too thinly results in micro-tears under structural movement.
Liquid Material Application Specifications Matrix
| Material Type | Wet Mils / Dry Mils | Primary Application Tool | Recoat Window (at 70°F) | Key Application Nuance |
|---|---|---|---|---|
| Aliphatic Polyurethane | 60 / 30 per coat | 1/8" V-notch squeegee + 3/8" nap roller | 8 - 24 hours | Requires a pore-sealing primer on highly porous concrete to prevent outgassing pinholes. |
| PMMA (Methyl Methacrylate) | 80 / 45 per coat | 1/4" V-notch squeegee + spike roller | 30 - 45 minutes | Extremely fast cure; spike roller is mandatory to de-aerate the thick film before it flashes off. |
| Elastomeric Acrylic | 22 / 11 per coat | Airless sprayer (3000 psi) + back-roll | 4 - 6 hours | Water-based; cannot be applied if rain is imminent or if ambient temps drop below 50°F. |
Sheet Membrane Waterproof Materials: Seam and Detailing Mastery
Sheet membranes, including self-adhered modified bitumen and thermoplastic (TPO/PVC) rolls, provide consistent, factory-controlled thickness. However, their vulnerability lies entirely at the seams and penetrations. According to The NRCA Roofing and Waterproofing Manual, over 85% of sheet membrane failures occur at laps, flashings, and transitions.
Heat-Welded Thermoplastics (TPO/PVC)
Thermoplastic sheets require hot-air welding to fuse the seams into a monolithic unit. The welder's nozzle temperature must be calibrated daily, typically ranging between 900°F and 1,100°F at the nozzle, depending on ambient wind and temperature. The automated welder should travel at 10 to 15 feet per minute. A manual pressure roller must follow immediately behind the welder to apply uniform pressure while the polymer is in a semi-molten state. Every seam must be probed with a blunt-nosed awl after cooling; any catch indicates a cold weld that requires a patch.
Self-Adhered Modified Bitumen
Peel-and-stick membranes rely on a proprietary adhesive layer that activates with a specific primer. The most common application error is installing the sheet before the primer has properly flashed off. The primer must be "tack-to-touch," not "dry-to-touch." If it transfers to your glove, it is too wet and will act as a bond-breaker. If it does not aggressively grab your skin, it has flashed off too far and requires re-priming. Minimum overlaps must be strictly maintained: 2-inch side laps and 4-inch end laps, with all T-joints detailed with a bead of compatible mastic and a reinforcement patch.
Handling Penetrations and Complex Transitions
Pipes, drains, and inside/outside corners represent the highest risk for water ingress. Liquid and sheet systems both require reinforcing fabric (typically a non-woven polyester fleece) at these stress points.
- Inside Corners: Create a cant (a 45-degree slope) using a fast-setting polyurethane sealant or hydraulic cement before applying the membrane. This prevents the membrane from bridging the 90-degree angle and tearing under hydrostatic pressure.
- Pipe Penetrations: For liquid systems, apply a heavy detail coat, embed the reinforcing fabric, and immediately saturate it with a second coat. The fabric must be fully encapsulated; any exposed fibers will wick moisture directly into the substrate.
- Drain Clamping Rings: The membrane must be carried down into the drain throat and clamped securely. Never terminate the membrane on the horizontal flange of the drain, as settling will immediately break the seal.
Troubleshooting Common Application Failures
Even experienced crews encounter anomalies. Recognizing the visual cues of a failing application allows for immediate remediation before the system is buried under protection boards or pavers.
| Visual Symptom | Root Cause Analysis | Corrective Action Protocol |
|---|---|---|
| Pinholes / Cratering (Liquid) | Outgassing from damp concrete or applying over a highly porous, unprimed surface. | Grind out craters to sound material. Apply a dedicated pore-sealing primer, allow to cure, and apply a localized detail coat. |
| Fishmouths (Sheet) | Membrane applied before primer flashed off, or pulling the sheet too tightly during placement. | Cut out the fishmouth completely. Apply a patch extending 2 inches beyond the cut in all directions, and seal edges with mastic. |
| Solvent Blisters (Liquid) | Material applied too thickly in a single pass, trapping solvents that vaporize and expand. | Slice the blister open to release trapped gas. Sand the edges flat, clean with solvent, and apply two thin, targeted topcoats. |
| Cold Welds (Thermoplastic) | Welder speed too fast, nozzle temp too low, or failure to clean membrane surface prior to welding. | Clean the area with manufacturer-approved cleaner. Apply a 3-inch wide patch over the failed seam using a hand-held hot air gun and silicone roller. |
Quality Assurance and Verification Testing
Visual inspection is insufficient for verifying the integrity of a completed waterproofing assembly. Before covering the membrane with protection courses or overburden, quantitative testing is mandatory.
For horizontal decks and plazas, flood testing per ASTM D5957 remains the gold standard. The area is dammed and filled with a minimum of 2 inches of water for 24 hours. The underside of the deck must be monitored continuously for active drips or damp spots. If flood testing is structurally unfeasible due to weight constraints, Electronic Leak Detection (ELD) or low-voltage vector mapping can be utilized. These systems pass a harmless electrical current across the membrane surface; any breach in the dielectric layer (a pinhole or cut) completes the circuit, allowing technicians to pinpoint leaks with millimeter accuracy.
Adhesion testing should also be conducted using a pull-off adhesion tester (ASTM D7234). Extracting 2-inch dollies from the cured membrane verifies that the bond strength exceeds the manufacturer's minimum psi requirement, ensuring the system will resist wind uplift and hydrostatic pressure over its service life. For comprehensive detailing on industry standards and verification protocols, professionals should consult the ICRI surface preparation guidelines and local building codes to ensure full compliance.
Written by
Marcus ChenMarcus Chen is a licensed structural engineer (PE) and building materials analyst with over 12 years of experience across residential, commercial, and industrial construction. He holds a Master of Science in Civil Engineering from UC Berkeley and spent six years at Thornton Tomasetti before transitioning to independent consulting and technical writing. Marcus specializes in material selection for seismic-prone regions, concrete reinforcement strategies, and lifecycle cost analysis. His work has been cited by the American Concrete Institute (ACI) and the Structural Engineers Association of California (SEAOC). When he is not on a job site or at his desk, you will find him hiking the Sierra Nevada or restoring a 1920s craftsman bungalow in Oakland, CA.
More from Marcus Chen
View all
Construction Cost
How Much Did the Eiffel Tower Cost to Build?
How much did the Eiffel Tower cost to build in 1889? We adjust for inflation and compare its budget to modern skyscraper construction.
Aug 4, 2026

Fire Resistance
What Is a Fire Resistant Material? Testing & Certification Guide
Discover what is a fire resistant material through ASTM and UL testing. Learn how fire ratings, certifications, and assemblies work in construction.
Aug 4, 2026

Construction Cost
How Much Did the Burj Khalifa Cost to Build?
How much did the Burj Khalifa cost to build? We break down the $1.5B project and extract 5 money-saving strategies for your next build.
Jul 30, 2026