Best Waterproof Material for Shower Walls: A Complete Pro Guide
Compare the best waterproof material for shower walls, including foam boards, liquid membranes, and sheet systems, with pro installation tips and 2026 costs.

The Anatomy of a Fail-Proof Shower Enclosure
Water intrusion is the primary cause of structural decay and mold proliferation in residential bathrooms. Selecting the correct waterproof material for shower walls is not merely a code requirement; it is the single most critical defense mechanism in your bathroom build. While tile and grout provide the aesthetic finish, they are inherently porous. The true waterproofing burden falls entirely on the substrate and membrane system hidden beneath.
Top Waterproof Materials for Shower Walls Compared
Choosing the right system depends on your budget, timeline, and the specific structural conditions of the framing. Below is a technical comparison of the three primary waterproofing categories available on the market in 2026.
| Material Category | Top Brand Examples | Waterproof Level | Avg. Cost (per sq. ft.) | Install Speed |
|---|---|---|---|---|
| XPS Foam Boards | Schluter Kerdi-Board, Wedi, GoBoard | Inherently Waterproof | $3.50 - $4.50 | Fast |
| Liquid-Applied Membranes | Laticrete Hydro Ban, RedGard, Mapei AquaDefense | Fully Waterproof (when applied correctly) | $1.50 - $2.50 | Slow (requires drying time) |
| Sheet Membranes | Schluter Kerdi, NobleSeal TS | Fully Waterproof | $2.00 - $3.00 | Moderate |
Deep Dive: Choosing the Right System
1. Extruded Polystyrene (XPS) Foam Boards
Foam shower boards have revolutionized wet-area construction. Products like Schluter Kerdi-Board and Johns Manville GoBoard feature a high-density XPS foam core that is completely impervious to water, even if the outer facing is punctured. These boards serve as both the structural substrate and the waterproofing layer in a single step.
- Pros: Extremely lightweight (one person can easily maneuver a 3x5 ft sheet), inherently waterproof, provides slight thermal insulation, and can be easily cut with a utility knife.
- Cons: Highest upfront material cost. Requires proprietary sealants and banding tapes at every seam, corner, and screw penetration to maintain the waterproof envelope.
- Pro Tip: When fastening foam boards, you must use the manufacturer's specific washer and screw combination. Standard drywall screws will pull through the foam under the weight of large-format porcelain tiles.
2. Liquid-Applied Elastomeric Membranes
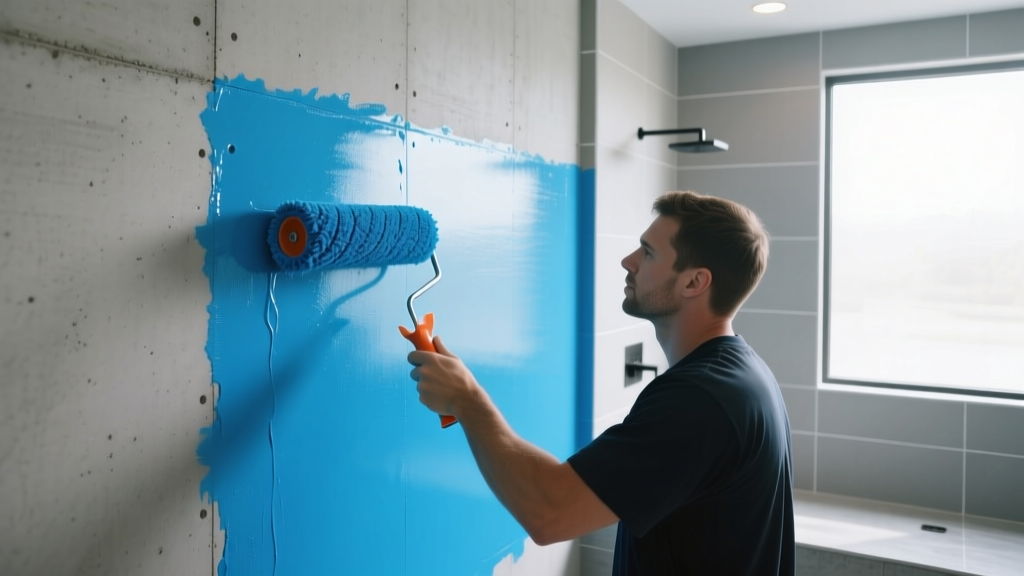
Liquid membranes like Laticrete Hydro Ban and Custom Building Products RedGard are applied directly over cement backer board or fiber-cement substrates. They cure into a seamless, flexible rubber-like shell that bridges small cracks and moves with the structural framing.
- Pros: Lowest material cost, excellent for complex geometries (niches, benches, multiple pipe penetrations), and creates a monolithic seamless barrier.
- Cons: Highly dependent on installer skill. Applying the membrane too thin results in catastrophic failure.
- Pro Tip: You must measure the wet film thickness using a wet mil gauge. According to Laticrete Technical Data Sheets, Hydro Ban requires a wet film thickness of 30-40 mils to achieve the required 20 dry mils. Never estimate thickness by eye.
3. Fleece-Backed Polyethylene Sheet Membranes
Sheet membranes, most notably Schluter Kerdi, consist of a high-density polyethylene core with a specialized non-woven fleece webbing on both sides. They are bonded to the substrate using unmodified thin-set mortar.
- Pros: Guarantees uniform thickness across the entire wall (eliminating the risk of thin spots found in liquid membranes), highly durable, and allows for immediate tiling after installation.
- Cons: Requires meticulous overlapping (minimum 2-inch overlaps) and careful thin-set application to avoid air pockets (voids) behind the membrane.
Real-World Cost Breakdown (2026 Estimates)
For a standard 3-foot by 5-foot alcove shower with a ceiling height of 8 feet (approximately 105 square feet of wall surface area), here is how the material and labor costs break down for professional installation in 2026:
- Foam Board System (e.g., Wedi): $850 - $1,100 (Higher material cost, but saves 4-6 hours in labor compared to hanging cement board and applying liquid waterproofing).
- Cement Board + Liquid Membrane (e.g., Durock + Hydro Ban): $550 - $750 (Lower material cost, but requires multiple days for mortar curing, board taping, and two coats of liquid membrane drying).
- Cement Board + Sheet Membrane (e.g., Durock + Kerdi): $650 - $850 (Moderate material cost, high labor precision required for thin-set application).
Critical Failure Modes and Troubleshooting
Even the best waterproof material for shower walls will fail if installed incorrectly. According to the EPA Mold Cleanup Guidelines, moisture trapped inside wall cavities can trigger toxic mold growth within 48 hours. Avoid these common field failures:
Failure 1: Liquid Membrane Pinholes and Blistering
Cause: Applying liquid membrane over a highly porous, dusty, or unprimed cement board. The substrate sucks the moisture out of the elastomeric coating too quickly, causing pinholes and blisters.
Fix: Lightly dampen the cement board with a sponge before rolling the first coat of liquid membrane. This prevents rapid moisture extraction and ensures a continuous film.
Failure 2: Sheet Membrane Delamination
Cause: Using a modified thin-set mortar (ANSI A118.4) beneath a polyethylene sheet membrane. Modified mortars require air drying to cure the latex polymers. Trapped between a waterproof membrane and a waterproof tile, the mortar stays soft and fails.
Fix: Strictly use an unmodified thin-set mortar (ANSI A118.1) or a manufacturer-specific modified mortar that is chemically engineered to cure in anaerobic environments (such as Schluter's All-Set).
Failure 3: Unsealed Penetrations in Foam Boards
Cause: Cutting holes for shower valves and pipe escutcheons without sealing the exposed XPS foam core.
Fix: Use manufacturer-specific pipe seals (e.g., Kerdi-SEAL-PS). Apply a continuous 1/2-inch bead of proprietary polyurethane sealant around the cutout before pressing the rubber collar into place.
Step-by-Step Waterproofing Sequence
- Substrate Preparation: Ensure all framing is plumb and blocking is installed for grab bars and heavy niches. Tape and mud all cement board seams with alkali-resistant fiberglass mesh tape and thin-set.
- Penetration Sealing: Seal all valve openings, shower arms, and niche perimeters with sealant or pre-formed membrane collars.
- Corner Treatment: Install pre-formed inside and outside corner pieces before doing the main field application. Corners are the highest stress points for structural movement.
- Field Application: Apply the membrane to the main wall areas, ensuring proper overlaps and maintaining the required thickness.
- Inspection: Check for voids, thin spots, or missed seams. Repair immediately before proceeding to tile installation.
Frequently Asked Questions
Can I use drywall as a substrate for shower walls if I waterproof over it?
No. Standard gypsum drywall will disintegrate if water bypasses the membrane. While some manufacturers allow moisture-resistant drywall (green board) behind their membranes in specific residential applications, cement backer board or XPS foam boards are the only universally accepted, fail-safe substrates for wet areas.
Do I need to waterproof the ceiling of the shower?
If you are installing a steam shower, the ceiling must be fully waterproofed and sloped at a minimum of 2 inches per foot to prevent condensation from dripping onto the user. For standard showers, waterproofing the ceiling is not strictly required by code, but it is highly recommended to prevent peeling paint and drywall degradation from rising steam.
Where can I find the official industry standards for shower waterproofing?
The definitive guide for tile and stone installation, including waterproofing requirements, is the TCNA Handbook. You can also reference Schluter Systems Technical Resources for detailed, system-specific installation manuals that align with ANSI A108 standards.
Written by
David NakamuraDavid Nakamura is a licensed architect (AIA) and construction technology writer focused on sustainable building methods, mass timber engineering, and high-performance building envelopes. He holds a Master of Architecture from the University of Washington and is a certified Passive House Consultant (CPHC). David spent eight years at the Seattle firm Mithun, where he led the design of three LEED Platinum projects, before founding his own practice specializing in net-zero residential design. He serves on the editorial advisory board of GreenBuilder Magazine and has authored peer-reviewed papers on cross-laminated timber (CLT) connections for the Journal of Structural Engineering. In his spare time, David teaches woodworking at Pratt Fine Arts Center and kayaks the Puget Sound.
More from David Nakamura
View all
Construction Cost
Labor Cost to Build a Deck Per Sq Ft: 2026 Installation Guide
Discover the exact labor cost to build a deck per sq ft in 2026. This installation guide breaks down contractor rates, complexity factors, and hidden fees.
Aug 4, 2026

Construction Cost
How Much Does It Cost to Build a 3 Bedroom House? Financing Guide
Learn exactly how much it costs to build a 3 bedroom house and explore 2026 financing options, construction loan types, and budget frameworks for your build.
Aug 4, 2026

Construction Cost
Cost to Build a Tennis Court: 2026 Guide
How much does it cost to build a tennis court in 2026? Breakdowns for asphalt, concrete, and synthetic surfaces plus fencing and lighting.
Jul 30, 2026