Waterproof Subfloor Material Guide: Top Choices for Wet Rooms
Compare the best waterproof subfloor material options for bathrooms and wet rooms, including cement boards, foam boards, and liquid membranes.

The Hidden Cost of Subfloor Failure
Water intrusion in wet areas is rarely a surface-level problem. When tile grout cracks or caulk fails, water migrates downward. If your subfloor assembly lacks a dedicated moisture barrier, the structural framing below will rot, harbor mold, and eventually compromise the floor's load-bearing capacity. Selecting the correct waterproof subfloor material is the single most critical decision in any bathroom, shower, or wet room construction. This guide breaks down the exact material specifications, real-world costs, and installation protocols required to build a failure-proof subfloor assembly in 2026.
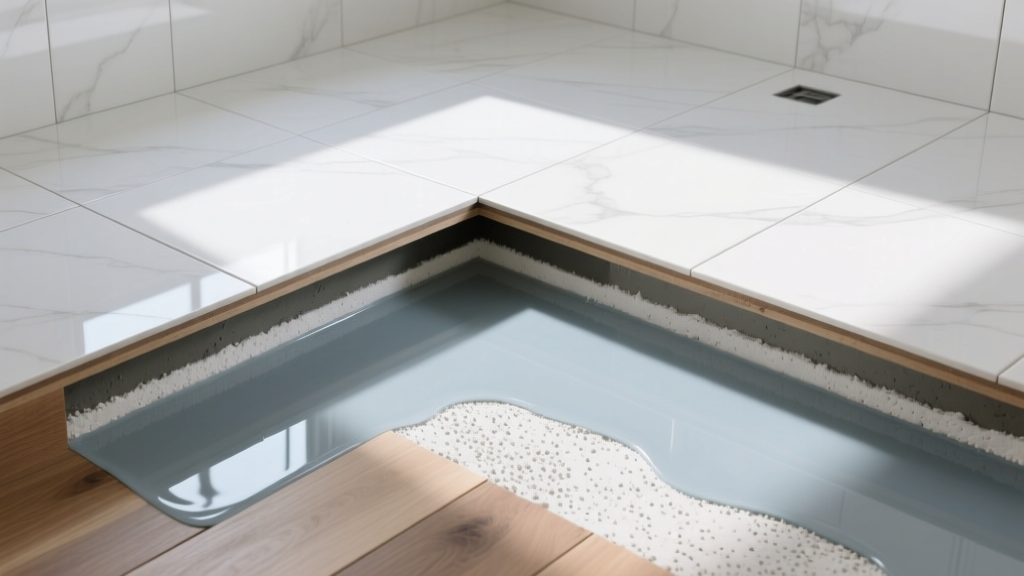
Core Categories of Waterproof Subfloor Materials
The term 'waterproof subfloor' is often misused in the industry. True waterproofing requires a continuous, impermeable barrier. Below are the three primary systems used by professional tile setters and waterproofing contractors.
1. Cementitious Backer Boards (Water-Resistant, Not Waterproof)
Products like USG Durock and James Hardie BackerBoard are industry staples. However, they are water-resistant, not waterproof. They will not degrade when wet, but they will wick moisture directly through to the wooden subfloor below. To use cement board in a wet room, it must be paired with a topical liquid membrane or sheet membrane.
2. Extruded Polystyrene (XPS) Foam Boards (Inherently Waterproof)
Extruded polystyrene boards, such as Schluter Kerdi-Board or Wedi Building Panels, feature a closed-cell foam core that is completely impervious to water. The waterproofing is built into the core, meaning a puncture in the surface fleece does not compromise the board's moisture resistance. These boards are lightweight, easy to cut with a utility knife, and serve as both an uncoupling layer and a waterproofing barrier when seams are properly sealed with manufacturer-specific sealant (e.g., Kerdi-Fix or Wedi SubSealant).
3. Liquid-Applied and Sheet Membranes over Plywood
For large-format tile installations where minimizing floor height is critical, applying a liquid membrane like Custom RedGard or a sheet membrane like Schluter Ditra directly over an exterior-grade plywood subfloor is the preferred method. This approach relies entirely on the integrity of the liquid or sheet barrier to protect the wood structure.
Material Comparison Matrix
| Material System | Waterproof Level | Weight / Sq Ft | Added Floor Height | Best Application |
|---|---|---|---|---|
| Cement Board + Liquid Membrane | High (Topical) | 3.5 - 4.5 lbs | 5/8" to 3/4" | Standard bathroom floors, high-traffic commercial |
| XPS Foam Board (1/2") | Absolute (Core) | 0.8 - 1.2 lbs | 1/2" | Wet rooms, steam showers, weight-restricted joists |
| Plywood + Sheet Membrane (Ditra) | High (Topical) | 1.5 - 2.0 lbs | 1/8" to 3/16" | Large format tile, height-restricted transitions |
| Plywood + Liquid Membrane | High (Topical) | 0.5 - 1.0 lbs | 1/16" (Minimal) | Budget-conscious residential baths, quick turnovers |
Real-World Cost Breakdown (Per Square Foot)
Material costs fluctuate based on regional supply chains, but the following 2026 pricing averages reflect the total subfloor preparation cost, including essential ancillaries (thinset, tapes, sealants, and fasteners).
- Cement Board System: $2.80 - $3.50 / sq ft (Includes 1/2" board, alkali-resistant tape, polymer-modified thinset, and corrosion-resistant screws).
- XPS Foam Board System: $6.50 - $8.20 / sq ft (Includes 1/2" foam board, proprietary sealant for seams, and specialized washer/fastener kits).
- Sheet Membrane System: $3.20 - $4.10 / sq ft (Includes uncoupling mat, unmodified thinset for plywood bonding, and waterproofing band for seams).
- Liquid Membrane System: $1.50 - $2.20 / sq ft (Includes two coats of liquid polymer at 50 sq ft per gallon coverage, plus fiberglass mesh for corners).
Critical Installation Failures and How to Avoid Them
Even the most expensive waterproof subfloor material will fail if installed incorrectly. Avoid these common contractor errors:
Oriented Strand Board (OSB) swells at the edges when exposed to moisture, creating 'ridges' that telegraph through tile and crack grout. Fix: Always use Exterior-grade or Exposure 1 plywood (minimum 5/8" thick for 16" joist spacing) as the structural subfloor beneath any waterproofing layer.
Standard drywall screws lack the corrosion resistance required for wet environments and will rust, bleed through grout, and lose structural grip. Fix: Use only alkali-resistant, galvanized, or stainless-steel backer board screws, spaced no more than 8 inches on center across the field and 6 inches on the perimeter.
Waterproofing prevents rot, but it does not prevent cracking from floor bounce. Fix: Verify your floor joist assembly meets the L/360 deflection standard for ceramic tile, or L/720 for natural stone. If the floor bounces, you must sister the joists or add cross-bracing before installing any subfloor material.
Step-by-Step: Prepping Plywood for Liquid Membrane Application
When utilizing a liquid-applied waterproof subfloor material over plywood, surface preparation dictates the lifespan of the membrane.
- Verify Fasteners: Walk the entire floor. Drive down any protruding nails and replace them with 2-inch deck screws to pull the plywood tight against the joists, eliminating squeaks and micro-movements.
- Gap the Seams: Ensure there is a 1/8-inch expansion gap between all plywood sheets. Do not fill these gaps with wood filler; the liquid membrane and fiberglass mesh will bridge them.
- Detail the Corners: Apply a heavy bead of 100% silicone or polyurethane sealant at all floor-to-wall transitions and inside corners. Embed 2-inch fiberglass mesh tape into the wet sealant.
- Apply the Membrane: Roll on the first coat of liquid membrane using a 3/8-inch nap roller. While the first coat is still wet, embed the manufacturer's reinforcing fabric over all seams and corners. Allow to cure (typically 2-4 hours), then apply the second coat perpendicular to the first.
- Measure Mil Thickness: Use a wet mil gauge to ensure the final application meets the manufacturer's required thickness (usually 30 to 50 wet mils, which dries to 20-30 dry mils). Guessing the thickness is the leading cause of liquid membrane failure.
Expert Insight on Thinset Compatibility: When installing tile over a liquid or sheet membrane, always check the membrane manufacturer's thinset requirements. For example, Schluter requires an unmodified thinset (ANSI A118.1) when bonding to Ditra over plywood, but requires a modified thinset (ANSI A118.4) when bonding to Kerdi-Board. Using the wrong thinset chemistry will result in a failed bond and voided warranties.
Frequently Asked Questions
Can I use a vapor barrier under cement board instead of a topical membrane?
While older building codes allowed a 4-mil polyethylene sheet or 15-lb roofing felt beneath cement board, this 'water-in, water-out' method is largely obsolete in premium construction. It traps moisture inside the cement board and mortar bed, leading to efflorescence and mold. A topical waterproofing membrane applied over the cement board is the modern standard, as it stops water before it penetrates the subfloor assembly.
Do I need to waterproof the subfloor under a toilet flange?
Yes. The area around a toilet flange is a primary leak point. When using a liquid or sheet membrane, run the material up and over the subfloor, and seal the perimeter of the flange with a high-quality polyurethane sealant before setting the toilet. Never rely solely on the wax ring or rubber gasket to protect the subfloor.
Written by
Elena RodriguezElena Rodriguez is a civil engineer and technical writer specializing in concrete technology, masonry systems, and ASTM/ACI compliance. She earned her B.S. in Civil Engineering from Texas A&M University and spent a decade at a materials testing laboratory, performing over 2,000 concrete compressive strength tests and masonry prism evaluations. Elena is an ACI-certified Field Testing Technician (Grade I) and a member of ASTM Committee C12 on Natural Building Stone. She currently consults on forensic engineering cases involving concrete failures and moisture intrusion. Based in San Antonio, TX, Elena is a proud member of the Society of Women Engineers (SWE) and coaches her daughter's FIRST Robotics team.
More from Elena Rodriguez
View all
Walls & Panels
Cost Analysis: Light Gauge Steel Framing Advantages and Disadvantages
Evaluate light gauge steel framing advantages and disadvantages through a strict cost analysis lens, comparing material, labor, and lifecycle expenses.
Aug 4, 2026

Walls & Panels
Gypsum Board Types: Exact Specifications, Thickness & Dimensions
Compare standard, Type X, and moisture-resistant gypsum board types. Get exact specifications, thicknesses, dimensions, and ASTM standards for your project.
Aug 4, 2026

Fire Resistance
Best Fire-Resistant Outdoor Decking Materials: 2026 Buyer Guide
Discover the best fire-resistant outdoor decking materials for 2026. Compare Class A PVC, aluminum, and hardwood options for WUI compliance and safety.
Aug 4, 2026