Troubleshooting Waterproofing Materials for Walls: Leak Fixes
Diagnose and fix failing waterproofing materials for walls. Expert troubleshooting for efflorescence, weeping cracks, and vapor drive condensation.

The Diagnostic Approach to Wall Moisture Intrusion
When interior wall finishes blister, peel, or harbor mold, the immediate instinct is often to apply a fresh coat of masonry sealer or repaint the drywall. This reactive approach almost universally fails within 12 to 18 months. Moisture intrusion in vertical building envelopes is driven by complex physics—hydrostatic pressure, capillary action, and vapor drive. Selecting the correct waterproofing materials for walls requires identifying the exact mechanical failure of the previous system before specifying a remediation product.
This troubleshooting guide dissects the three most common wall moisture failures in modern construction and historic masonry, providing exact material specifications, surface preparation protocols, and application metrics to ensure permanent remediation.
Symptom 1: Efflorescence and Blistering on Interior Masonry
Root Cause Analysis
White, powdery deposits (efflorescence) and blistering paint on below-grade or retaining masonry walls indicate active hydrostatic pressure. Water in the surrounding soil is being forced through the microscopic capillary pores of the concrete or CMU (Concrete Masonry Unit) block. When standard acrylic or silane/siloxane surface sealers are applied to the interior (negative side), they trap the vapor. The resulting osmotic blistering generates pressures exceeding 100 psi, inevitably spalling the concrete surface and peeling the coating.
The Material Fix: Crystalline Capillary Waterproofing
To resolve negative-side hydrostatic pressure, you must transition from surface barrier coatings to integral crystalline technology. Products like Xypex Concentrate or Kryton Krystol T1 utilize proprietary chemicals that react with free lime and moisture within the concrete matrix to form insoluble needle-like crystals. These crystals block the capillary tracts permanently.
Cost Expectation: Professional-grade crystalline slurries cost between $3.50 and $5.50 per square foot for materials, requiring two coats applied 24 hours apart while the substrate remains damp.
Symptom 2: Weeping Hairline Cracks in Below-Grade Concrete
Root Cause Analysis
Hairline cracks (0.002 to 0.05 inches wide) that actively weep water during heavy precipitation events indicate that the exterior positive-side membrane has been compromised by structural settling or backfill compaction forces. While the structural integrity of the wall may be intact, the waterproofing envelope is breached.
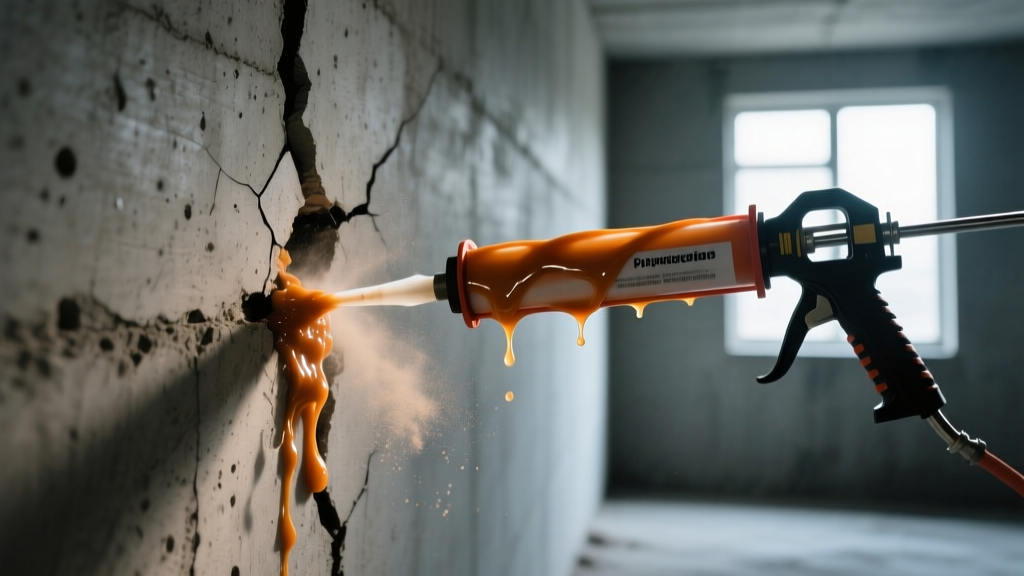
The Material Fix: Hydrophobic Polyurethane Injection
Epoxy injections are strictly for dormant, structural cracks. For active, weeping cracks, high-density hydrophobic polyurethane resin is the only viable waterproofing material for walls in this scenario. Polyurethane reacts with the water inside the crack, expanding up to 20 times its liquid volume to chase the water back to the exterior soil line and form a flexible, watertight gasket.
- Port Installation: Drill 5/8-inch holes at a 45-degree angle to intersect the crack at mid-depth. Space injection ports 8 to 10 inches apart. According to the Portland Cement Association's Guide to Concrete Cracking, improper port spacing is the leading cause of incomplete void filling.
- Surface Seal: Apply a fast-setting hydraulic cement or epoxy paste over the surface of the crack to prevent the injected resin from blowing out the front face.
- Injection Sequence: Pump the polyurethane starting from the lowest port. When pure resin (unmixed with water) extrudes from the port directly above, cap the lower port and move to the next.
Cost Expectation: DIY polyurethane injection kits (e.g., RadonSeal or SikaFix) range from $120 to $180 per kit, covering approximately 10 linear feet of 1/16-inch crack. Professional injection services typically charge $12 to $18 per linear foot.
Symptom 3: Peeling Drywall and Mold in Wood-Framed Cavities
Root Cause Analysis
When moisture damage appears on interior drywall in above-grade wood-framed walls, the culprit is rarely bulk water intrusion. Instead, it is typically vapor drive condensation. In air-conditioned homes located in hot, humid climates, warm exterior moisture migrates inward and condenses on the cool interior side of the wall cavity. If a Class I vapor retarder (like 6-mil polyethylene) was installed on the interior, the wall cavity cannot dry inward, leading to catastrophic mold growth and drywall degradation.
The Material Fix: Smart Vapor Retarders and Fluid-Applied Barriers
The Building Science Corporation's research on wall assemblies dictates that walls must be able to dry in at least one direction. To fix interior vapor traps, remove the damaged drywall and polyethylene sheeting.
- Interior Remedy: Install a smart vapor retarder like CertainTeed MemBrain or Pro Clima Intello. These materials alter their vapor permeability based on ambient humidity, remaining closed during winter to block interior moisture, and opening during summer to allow the wall cavity to dry inward.
- Exterior Remedy: If the wall is open to the exterior sheathing, apply a fluid-applied weather-resistive barrier (WRB) like Prosoco R-Guard Cat 5. This silane-terminated polymer membrane seals the OSB or plywood sheathing, blocking bulk water while maintaining a high vapor permeability rating (over 15 perms) to allow outward drying.
Material Failure Matrix: Why Previous Coatings Failed
Understanding why a previous application failed prevents repeating the same expensive mistakes. Use this matrix to diagnose the incompatibility between the chosen material and the wall's environmental conditions.
| Material Class | Typical Use Case | Primary Failure Mode | Environmental Trigger | Correction Strategy |
|---|---|---|---|---|
| Acrylic Masonry Sealer | Interior basement walls | Osmotic blistering and peeling | Hydrostatic pressure from exterior soil | Remove entirely; apply crystalline slurry |
| Epoxy Injection Resin | Below-grade concrete cracks | Adhesion failure; water bypasses resin | Moisture present in crack during curing | Switch to hydrophobic polyurethane |
| 6-Mil Polyethylene | Interior wood-framed walls | Cavity condensation and mold growth | Summer vapor drive in humid climates | Replace with variable-perm smart retarder |
| Cementitious Tanking Slurry | CMU block retaining walls | Brittle cracking at mortar joints | Minor structural settling or thermal shift | Reinforce with fiberglass mesh at joints |
Execution Protocol: Surface Prep for Negative-Side Applications
The EPA's guidelines on moisture control emphasize that moisture remediation is impossible without addressing the source and preparing the substrate. When applying negative-side waterproofing materials for walls, 90% of coating failures are traced back to inadequate surface preparation.
Step 1: Moisture Content Verification
Use a pin-type moisture meter to test the substrate. While cementitious and crystalline products require a damp surface (often specified as Saturated Surface Dry, or SSD), polyurethane and epoxy systems require strict moisture limits. Do not apply epoxy if the concrete moisture content exceeds 4% by weight, or polyurethane if it exceeds 12%.
Step 2: Contaminant Removal
Efflorescence, form release oils, and existing paint must be removed. Mechanical grinding with diamond cup wheels is mandatory. Avoid muriatic acid washing; acid opens the pores but leaves chloride salts that will eventually draw moisture back to the surface via hygroscopic action.
Step 3: Joint and Pipe Penetration Detailing
Before applying the primary waterproofing coating, address the cold joints (where the wall meets the floor slab) and pipe penetrations. Route out a 1/2-inch by 1/2-inch chase using a diamond blade grinder. Fill this chase with a hydrophilic waterstop mastic or a flexible polyurethane sealant (e.g., SikaFlex-1A) to accommodate minor differential movement before the rigid crystalline or cementitious coating is applied over the entire surface.
Troubleshooting wall moisture is an exercise in building physics. By matching the specific symptom to the correct chemical and mechanical properties of modern waterproofing materials for walls, contractors and homeowners can transition from temporary patching to permanent structural remediation.
Written by
Elena RodriguezElena Rodriguez is a civil engineer and technical writer specializing in concrete technology, masonry systems, and ASTM/ACI compliance. She earned her B.S. in Civil Engineering from Texas A&M University and spent a decade at a materials testing laboratory, performing over 2,000 concrete compressive strength tests and masonry prism evaluations. Elena is an ACI-certified Field Testing Technician (Grade I) and a member of ASTM Committee C12 on Natural Building Stone. She currently consults on forensic engineering cases involving concrete failures and moisture intrusion. Based in San Antonio, TX, Elena is a proud member of the Society of Women Engineers (SWE) and coaches her daughter's FIRST Robotics team.
More from Elena Rodriguez
View all
Walls & Panels
Cost Analysis: Light Gauge Steel Framing Advantages and Disadvantages
Evaluate light gauge steel framing advantages and disadvantages through a strict cost analysis lens, comparing material, labor, and lifecycle expenses.
Aug 4, 2026

Walls & Panels
Gypsum Board Types: Exact Specifications, Thickness & Dimensions
Compare standard, Type X, and moisture-resistant gypsum board types. Get exact specifications, thicknesses, dimensions, and ASTM standards for your project.
Aug 4, 2026

Fire Resistance
Best Fire-Resistant Outdoor Decking Materials: 2026 Buyer Guide
Discover the best fire-resistant outdoor decking materials for 2026. Compare Class A PVC, aluminum, and hardwood options for WUI compliance and safety.
Aug 4, 2026