Best Practices for Exterior Wall Material Build-Up Design
Master exterior wall material build-up design with 2026 code-compliant assemblies, R-value matrices, and moisture management best practices.

Defining the High-Performance Material Build-Up
An exterior wall assembly is not merely a structural boundary; it is a complex environmental separator tasked with managing heat, air, moisture, and structural loads. When architects and contractors finalize the material build-up for a project, they are dictating the building's long-term durability, energy efficiency, and indoor air quality. A flawed material build schedule or improper layering sequence can lead to catastrophic interstitial condensation, mold proliferation, and premature cladding failure.
According to building science pioneer Joseph Lstiburek, the ideal wall assembly must feature four primary control layers: water, air, vapor, and thermal. Crucially, these layers must be continuous and positioned correctly relative to one another to prevent moisture trapping. As referenced in the foundational guide BSI-001: The Perfect Wall by Building Science Corporation, placing the thermal control layer on the exterior of the structural sheathing is the single most effective strategy for mitigating thermal bridging and condensation risks.
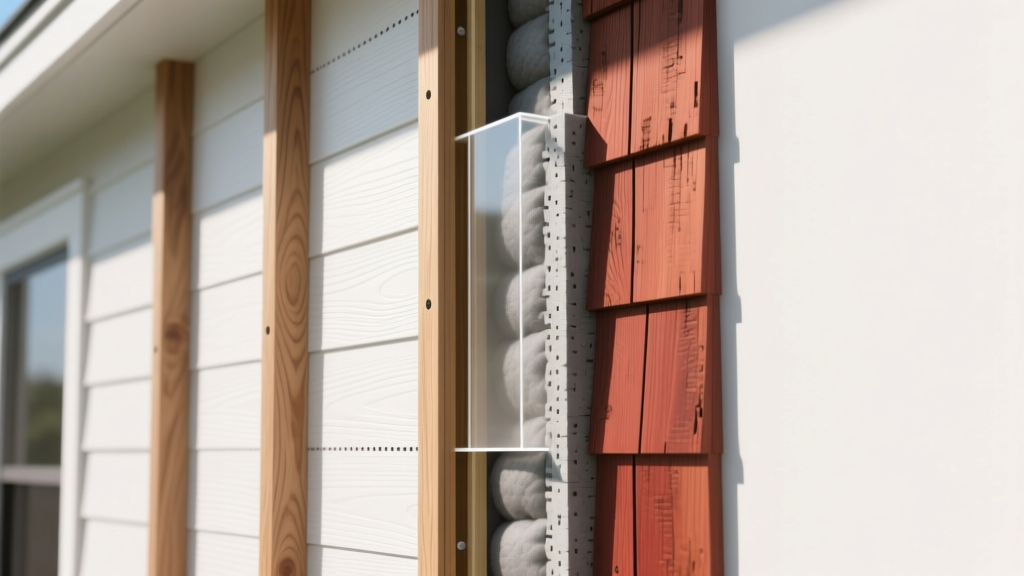
Layer-by-Layer Material Build Specifications
Optimizing your exterior material build requires selecting products with compatible vapor permeability (perm ratings) and precise R-values. Below is the optimal sequence from the interior framing outward to the cladding.
1. Structural Sheathing and Air Control
Traditional assemblies use standard OSB or plywood wrapped in a separate housewrap. However, modern best practices integrate the structural sheathing with the air and water-resistive barrier (WRB). The Huber ZIP System sheathing utilizes an engineered wood panel with a factory-laminated phenolic-impregnated paper overlay. This creates a monolithic air barrier when seams are taped, achieving an air leakage rate well below the IECC requirement of 3.0 ACH50. The ZIP system's perm rating ranges from 12 to 16, classifying it as vapor-open, which allows the wall cavity to dry to the exterior if moisture infiltrates from the interior.
2. Continuous Insulation (ci) and Thermal Breaks
Placing rigid insulation over the sheathing eliminates the thermal bridging caused by wood studs (which account for 20% to 25% of the wall area). The choice of insulation material drastically alters the wall's drying potential:
- Extruded Polystyrene (XPS): R-5 per inch. Highly moisture-resistant but possesses a low perm rating (approx. 1.1 perms at 1 inch), which can restrict outward drying.
- Polyisocyanurate (Polyiso): R-6.5 per inch at 75°F. Foil-faced polyiso acts as a Class I vapor retarder (less than 0.1 perms), completely blocking exterior drying. Edge Case Warning: Polyiso experiences thermal drift; its R-value drops to approximately R-5.5 per inch at 25°F due to the blowing agents used in manufacturing.
- Mineral Wool (Rockwool Comfortboard 80): R-4.2 per inch. Highly vapor-permeable (approx. 50 perms) and hydrophobic. This is the premium choice for high-performance material build-ups in wet climates, as it allows unrestricted outward drying.
3. Weather-Resistive Barrier (WRB) and Flashing
If your sheathing does not have an integrated WRB, a fluid-applied membrane (such as Henry Blueskin VP100) or a high-performance sheet membrane (like Solitex Mento) must be applied over the sheathing and under the continuous insulation. Fluid-applied membranes seal seamlessly around fastener penetrations and complex geometry, providing superior air-tightness compared to mechanically fastened housewraps.
4. The Ventilated Rainscreen Gap
A minimum 3/8-inch to 1/2-inch ventilated air gap between the WRB/insulation and the exterior cladding is non-negotiable for moisture management. This capillary break and drainage plane allows hydrostatic pressure to equalize and bulk water to drain. Products like Benjamin Obdyke HydroGap or Keene DriWall provide a structured mat that maintains this gap while preventing mortar droppings from clogging the drainage pathway in masonry or stucco applications.
Assembly Cost and R-Value Comparison Matrix
The following table outlines three distinct material build-up profiles for Climate Zone 5, comparing code-minimum assemblies against high-performance and Passive House-level specifications. Costs reflect 2026 material averages, excluding labor.
| Assembly Profile | Sheathing & WRB | Continuous Insulation | Cavity Insulation | Whole-Wall R-Value | Est. Material Cost (per sq. ft.) |
|---|---|---|---|---|---|
| Code-Minimum (CZ5) | 1/2" OSB + Housewrap | 1" XPS (R-5) | R-20 Fiberglass | R-18.5 | $2.80 - $3.20 |
| High-Performance | ZIP System Sheathing | 2" Polyiso (R-13) | R-23 Rockwool | R-29.0 | $5.40 - $6.10 |
| Passive House Ready | Fluid-Applied Membrane | 4" Mineral Wool (R-17) | R-23 Dense Pack Cellulose | R-36.5 | $8.50 - $10.20 |
Critical Failure Modes and Edge Cases
Even with premium materials, improper sequencing or incompatible perm ratings will compromise the material build. Avoid these common field failures:
Inward Solar Vapor Drive
When porous cladding (like brick veneer or traditional stucco) absorbs rainwater and is subsequently baked by the sun, massive vapor pressure drives moisture inward. If your material build-up utilizes foil-faced polyiso on the exterior and a Class I polyethylene vapor retarder on the interior drywall, the moisture becomes trapped inside the wall cavity, leading to rapid sheathing rot. The Fix: Never use a Class I interior vapor retarder in cooling-dominated or mixed-humid climates. Instead, specify a smart vapor retarder like CertainTeed MemBrain or Pro Clima Intello, which shifts from vapor-closed in winter to vapor-open in summer.
Fastener Thermal Bridging and Pull-Through
Attaching thick continuous insulation and heavy cladding requires long structural screws that penetrate back into the studs. Standard wood screws lack the shear strength and head diameter required. Using undersized fasteners leads to pull-through and cladding sagging. The Fix: Specify engineered structural screws with neoprene washers, such as Simpson Strong-Tie SDWS or FastenMaster HeadLok, spaced at a maximum of 16 inches on center. Calculate the fastener length by adding: Cladding Thickness + Rainscreen Gap + CI Thickness + Sheathing Thickness + Minimum 1.5 inches of stud embedment.
Procurement and Material Build Scheduling
According to the U.S. Department of Energy's Continuous Insulation guidelines, integrating ci alters the sequencing of the framing and weatherization trades. When generating your material build list and procurement schedule, account for the following lead times and staging requirements:
- Membrane Curing Times: Fluid-applied WRBs require specific temperature and humidity windows to cure properly. Do not schedule fluid applications if ambient temperatures are projected to drop below 40°F (4°C) within 24 hours.
- Insulation Compression: Mineral wool boards are highly compressible. If staging material builds on-site, store Rockwool Comfortboard flat and elevated on pallets. Storing them on edge under tarps will cause the bottom boards to crush and lose their specified thickness and R-value.
- Tape Adhesion: Acrylic seam tapes used on integrated sheathing systems require a clean, dry surface. Schedule a dedicated labor hour for wire-brushing and priming sheathing edges before tape application during high-humidity seasons.
By rigorously specifying the perm ratings, thermal resistance, and structural fastening requirements of every layer, you transform a basic wall into a resilient, high-performance building envelope capable of meeting the stringent energy and durability demands of modern construction.
Written by
James ThorntonJames Thornton is a construction industry veteran with 25 years of hands-on experience in wood framing, lumber grading, and residential building codes. He started as a framing carpenter in rural Oregon, earned his ICC Residential Building Inspector certification, and eventually became a senior plan reviewer for the City of Portland Bureau of Development Services. James holds a B.S. in Wood Science & Technology from Oregon State University and is a certified lumber grader through the West Coast Lumber Inspection Bureau (WCLIB). He has inspected over 3,000 residential construction sites and authored the city's internal guide on advanced framing techniques (2x6 at 24" O.C.). James lives in Bend, OR, where he builds custom timber-frame cabins and competes in lumberjack sports.
More from James Thornton
View all
Insulation
Best Home Insulation Materials: Complete 2026 Guide
Compare top home insulation materials for 2026. Find R-values, installed costs per square foot, and best uses for fiberglass, spray foam, and mineral wool.
Aug 4, 2026

Sustainable Building
Certify Your Green Building Material for LEED and WELL
Step-by-step guide to certifying a green building material for LEED v5 and WELL v2. Master EPDs, HPDs, and VOC limits for 2026 project specifications.
Aug 4, 2026

Stone & Masonry
Veneer Stacked Stone Panels: Interior Design & Style Showcase
Discover how veneer stacked stone panels transform interiors. Explore modern design profiles, material pairings, and technical installation specs.
Aug 4, 2026