Best Materials for Luxury Car Interiors: 2026 Application Guide
Discover the best materials for luxury car interiors in 2026. This application guide covers Alcantara, Nappa leather, and forged carbon fiber installation.

The Intersection of Automotive and Architectural Material Science
The boundary between high-end architectural finishes and automotive cabin fabrication has largely dissolved. In 2026, the best materials for luxury car interiors are no longer just about aesthetics; they demand rigorous application protocols to survive extreme thermal cycling, UV exposure, and abrasive wear. Custom builders, restomod shops, and OEM fabricators must treat automotive interiors as high-stress environments. Unlike static architectural panels, a vehicle cabin can experience surface temperatures exceeding 160°F (71°C) in direct sunlight, requiring specialized adhesives, substrate preparation, and material splits that standard upholstery guides often ignore.
This application guide details the exact specifications, adhesive chemistries, and installation frameworks required for the premier materials dominating the luxury automotive sector today.
The Core Material Matrix: Leather, Microfiber, and Composites
Semi-Aniline and Nappa Leather
True luxury automotive leather differs fundamentally from architectural or furniture leather. While a high-end sofa might use a 1.4mm to 1.6mm thick hide, automotive leather must be split down to 1.0mm - 1.2mm. This reduced thickness is non-negotiable for wrapping complex compound curves—such as steering wheel rims and dashboard crowns—without inducing buckling or requiring excessive skiving at the seams. Top-tier OEMs source chrome-tanned Nappa leather from specialized tanneries like Bridge of Weir or Poltrona Frau. Chrome-tanning is mandatory for automotive applications due to its superior thermal stability and resistance to UV degradation compared to vegetable-tanned alternatives.
Alcantara and Dinamica Microfiber
Composed of a proprietary blend of polyester (approx. 68%) and polyurethane (approx. 32%), Alcantara and its competitor Dinamica offer unparalleled grip and weight savings. For automotive applications, fabricators must select the correct backing. Headliners and flat door panel inserts require a foam-backed microfiber (approx. 280 g/m²) to hide substrate imperfections, while steering wheels and seat bolsters demand a scrim-backed variant (approx. 220 g/m²) to prevent the material from stretching out of shape under lateral G-forces.
High-Temperature Adhesive Selection and Substrate Prep
The most common point of failure in custom luxury car interiors is adhesive breakdown. Fabricators must abandon standard aerosol adhesives like 3M Super 77, which softens at approximately 120°F. Instead, professional shops rely on two-part Polyurethane Dispersions (PUD) or high-temperature solvent-based contact cements.
- PUD Adhesives (e.g., Renia-Topfit, Kömmerling): Water-based, two-part systems mixed with a crosslinker (usually 5% by volume). They offer exceptional heat resistance up to 250°F (121°C) and remain flexible, making them the gold standard for wrapping leather and microfiber over ABS plastic and fiberglass.
- High-Tack Solvent Cements (e.g., 3M Hi-Tack 74): Used for rigid trim pieces and sound deadening. While easier to apply than PUD, they require meticulous ventilation and can melt certain low-grade ABS substrates if applied too heavily.
Substrate Preparation Protocol
Adhesion is only as strong as the substrate prep. For OEM ABS plastics and aftermarket fiberglass dashboards, the surface must be scuffed with 180-grit aluminum oxide sandpaper. Never use acetone to clean automotive plastics; it will chemically melt ABS and polycarbonate. Instead, wipe the scuffed surface with a 70% isopropyl alcohol (IPA) solution to remove mold release agents and dust before adhesive application.
Material Performance and Application Matrix
| Material | Thickness / Weight | Max Temp Tolerance | Ideal Application Zone |
|---|---|---|---|
| Semi-Aniline Leather | 1.0mm - 1.2mm | 180°F (82°C) | Seat inserts, dash wraps, door uppers |
| Scrim-Backed Alcantara | 220 g/m² | 210°F (99°C) | Steering wheels, shift boots, bolsters |
| Foam-Backed Alcantara | 280 g/m² | 190°F (87°C) | Headliners, A/B/C pillars, flat inserts |
| Forged Carbon Fiber | 2mm - 4mm (rigid) | 250°F+ (121°C+) | Center consoles, mirror caps, trim bezels |
Step-by-Step Application: Wrapping Complex Compound Curves
Wrapping a complex 3D surface, such as a center console or a sculpted headliner, requires a precise sequence of heat and tension management. Below is the professional framework for applying microfiber or thin-split leather using a PUD adhesive system.
- Pattern Templating: Use a stretchable masking film (like 3M Tape) to map the 3D surface onto a 2D plane. Cut the leather or microfiber with a 1-inch seam allowance. For microfiber, always note the directional nap; the fibers must brush 'downward' or toward the rear of the vehicle to prevent glare and ensure uniform color.
- Adhesive Application: Spray or brush the mixed PUD adhesive onto both the substrate and the back of the material. Allow the water carrier to flash off completely. The adhesive will transition from milky white to clear/tacky. This usually takes 15-30 minutes depending on ambient humidity.
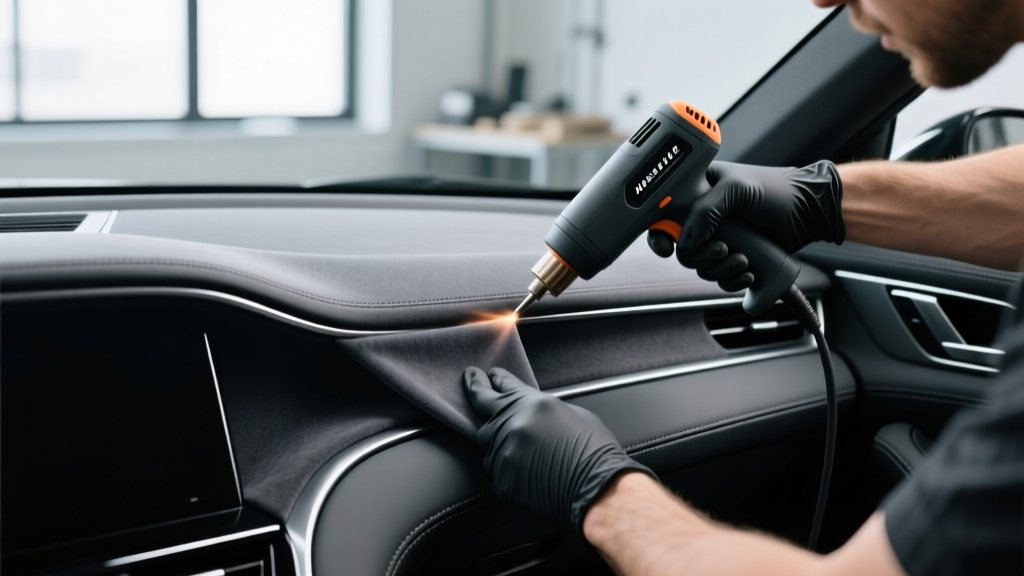
- Heat Activation and Positioning: Use a digital heat gun set to exactly 120°C (248°F) to reactivate the dried adhesive. Do not exceed 130°C, as this will melt the polyurethane backing of Alcantara or scorch the finish of Nappa leather. Lay the material onto the substrate, starting from the highest point of the curve and working outward.
- Tensioning and Post-Heating: Use a felt-edged squeegee and your hands to stretch the material into recesses. Once fully adhered, perform a 'post-heating' pass over the entire surface at 90°C. This critical step resets the material's memory, preventing it from shrinking back and lifting at the edges over time.
Forged Carbon Fiber and Open-Pore Wood Trim
While leather and microfiber dominate tactile surfaces, rigid trim pieces in 2026 luxury vehicles increasingly feature forged carbon fiber and open-pore woods. Unlike traditional woven carbon fiber, which is limited to 2D draping, forged carbon fiber utilizes chopped carbon tow (approx. 1-inch lengths) suspended in an epoxy resin. This allows the material to be compression-molded into deep, complex 3D shapes like HVAC vents and shifter surrounds.
For open-pore woods (such as walnut or eucalyptus), the application challenge lies in the clear coat. Standard high-gloss polyurethanes obscure the natural grain. Fabricators must use a 2K (two-component) matte or satin polyurethane clear coat, applied in a dust-free booth, to seal the wood against the extreme humidity fluctuations inherent in automotive environments without creating a plastic-like visual barrier.
Emerging Sustainable Luxury Materials
The definition of luxury has shifted heavily toward sustainability. As noted by environmental and automotive regulatory bodies, the push for lower lifecycle emissions has introduced new bio-based materials into the cabin. Mycelium-based leathers (like Mylo) and regenerated nylons (like Econyl) are now standard in premium EVs. However, these materials present unique application challenges: bio-based leathers often have a lower thermal tolerance and reduced elongation-at-break compared to animal hides. Fabricators must use lower-temperature PUD adhesives and avoid aggressive mechanical stretching, relying instead on precise pattern-making to achieve a wrinkle-free finish on tight radii.
Troubleshooting Common Failure Modes
- Edge Delamination: Usually caused by insufficient substrate scuffing or failure to post-heat the material. Fix: Inject a small amount of cyanoacrylate (CA) glue or flexible PUD under the lifted edge, clamp with low-tack painter's tape, and apply gentle heat.
- Seam Puckering: Occurs when the leather is too thick (over 1.2mm) for the radius of the curve. Fix: The edges must be skived (thinned) to 0.6mm before sewing, or the substrate must be routed to create a recessed channel for the seam to sit flush.
- Microfiber Nap Inconsistency: Appears as dark and light patches on the finished panel. This is caused by brushing the nap in opposing directions during installation or using an adhesive that bleeds through the scrim. Fix: Always use a foam-backed variant for flat panels to prevent adhesive bleed-through, and brush the entire finished panel uniformly with a soft-bristle suede brush.
Written by
Priya KapoorPriya Kapoor is a real estate market analyst and construction economics researcher with expertise in housing affordability, development feasibility, and infrastructure investment. She holds a Master of Regional Planning from Cornell University and previously worked as a senior analyst at CBRE's Investment Properties group, where she modeled returns for $4B in mixed-use development pipelines. Priya now runs an independent research practice advising developers, municipalities, and REITs on construction cost forecasting and market timing. She publishes the quarterly "BuildMat Market Pulse" report tracking material price indices across 12 commodity categories. Based in Austin, TX, Priya serves on the board of Habitat for Humanity Austin and is a marathon runner.
More from Priya Kapoor
View all
Construction Cost
Cost to Build a 1600 Sq Ft Home in 2026: Full Breakdown
Accurate 2026 cost to build a 1600 sq ft home—material, labor, and regional pricing breakdowns included. Plan your budget with real-time estimates.
Aug 11, 2026

Wood & Lumber
Name the Types of Wood for Pressure Treatment and Preservation
Learn how to name the types of wood best suited for pressure treatment. Compare species treatability, chemical retention levels, and 2026 preservation costs.
Aug 4, 2026

Stone & Masonry
Stone Veneer Suppliers Lindenhurst: 2026 Cost Analysis
Analyze 2026 stone veneer costs in Lindenhurst, NY. Compare local supplier pricing, delivery fees, and Suffolk County installation labor rates.
Aug 4, 2026