Advanced Installation Techniques for Aircraft Insulation Materials
Master the installation of aircraft insulation materials like aerogel and melamine foam. Learn specialized techniques, sealing protocols, and QA testing.

The Engineering Gap: Aerospace vs. Standard Building Envelopes
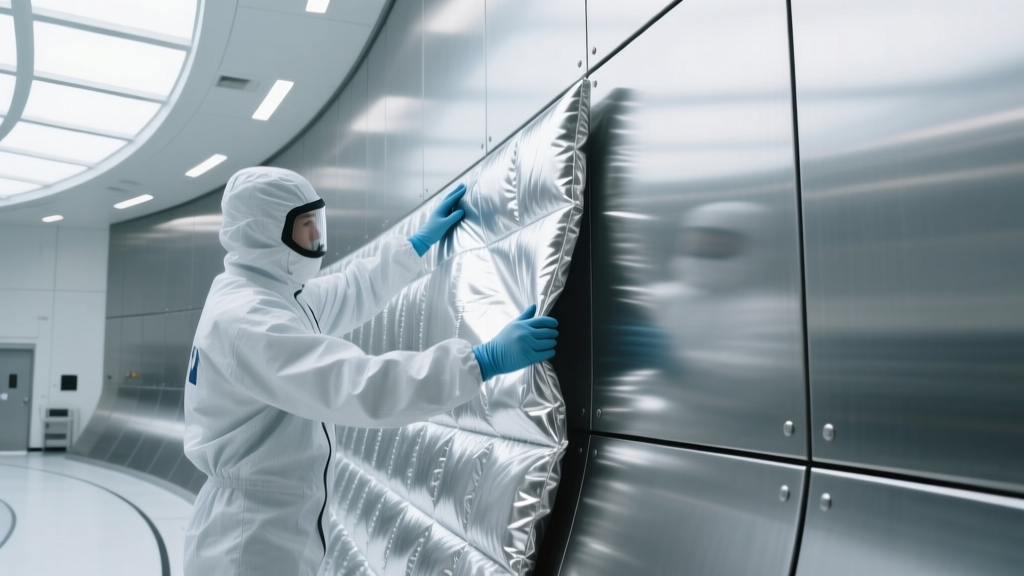
Standard commercial insulation materials—such as kraft-faced fiberglass batts or extruded polystyrene (XPS)—fail catastrophically when subjected to the extreme thermal cycling, strict weight-to-volume ratios, and rigorous acoustic damping requirements of specialized aerospace facilities. When contractors are tasked with insulating high-performance cleanrooms, anechoic testing chambers, or next-generation aircraft hangars, they must turn to aircraft insulation materials. These advanced substrates, originally engineered for fuselage and bulkhead applications, include silica aerogel blankets, open-cell melamine foams, and Tedlar-faced aramid composites.
Installing these materials requires abandoning conventional friction-fit and staple-gun methodologies. Aircraft insulation materials rely on precise chemical adhesion, staggered micro-seam sealing, and strict particulate control during fabrication. According to the U.S. Department of Energy, advanced building envelope insulation requires meticulous attention to thermal bridging, a factor that is amplified tenfold when utilizing ultra-thin, high-R-value aerospace substrates.
Material Matrix: Properties and Handling Profiles
Before initiating installation, crews must understand the distinct mechanical properties of the three primary aircraft insulation materials adapted for specialty construction. Misidentifying the compression tolerance or friability of these materials will compromise the entire thermal or acoustic envelope.
| Material Type | Brand Example | R-Value / Inch | Compression Tolerance | Primary Cutting Tool |
|---|---|---|---|---|
| Silica Aerogel Blanket | Aspen Spaceloft | R-10.3 | Zero (Do not compress) | Ceramic snap-off blade |
| Open-Cell Melamine Foam | BASF Basotect | R-3.8 | High (Resilient rebound) | Serrated foam knife |
| Tedlar-Faced Aramid/Glass | Custom Aerospace Layups | R-4.2 | Low (Delamination risk) | Heavy-duty shear scissors |
Step-by-Step Protocol: Installing Aerogel Blankets
Aerogel blankets offer the highest thermal resistance per inch of any commercially available building material. However, the silica matrix is highly abrasive and hydrophobic. Standard installation techniques will result in degraded performance and severe health hazards.
1. Surface Preparation and Priming
Aerogel blankets are typically adhered directly to steel or aluminum substrates in specialty facilities. Water-based cleaning agents will leave residue that prevents adhesive bonding. Wipe the substrate with a methyl ethyl ketone (MEK) or isopropyl alcohol (IPA) solution. Allow 15 minutes for complete flash-off before applying adhesive.
2. Precision Cutting and Particulate Control
Cut the blankets to exact dimensions. Unlike fiberglass, aerogel does not expand to fill gaps. Leave a strict 1/8-inch gap at the perimeter edges to accommodate structural expansion of the metal substrate without buckling the aerogel.
3. Adhesive Application and Curing
Apply a high-temperature, two-part epoxy adhesive such as 3M Scotch-Weld DP460 using a pneumatic dispensing gun in a 1/4-inch bead pattern spaced 12 inches apart. Press the aerogel blanket firmly into the adhesive. The DP460 provides a 60-minute work life and requires a full 24-hour cure at 72°F (22°C) before any seam taping can commence.
4. Staggered Seam Sealing
Thermal bridging at the seams will negate the aerogel's high R-value. All horizontal and vertical seams must be overlapped by exactly 2 inches. Seal the overlap with 3-inch wide, foil-backed butyl rubber tape. Do not use standard acrylic HVAC tape, which will degrade under the extreme thermal differentials present in aerospace testing environments.
Acoustic Decoupling: Melamine and Aramid Composites
When the primary objective shifts from thermal resistance to extreme acoustic damping (STC 60+ or anechoic requirements), open-cell melamine foams and Tedlar-faced composites take precedence. These aircraft insulation materials are designed to absorb high-frequency turbine whine and low-frequency structural vibrations.
Melamine foam is highly friable and cannot be friction-fit between studs. It must be mechanically pinned or chemically bonded. For wall cavities in acoustic test chambers, install resilient isolation channels spaced 24 inches on center. Apply a continuous bead of acoustical sealant to the back of the melamine panels and press them into the channels. Secure the panels using acoustic washers and self-drilling screws, ensuring the screw head sits flush with the foam surface without crushing the cellular structure. Over-compressing melamine foam by more than 10% alters its acoustic impedance, drastically reducing its sound absorption coefficient at frequencies above 2,000 Hz.
For Tedlar-faced composites, which act as both a vapor barrier and a mid-frequency sound blocker, install the material as a continuous, unbroken membrane behind the interior drywall. Use acoustical caulk at every penetration (electrical boxes, HVAC ducts) to maintain the airtight integrity of the Tedlar layer.
Cost and Labor Matrix for Specialty Installations
Contractors must account for the steep premium in both material costs and specialized labor when bidding on projects requiring aircraft insulation materials. The precision required for seam sealing and the mandatory PPE protocols slow down installation rates significantly compared to standard commercial insulation.
| Material Category | Material Cost (per sq. ft.) | Labor Rate (per sq. ft.) | Installation Speed (sq. ft. / hr) |
|---|---|---|---|
| 10mm Silica Aerogel Blanket | $6.50 - $8.20 | $4.15 - $5.50 | 35 - 45 |
| 2-inch Melamine Acoustic Foam | $3.80 - $4.50 | $2.90 - $3.40 | 60 - 75 |
| Tedlar-Faced Acoustic Blanket | $2.50 - $3.10 | $2.10 - $2.80 | 80 - 100 |
Note: Pricing reflects Q1 2026 commercial specialty distributor averages. Labor rates assume unionized specialty insulation contractors with specific aerospace-facility clearances.
Quality Assurance: Thermal and Acoustic Verification
Visual inspection is entirely inadequate for verifying the integrity of aircraft insulation materials. A 1/16-inch gap in an aerogel seam can create a thermal bypass that leads to localized condensation, which will corrode the underlying steel substrate over time.
Infrared Thermography (Thermal Verification)
Once the insulation is installed but before the interior cladding is applied, conduct a comprehensive infrared scan using a high-resolution thermal camera (e.g., FLIR E8-XT or higher). The facility's HVAC system must be running to create a minimum 18°F (10°C) temperature differential between the interior and exterior environments. Any thermal anomalies appearing as distinct linear streaks indicate failed seam tape or adhesive voids. These areas must be stripped, cleaned with IPA, and re-sealed.
Impedance Tube Testing (Acoustic Verification)
For melamine and aramid installations, randomly select three 12x12 inch samples from the installed wall using a core cutter. Send these samples to an independent acoustical laboratory for normal incidence sound absorption testing via an impedance tube (per ASTM C384). This verifies that the installation process—specifically the adhesive application and mechanical pinning—did not over-compress the foam or block its open-cell pores, ensuring the material performs to its engineered aerospace specifications.
Written by
David NakamuraDavid Nakamura is a licensed architect (AIA) and construction technology writer focused on sustainable building methods, mass timber engineering, and high-performance building envelopes. He holds a Master of Architecture from the University of Washington and is a certified Passive House Consultant (CPHC). David spent eight years at the Seattle firm Mithun, where he led the design of three LEED Platinum projects, before founding his own practice specializing in net-zero residential design. He serves on the editorial advisory board of GreenBuilder Magazine and has authored peer-reviewed papers on cross-laminated timber (CLT) connections for the Journal of Structural Engineering. In his spare time, David teaches woodworking at Pratt Fine Arts Center and kayaks the Puget Sound.
More from David Nakamura
View all
Construction Cost
Labor Cost to Build a Deck Per Sq Ft: 2026 Installation Guide
Discover the exact labor cost to build a deck per sq ft in 2026. This installation guide breaks down contractor rates, complexity factors, and hidden fees.
Aug 4, 2026

Construction Cost
How Much Does It Cost to Build a 3 Bedroom House? Financing Guide
Learn exactly how much it costs to build a 3 bedroom house and explore 2026 financing options, construction loan types, and budget frameworks for your build.
Aug 4, 2026

Construction Cost
Cost to Build a Tennis Court: 2026 Guide
How much does it cost to build a tennis court in 2026? Breakdowns for asphalt, concrete, and synthetic surfaces plus fencing and lighting.
Jul 30, 2026