How to Install the Best Acoustic Insulation Material for Soundproof Walls
Master installation techniques for the best acoustic insulation material. Learn framing, friction-fitting, and sealing for STC 55+ soundproof walls.

The Physics of Soundproofing: Why Installation Dictates Performance
When evaluating the best acoustic insulation material, contractors and homeowners often fixate solely on the product's laboratory Sound Transmission Class (STC) rating. However, acoustic engineering relies on a fundamental truth: a $2.00 per square foot mineral wool batt installed poorly will underperform a $0.60 per square foot standard fiberglass batt installed flawlessly. Sound behaves as both an airborne wave and a structural vibration. If your installation leaves even a 1% gap at the perimeter, or if the insulation is compressed tightly against the drywall, acoustic energy will bypass the material entirely through flanking paths and mass-air-mass resonance.
According to the Institute of Noise Control Engineering (INCE-USA), achieving a true STC 50+ rating in a residential or commercial partition requires a holistic assembly approach. The insulation inside the cavity serves one specific purpose: it dampens the resonance of the air trapped between the two layers of drywall. To maximize this damping effect, the installation technique must prioritize complete cavity fill, structural decoupling, and airtight perimeter sealing.
Material Selection Matrix: Density and Acoustic Damping
Not all insulation is created equal. Thermal resistance (R-value) does not correlate directly with acoustic dampening. Acoustic performance relies heavily on material density (measured in pounds per cubic foot, or pcf) and the internal friction of the fibers. Below is a comparison of the most common cavity insulations used in soundproofing assemblies.
| Material Type | Brand Example | Density (pcf) | Acoustic Function | Est. Cost (2026) |
|---|---|---|---|---|
| Mineral Wool Batts | Rockwool Safe'n'Sound | 2.5 - 2.8 | Excellent broadband damping; non-combustible. | $1.25 - $1.45 / sq ft |
| High-Density Fiberglass | Owens Corning 703/705 | 3.0 - 6.0 | Superior low-frequency absorption; rigid board. | $2.10 - $3.50 / sq ft |
| Standard Fiberglass | Owens Corning EcoTouch | 0.5 - 0.8 | Poor damping; primarily thermal. Avoid for STC 50+. | $0.55 - $0.75 / sq ft |
| Open-Cell Spray Foam | Icynene Classic Max | 0.5 | Couples drywall to studs; transmits vibration. | $1.10 - $1.60 / bd ft |
Note: Open-cell spray foam is frequently marketed for soundproofing, but it physically bonds the drywall to the framing, creating a rigid bridge that transmits structural vibration. For high-performance acoustic walls, friction-fit batts are the industry standard.
Step-by-Step Installation Technique for STC 55+ Walls
To achieve an STC 55 or higher, you must combine the best acoustic insulation material with a decoupled framing structure. Follow these precise installation steps to eliminate acoustic short-circuiting.
Step 1: Decouple the Framing Structure
Before installing any insulation, ensure your framing is decoupled. A standard 2x4 stud wall with drywall on both sides maxes out around STC 36, regardless of the insulation used. Upgrade to a staggered-stud configuration on a 2x6 bottom plate, or use 2x4 studs with resilient channels. This physical separation prevents sound vibrations from traveling directly through the wood from one side of the wall to the other. For comprehensive assembly details, refer to the USG Acoustical Design and Wall Partition Systems guidelines.
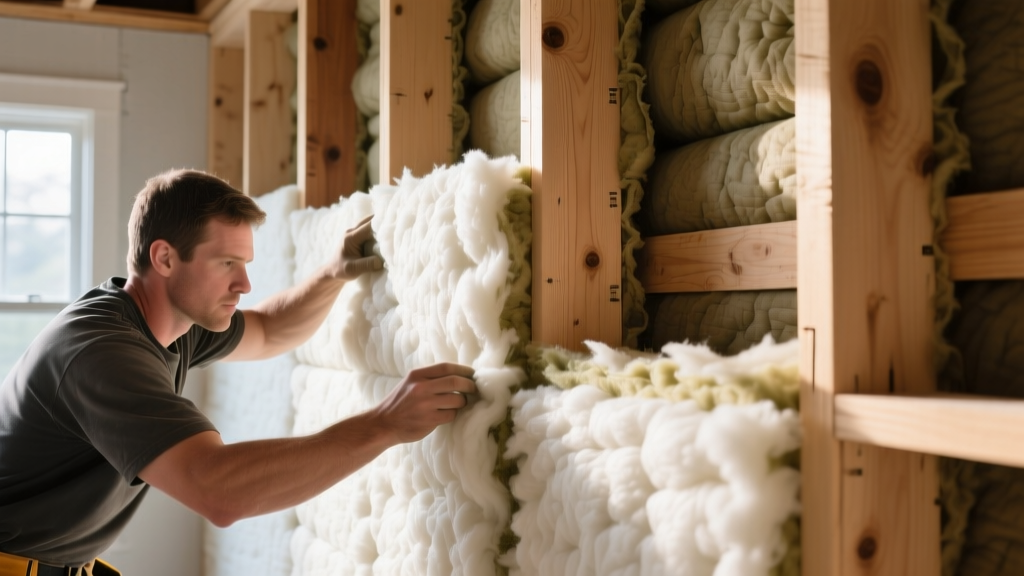
Step 2: The 1/2-Inch Overcut Rule (Friction Fitting)
The most common installation failure is cutting the insulation batts exactly to the stud spacing (14.5 inches for 16-inch on-center framing). This leaves micro-gaps along the edges where sound waves easily penetrate.
- Measure and Cut: Measure the exact cavity height and add 1/2 inch. Measure the exact cavity width and add 1/2 inch.
- Insert Without Compression: Press the batt into the cavity. The extra 1/2 inch of material will compress slightly against the edges, creating a tight friction fit that blocks airborne flanking.
- Avoid Deep Compression: Do not force a 5.5-inch thick batt into a 3.5-inch 2x4 cavity. Compressing mineral wool alters its density and ruins its low-frequency absorption capabilities. Match the batt thickness to the cavity depth.
Step 3: Perimeter Sealing with Acoustic Sealant
Acoustic sealant is the unsung hero of soundproofing. Unlike standard latex painter's caulk, which dries hard and brittle, acoustic sealant (such as Tremco Acoustical Sealant or OSI SC-175) remains permanently pliable. It absorbs vibration rather than transmitting it.
- Apply a continuous 3/8-inch bead of acoustic sealant along the floor track before installing the bottom plate.
- Apply a bead along the top plate where it meets the ceiling.
- Run a bead down the corner studs where the drywall will eventually terminate.
- When hanging drywall, leave a 1/4-inch gap between the drywall and the floor/ceiling, and fill this gap with the acoustic sealant before installing baseboards.
Critical Failure Modes: Penetrations and Flanking Paths
Even if you install the best acoustic insulation material perfectly, a single unsealed electrical box can drop your wall's STC rating by 10 to 15 points. Sound behaves like water; it will find the path of least resistance.
⚠ Warning: Back-to-Back Electrical Boxes
Never install electrical outlets back-to-back on opposite sides of a soundproof wall. This creates a direct, un-insulated tunnel for sound to bypass the drywall and insulation entirely. If you must place boxes on the same wall stud bay, stagger them horizontally by at least 24 inches and wrap each box in an acoustic putty pad (e.g., Trademark Soundproofing Putty Pads) to add mass and seal the gaps around the Romex wire.
💡 Pro Tip: HVAC and Plumbing Penetrations
If plumbing drains or HVAC ducts must pass through the acoustic wall, do not let them touch the wood framing. Wrap the pipes in closed-cell elastomeric insulation (like Armaflex) and use acoustic hangers. Leave a 1/2-inch clearance around the pipe where it passes through the drywall, and fill the annular space heavily with acoustic sealant.
Cost Breakdown: Material and Labor Estimates for a 100 Sq Ft Wall
Budgeting for a high-performance acoustic wall requires looking beyond just the insulation. The cost of the best acoustic insulation material is only a fraction of the total assembly cost. Below is a realistic 2026 cost breakdown for a 10x10 foot (100 sq ft) STC 55 interior partition wall, including framing, insulation, decoupling, and finishing.
| Component | Specification | Estimated Cost (100 sq ft) |
|---|---|---|
| Framing Lumber | 2x6 bottom plate, staggered 2x4 studs | $180 - $240 |
| Acoustic Insulation | Rockwool Safe'n'Sound (3.5") | $125 - $145 |
| Decoupling Clips/Channel | Resilient channels or sound isolation clips | $90 - $150 |
| Drywall & Damping | Two layers 5/8" Type X + Green Glue compound | $350 - $480 |
| Acoustic Sealant | 3 tubes Tremco / OSI SC-175 | $25 - $35 |
| Labor (Specialty) | Acoustic framing and drywall installation | $600 - $900 |
| Total Estimated Cost | Per 10x10 Wall Assembly | $1,370 - $1,950 |
While the insulation itself costs roughly $135 for the wall, the Green Glue damping compound and the second layer of drywall represent the largest material expenses. However, skipping the damping compound to save money will result in a wall that performs no better than a standard bedroom partition. For deeper insights into how environmental noise impacts building design and occupant health, review the Environmental Protection Agency (EPA) Noise Pollution Guidelines.
Final Inspection Checklist Before Closing the Wall
Before scheduling the drywall crew, perform this three-point inspection to ensure your acoustic insulation installation is flawless:
- The Flashlight Test: Turn off the work lights and shine a high-lumen flashlight from the back side of the studs. Look for any pinpricks of light escaping through the insulation. Any light gap is a sound gap. Stuff small scraps of mineral wool into these voids.
- The Tap Test: Lightly tap the face of the insulation. It should feel firm and spring back immediately. If it feels hard and compressed, you have over-stuffed the cavity and need to trim the batt.
- The Plumb Check: Ensure the resilient channels or staggered studs are perfectly plumb. If the framing bows, the drywall will pull against it, creating tension points that transmit vibration and compromise the decoupling.
By treating the installation process with the same rigor as the material selection, you guarantee that the best acoustic insulation material performs to its maximum engineered potential, delivering a truly soundproof environment.
Written by
Priya KapoorPriya Kapoor is a real estate market analyst and construction economics researcher with expertise in housing affordability, development feasibility, and infrastructure investment. She holds a Master of Regional Planning from Cornell University and previously worked as a senior analyst at CBRE's Investment Properties group, where she modeled returns for $4B in mixed-use development pipelines. Priya now runs an independent research practice advising developers, municipalities, and REITs on construction cost forecasting and market timing. She publishes the quarterly "BuildMat Market Pulse" report tracking material price indices across 12 commodity categories. Based in Austin, TX, Priya serves on the board of Habitat for Humanity Austin and is a marathon runner.
More from Priya Kapoor
View all
Construction Cost
Cost to Build a 1600 Sq Ft Home in 2026: Full Breakdown
Accurate 2026 cost to build a 1600 sq ft home—material, labor, and regional pricing breakdowns included. Plan your budget with real-time estimates.
Aug 11, 2026

Wood & Lumber
Name the Types of Wood for Pressure Treatment and Preservation
Learn how to name the types of wood best suited for pressure treatment. Compare species treatability, chemical retention levels, and 2026 preservation costs.
Aug 4, 2026

Stone & Masonry
Stone Veneer Suppliers Lindenhurst: 2026 Cost Analysis
Analyze 2026 stone veneer costs in Lindenhurst, NY. Compare local supplier pricing, delivery fees, and Suffolk County installation labor rates.
Aug 4, 2026