Pro Installation Techniques for Materials That Are Good Insulators
Master the installation techniques for materials that are good insulators. Learn pro framing, sealing, and density tips to maximize R-value.

The Field vs. Lab R-Value Discrepancy
Purchasing premium insulation is only half the battle. In laboratory settings, materials that are good insulators perform to their rated R-values. In the field, poor installation techniques can degrade thermal resistance by 20% to 40%. Gaps, compression, thermal bridging, and moisture intrusion compromise the trapped air pockets that give insulation its thermal properties. According to the U.S. Department of Energy, even a 4% gap in batt insulation can result in a 50% reduction in its effective R-value. This guide details the exact installation protocols required to force field performance to match laboratory specifications across the most common insulation categories.
The Compression Penalty: Fiberglass and Mineral Wool Batts
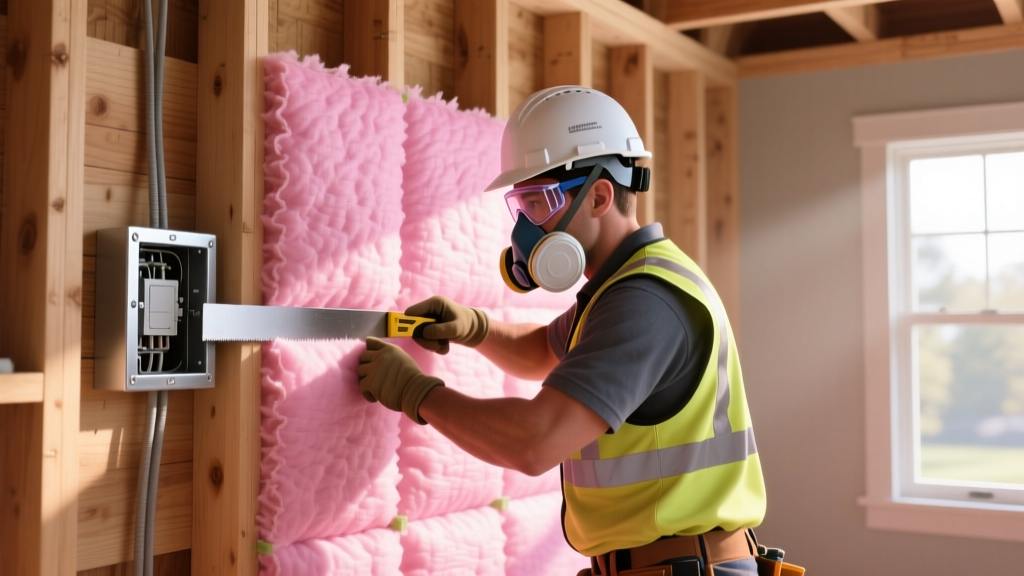
Fiberglass and mineral wool rely on millions of microscopic air pockets to resist heat flow. When these materials are compressed, the air pockets collapse, increasing thermal conductivity. Builders often attempt to stuff R-19 (designed for 6.25-inch 2x6 cavities) into 3.5-inch 2x4 cavities to 'get more R-value.' This is a critical error.
Compressing an R-19 batt into a 3.5-inch 2x4 cavity does not yield R-19. It drops the effective R-value to approximately R-14, while simultaneously increasing material costs and labor time. Always match the batt thickness to the cavity depth.
Pro Technique: The Cut-and-Cobble Method
Friction fitting—simply shoving the batt into the cavity and letting it expand—often leaves gaps at the edges. Instead, use the cut-and-cobble method:
- Measure and Overcut: Cut the batt exactly 0.5 inches wider than the stud cavity and 1 inch longer than the cavity height.
- Flange Management: For faced batts, staple the flange to the face of the stud, not the inside edge, to prevent drywall bulging and flange detachment.
- Electrical Box Detailing: Never mash insulation behind or over electrical boxes. Slit the batt down the middle, fold one half behind the box, and wrap the other half around the front, sealing the perimeter with acoustic sealant.
Substrate Prep and Spray Polyurethane Foam (SPF)
Spray polyurethane foam represents the pinnacle among materials that are good insulators due to its dual function as an air and thermal barrier. However, SPF is highly sensitive to environmental conditions during application. If the chemical reaction is disrupted by cold substrates, the foam will exhibit poor cell structure, shrinkage, and off-gassing.
| Property | Open-Cell (Half-Pound) | Closed-Cell (Two-Pound) |
|---|---|---|
| R-Value per Inch | 3.5 - 3.8 | 6.0 - 7.0 |
| Minimum Substrate Temp | 60°F (15°C) | 65°F (18°C) |
| Moisture Tolerance | Low (requires dry substrate) | Very Low (will not adhere to damp wood) |
| Trim Timing | 24 hours post-spray | 2 to 4 hours post-spray |
Thermal Imaging for Substrate Verification
Before the SPF truck begins mixing, use a FLIR thermal imaging camera to scan the framing and sheathing. Wood framing cools faster than ambient air in winter builds. If the sheathing reads below 60°F, use temporary salamander heaters to raise the ambient and surface temperatures. Applying closed-cell foam to 45°F OSB sheathing results in a friable, 'crunchy' foam that fails adhesion tests and must be scraped off at a massive financial loss.
Rigid Foam Board Seams: The Tape and Caulk Matrix
Rigid foam boards (XPS, EPS, and Polyiso) provide excellent continuous insulation (ci). The failure point in rigid foam installation is almost always the seam. As the Environmental Protection Agency notes, unsealed insulation joints allow convective heat loss and moisture drive, negating the board's thermal benefits.
Material-Specific Seam Sealing
Not all tapes and adhesives are compatible with all foam facers. Using the wrong sealant can melt the foam or fail to bond to the facer.
- Polyiso (Foil-Faced): Solvent-based adhesives will degrade the foam core if they penetrate the seams. Use acrylic-based sealants (like Prosoco R-Guard FastFlash) or specialized foil tapes (like Siga Sicral or Dow Weathermate). Apply tape with a hard plastic squeegee to ensure 100% contact area; hand-pressing is insufficient.
- XPS (Extruded Polystyrene): XPS has a smooth, low-surface-energy skin that resists adhesion. Lightly scarify the seam edges with 80-grit sandpaper before applying butyl flashing tape or compatible canned spray foam (like Great Stuff Pro Gaps & Cracks) to the joints.
- EPS (Expanded Polystyrene): Highly susceptible to melting from solvents. Strictly use water-based or EPS-compatible acrylic adhesives for all seams and penetrations.
Dense-Pack Cellulose: Achieving the 3.5 lb/ft³ Target
Blown-in cellulose is a premier choice for retrofitting existing walls and filling complex framing geometries. However, 'loose-fill' cellulose in closed wall cavities will settle over time, leaving uninsulated gaps at the top of the wall. The solution is dense-packing.
The Dense-Pack Installation Protocol
- Netting Preparation: If the cavity is open (new construction or gut rehab), install uninsulated insulation netting stapled tightly across the studs. Do not rely on drywall to hold the pressure; drywall screws will pop under dense-pack pressure.
- Drilling and Hose Insertion: For closed-cavity retrofits, drill a 2-inch hole at the top and bottom of each stud bay. Insert the filling hose to the bottom of the cavity.
- Pressure Calibration: Set the blower machine to deliver cellulose at a minimum density of 3.5 lbs per cubic foot. The hose should be pulled up slowly as the cavity fills, maintaining backpressure.
- The Knock Test: Once filled, tap the wall cavity with a knuckle. A properly dense-packed cavity sounds solid and dull, like a stud. A hollow sound indicates a void that requires immediate re-filling.
- Moisture Verification: Cellulose is hygroscopic. Use a pinless moisture meter on the wall cavity post-installation. Moisture content must remain below 15% to prevent mold growth and structural rot.
Continuous Insulation (ci) and Thermal Bridging Mitigation
Wood framing accounts for roughly 20% to 25% of a standard wall's surface area. Because wood has an R-value of only about 1.25 per inch, the studs act as thermal bridges, bypassing the cavity insulation. Modern energy codes increasingly mandate continuous insulation (ci) installed over the exterior sheathing to break this bridge.
Staggered Seams and Structural Furring
When installing exterior rigid foam (typically 1.5 to 2 inches of Polyiso), never align the vertical seams of the foam with the vertical seams of the underlying sheathing. Stagger all joints by at least 12 inches. To attach exterior cladding furring strips through the foam and into the studs, use structural insulated screws (such as FastenMaster HeadLok or Simpson Strong-Tie ZIP System screws). These screws feature integrated neoprene washers that seal the penetration, preventing water intrusion through the continuous insulation layer while providing the necessary pull-out strength for the cladding weight.
Written by
James ThorntonJames Thornton is a construction industry veteran with 25 years of hands-on experience in wood framing, lumber grading, and residential building codes. He started as a framing carpenter in rural Oregon, earned his ICC Residential Building Inspector certification, and eventually became a senior plan reviewer for the City of Portland Bureau of Development Services. James holds a B.S. in Wood Science & Technology from Oregon State University and is a certified lumber grader through the West Coast Lumber Inspection Bureau (WCLIB). He has inspected over 3,000 residential construction sites and authored the city's internal guide on advanced framing techniques (2x6 at 24" O.C.). James lives in Bend, OR, where he builds custom timber-frame cabins and competes in lumberjack sports.
More from James Thornton
View all
Insulation
Best Home Insulation Materials: Complete 2026 Guide
Compare top home insulation materials for 2026. Find R-values, installed costs per square foot, and best uses for fiberglass, spray foam, and mineral wool.
Aug 4, 2026

Sustainable Building
Certify Your Green Building Material for LEED and WELL
Step-by-step guide to certifying a green building material for LEED v5 and WELL v2. Master EPDs, HPDs, and VOC limits for 2026 project specifications.
Aug 4, 2026

Stone & Masonry
Veneer Stacked Stone Panels: Interior Design & Style Showcase
Discover how veneer stacked stone panels transform interiors. Explore modern design profiles, material pairings, and technical installation specs.
Aug 4, 2026