Installing Top Eco-Friendly Siding Materials with Insulation
Master the installation of top eco-friendly siding materials with insulation. Learn framing, moisture management, and fastening techniques for 2026 builds.

The 2026 Landscape of Eco-Friendly Insulated Siding
With the widespread adoption of the 2024 and 2026 International Energy Conservation Code (IECC) updates, building envelopes require higher continuous insulation (ci) thresholds to eliminate thermal bridging. Insulated siding—siding panels pre-bonded or field-paired with rigid foam or mineral wool—has evolved from a niche product to a mainstream compliance strategy. However, when prioritizing sustainability, builders must look beyond traditional petroleum-heavy vinyl. The current market favors eco-friendly alternatives that combine low-embodied-carbon facades with high-performance, low-GWP (Global Warming Potential) insulation.
Installing these systems requires a departure from standard lap siding techniques. The added thickness of the insulation layer alters fastener penetration depths, changes moisture drying potentials, and demands rigorous flashing details. Below is the definitive technical guide to installing the top eco-friendly insulated siding systems.
Material Selection and Thermal Performance Matrix
Before driving the first nail, it is critical to understand the specific material properties of the top sustainable insulated siding options available in 2026. Each material interacts differently with the weather-resistive barrier (WRB) and structural sheathing.
| Material System | Eco-Credentials | Insulation Type & R-Value | Avg. Material Cost (sq. ft.) |
|---|---|---|---|
| FSC-Engineered Wood + GPS | Sustainably harvested wood strands; low-VOC resins. | Graphite Polystyrene (GPS); R-2.5 to R-3.8 | $9.50 - $12.00 |
| Poly-Ash Composite + Mineral Wool | 70% recycled fly ash and wood fibers; zero VOCs; fully recyclable. | 1.5-inch Mineral Wool (field-applied); R-6.0+ | $11.00 - $14.50 |
| Recycled Steel + Thermal Furring | 90% post-consumer steel; infinite recyclability. | EPS Thermal Break Furring; R-1.5 (break only) | $8.50 - $11.50 |
According to the U.S. Department of Energy Building Envelope Guidelines, integrating continuous exterior insulation is mandatory for minimizing thermal bridging through wood studs, which can account for up to 25% of a wall's surface area.
Wall Assembly Prep: The Moisture Management Imperative
Insulated siding sits flush against the WRB, eliminating the traditional capillary break and drainage gap found in standard lap siding. This physical reality dictates a strict approach to water management.
Upgrading the Weather-Resistive Barrier (WRB)
Standard woven housewraps are insufficient for insulated eco-siding. The friction from the foam backing can abrade the wrap, and any trapped moisture lacks a clear drainage plane. For 2026 installations, specify a fluid-applied membrane (such as Prosoco R-Guard FastFlash) or a self-adhered peel-and-stick membrane (like Henry Blueskin VP100). These create a monolithic, airtight seal that doubles as a secondary drainage plane.
As detailed in Building Science Corporation's water management principles, the WRB must be integrated with window and door flashings using a shingle-lap methodology to ensure bulk water is directed outward and downward, regardless of the siding's interior profile.
Core Installation Techniques by Material Type
Engineered Wood with Graphite EPS Backing
Engineered wood siding laminated with GPS (Graphite Polystyrene) offers superior R-value per inch compared to standard white EPS. The graphite infusion reflects radiant heat, but the material is highly sensitive to UV degradation and compression.
- Handling: Store bundles flat and shaded. UV exposure degrades the GPS backing within 48 hours, causing delamination.
- Cutting: Use a fine-tooth carbide blade (minimum 60-tooth). Cut with the finished side up to prevent splintering the engineered wood face, and support the foam backing fully to avoid snapping the bond.
- Starter Track: Because the foam backing extends below the wood reveal, you must use a manufacturer-specific insulated starter strip. Standard vinyl starter tracks will leave the bottom edge of the foam exposed to pests and moisture.
Poly-Ash Composite over Field-Applied Mineral Wool
Poly-ash composites (like TruExterior) are dimensionally stable and eco-friendly, but they are heavy. When paired with semi-rigid mineral wool (like Rockwool Comfortboard 80) for continuous insulation, the assembly requires a robust fastening strategy.
- Furring Strip Grid: Install 1x3 wood or metal furring strips vertically at 16-inch or 24-inch on-center (matching the stud layout) directly over the mineral wool. This compresses the mineral wool slightly, creating a firm nailing base and a vertical drainage channel behind the siding.
- Siding Attachment: Fasten the poly-ash siding directly into the furring strips. Do not attempt to blind-nail through the thick composite and mineral wool into the structural studs without a furring grid; the holding power will be severely compromised.
When installing any pre-laminated insulated siding, do not over-drive the fasteners. Driving the nail head deep into the siding face compresses the foam backing against the sheathing. This compression crushes the cellular structure of the EPS/GPS, locally destroying its R-value and voiding the manufacturer's warranty. Fastener heads must sit flush with the nailing hem—no deeper.
Fastening Schedules and Expansion Tolerances
The most common field failure in insulated siding installation is improper fastener selection and spacing. The added thickness of the insulation layer requires recalculation of fastener length.
The Fastener Length Formula
Building codes (and ASTM D7793 standards for insulated siding) require a minimum of 1.25 inches of fastener penetration into the structural framing (studs). Calculate your minimum nail length as follows:
Siding Thickness (0.5") + Foam Insulation Thickness (1.5") + Sheathing Thickness (0.5") + Stud Penetration (1.25") = 3.75" Minimum Fastener Length.
Always use hot-dipped galvanized or stainless steel ring-shank nails. Electroplated nails will corrode due to the moisture trapped between the foam and the WRB. For engineered wood and poly-ash, use 0.113-inch diameter ring-shank nails to prevent withdrawal under wind-load stresses.
Expansion Gaps
While eco-friendly facades like poly-ash and fiber-cement have near-zero thermal expansion, the foam insulation backing expands and contracts with temperature fluctuations. Maintain a strict 1/8-inch expansion gap at all end joints and corner posts. Never force panels tight against trim; caulk the 1/8-inch gap with a high-quality, low-VOC polyurethane sealant that remains flexible across a -40°F to 180°F range.
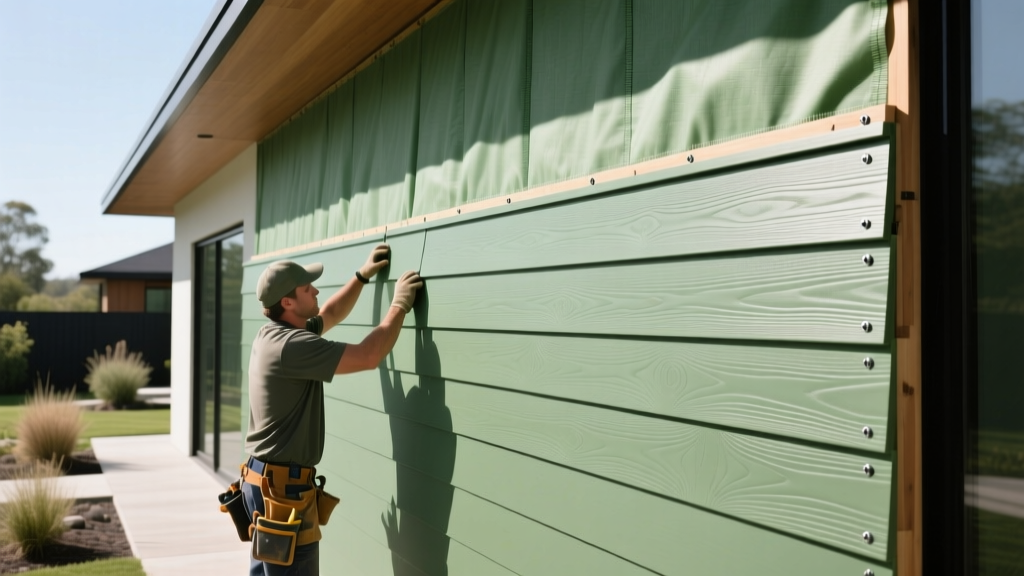
Flashing Transitions and Penetrations
Adding 1.5 to 2.5 inches of insulation to the exterior wall dramatically alters the geometry of penetrations. Standard window flanges and electrical boxes will no longer sit flush with the siding plane.
- Window Bucking: Windows must be 'bucked out' (extended outward) using treated wood or high-density PVC trim to align the window flange with the exterior face of the insulation. Apply fluid-applied flashing over the bucking before installing the window.
- Sill Pans: Install sloped sill pans with a minimum 3:12 pitch beneath all windows. The insulation layer can trap water that bypasses the window frame; the sill pan ensures it is routed over the WRB and out through weep holes in the insulated starter track.
- Electrical Boxes: Use extra-deep, weatherproof exterior electrical boxes designed specifically for continuous insulation assemblies. Seal the box flange to the WRB with compatible flashing tape before the insulation layer is applied.
Troubleshooting Common Field Failures
Even experienced crews make mistakes when transitioning to insulated eco-siding. Use this diagnostic framework to identify and correct field issues.
| Symptom | Root Cause | Corrective Action |
|---|---|---|
| Wavy or undulating siding appearance | Uneven stud framing compounded by the rigid foam backing bridging the low spots. | Install vertical furring strips and shim them plumb before applying the insulated siding. Do not rely on the foam to hide framing defects. |
| Foam delamination at cut edges | Cutting with dull blades or reciprocating saws that tear the adhesive bond. | Use sharp, fine-tooth circular saws or specialized guillotine shears. Seal all exposed foam edges at cuts with a compatible spray foam or sealant to prevent moisture ingress. |
| Insect nesting in bottom edges | Missing or improperly installed starter track leaving the bottom foam edge exposed. | Remove bottom course and install manufacturer-specified insulated starter strip with integrated pest screening. |
| Visible nail pops or siding buckling | Over-driving nails, crushing the foam, or nailing too tightly in the nailing hem without allowing for lateral movement. | Center nails in the nailing slots, leaving 1/32-inch clearance between the nail head and the hem. Replace crushed panels. |
Final Quality Assurance
Before demobilizing, conduct a visual and physical inspection of the envelope. Verify that all horizontal terminations (where siding meets masonry, roofing, or decks) maintain a minimum 2-inch clearance to prevent capillary water draw and allow the insulated system to dry. Ensure all vertical corner posts are plumb and properly sealed at the top to prevent wind-driven rain from entering the wall cavity behind the foam. By adhering to these precise installation techniques, builders can guarantee that the thermal and environmental benefits of eco-friendly insulated siding are fully realized in the field.
Written by
David NakamuraDavid Nakamura is a licensed architect (AIA) and construction technology writer focused on sustainable building methods, mass timber engineering, and high-performance building envelopes. He holds a Master of Architecture from the University of Washington and is a certified Passive House Consultant (CPHC). David spent eight years at the Seattle firm Mithun, where he led the design of three LEED Platinum projects, before founding his own practice specializing in net-zero residential design. He serves on the editorial advisory board of GreenBuilder Magazine and has authored peer-reviewed papers on cross-laminated timber (CLT) connections for the Journal of Structural Engineering. In his spare time, David teaches woodworking at Pratt Fine Arts Center and kayaks the Puget Sound.
More from David Nakamura
View all
Construction Cost
Labor Cost to Build a Deck Per Sq Ft: 2026 Installation Guide
Discover the exact labor cost to build a deck per sq ft in 2026. This installation guide breaks down contractor rates, complexity factors, and hidden fees.
Aug 4, 2026

Construction Cost
How Much Does It Cost to Build a 3 Bedroom House? Financing Guide
Learn exactly how much it costs to build a 3 bedroom house and explore 2026 financing options, construction loan types, and budget frameworks for your build.
Aug 4, 2026

Construction Cost
Cost to Build a Tennis Court: 2026 Guide
How much does it cost to build a tennis court in 2026? Breakdowns for asphalt, concrete, and synthetic surfaces plus fencing and lighting.
Jul 30, 2026