Installing Different Kinds of Insulation Materials: Pro Techniques
Master installation techniques for all kinds of insulation materials. Learn pro methods for fiberglass, spray foam, rigid boards, and blown-in cellulose.

The Physics of Placement: Why Material Dictates Method
The thermal performance of any building envelope relies entirely on the intersection of material chemistry and installation precision. A batt rated at R-21 will perform at R-15 if compressed, just as a continuous rigid foam layer will fail if its seams are improperly taped. When evaluating the various kinds of insulation materials, professional installers do not merely look at the center-of-cavity R-value printed on the packaging; they evaluate the material's hygrothermal behavior, compression tolerance, and air-sealing capabilities. This guide details the exact field techniques required to extract maximum performance from the four primary insulation categories used in modern construction.
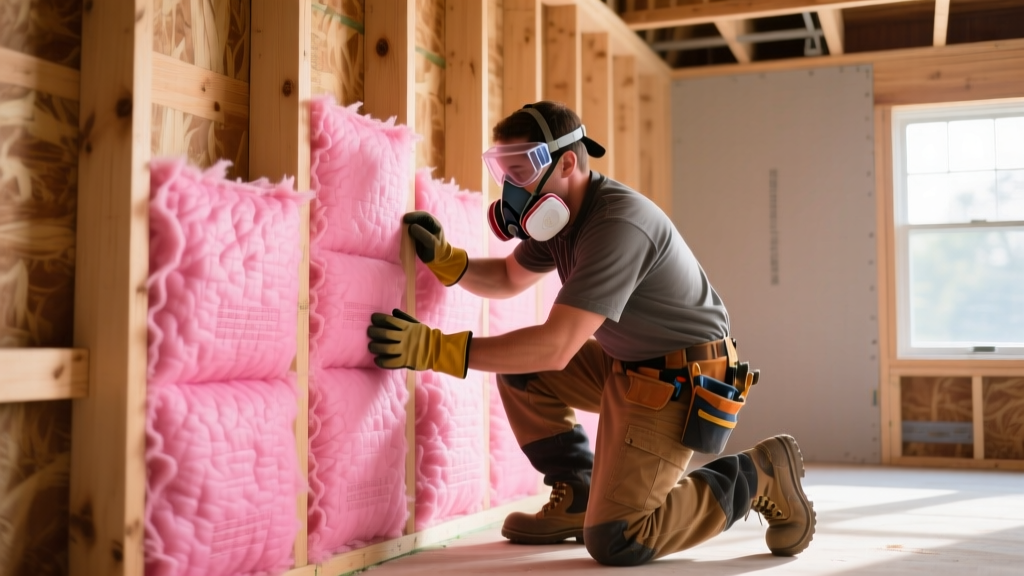
Fiberglass and Mineral Wool Batts: Friction-Fit Mastery
Fiberglass and mineral wool (stone wool) rely on trapped air within their glass or basalt fibers to resist heat flow. The most common installation failure is compression, which reduces the volume of trapped air and plummets the effective R-value. According to the North American Insulation Manufacturers Association (NAIMA), a batt must completely fill the cavity without gaps, voids, or compression to achieve its labeled rating.
Cutting and Sizing Tolerances
Never tear or fold insulation to fit around obstacles. Use a dedicated insulation knife with a serrated edge and a rigid straight-edge guide. For standard 16-inch on-center framing, cut the batt exactly 15.5 inches wide. For 24-inch on-center framing, cut to 23.5 inches. This 0.5-inch overcut creates the necessary lateral compression for a friction fit that prevents the batt from slumping over time.
Compressing an R-21 (6.5-inch) fiberglass batt into a standard 2x4 wall cavity (3.5 inches) does not yield R-21 in a thinner profile. The compressed material will perform at approximately R-13 to R-14, effectively negating the premium paid for the higher-rated product. Always match the batt thickness to the cavity depth.
| Labeled Batt R-Value | Designed Thickness | Compressed to 3.5 in. (2x4) | Effective R-Value Loss |
|---|---|---|---|
| R-13 | 3.5 in. | 3.5 in. (No compression) | 0% |
| R-15 | 3.5 in. (High Density) | 3.5 in. (No compression) | 0% |
| R-19 | 6.25 in. | 3.5 in. (Severe compression) | ~26% Loss (Yields R-14) |
| R-21 | 5.5 in. (High Density) | 3.5 in. (Severe compression) | ~33% Loss (Yields R-14) |
Closed-Cell Spray Polyurethane Foam (ccSPF): Thermal and Moisture Sealing
Closed-cell spray foam (typically 2.0 lb/ft³ density) provides an R-value of roughly R-6.5 to R-7 per inch and acts as a Class II vapor retarder at 1.5 inches thick. Modern ccSPF formulations utilize HFO blowing agents with a Global Warming Potential (GWP) of less than 1, replacing older HFCs. Installation requires strict adherence to substrate temperature and pass-thickness limits.
Substrate Preparation and Application Protocol
- Thermal Conditioning: The substrate (wood, concrete, or metal) must be between 60°F and 120°F. Applying ccSPF to cold lumber (below 50°F) results in poor adhesion, shrinkage, and delamination as the foam cools too rapidly during the exothermic reaction.
- Moisture Verification: Wood substrates must have a moisture content below 19%. Use a pin-type moisture meter before spraying.
- Lift Thickness Limits: Never apply ccSPF in a single thick pass. The exothermic reaction can cause the core temperature to exceed 350°F, leading to scorching, charring, and the release of toxic gases. Apply in maximum lifts of 2 to 3 inches, allowing 10 to 15 minutes of cooling time between passes.
- Wire and Pipe Masking: Pull electrical wires 1.5 inches away from the sheathing to ensure foam encapsulates them completely, preventing thermal bridging and air leaks along the wire runs.
Rigid Foam Boards (XPS, EPS, Polyiso): Continuous Insulation Integration
Rigid foam boards are the cornerstone of continuous insulation (ci) strategies, breaking thermal bridges created by wood and steel framing. The U.S. Department of Energy emphasizes that continuous exterior insulation is critical for preventing condensation within wall assemblies in extreme climates. However, the three primary types of rigid foam require distinct installation approaches.
Polyisocyanurate (Polyiso) and Thermal Drift
Polyiso offers the highest initial R-value per inch (R-6.5), but it suffers from thermal drift in cold temperatures. As outdoor temperatures drop below 50°F, the blowing gases inside the closed cells condense, dropping the effective R-value to roughly R-5.6 per inch. When designing and installing Polyiso in Climate Zones 5 and higher, always calculate the assembly's R-value using the cold-temperature rating, not the 75°F labeled rating.
Seam Taping and Fastener Schedules
A rigid foam layer is only as effective as its taped seams. Untaped seams allow convective heat loss and moisture intrusion. Use a minimum 4-inch wide acrylic or butyl flashing tape (such as Siga Wigluv or Zip System tape) over all vertical and horizontal joints. Do not use standard duct tape or asphalt-based products, which degrade under UV exposure and temperature cycling.
When mechanically fastening rigid foam to sheathing, use capped nails or specialized insulation screws with large plastic washers (minimum 2-inch diameter). Standard roofing nails will pull through the foam under wind-load stress. For 2-inch thick XPS, fasteners must penetrate the structural sheathing and framing by a minimum of 1.5 inches.
Blown-In Cellulose and Fiberglass: Dense-Pack vs. Loose-Fill
Blown-in materials are ideal for retrofitting existing enclosed walls and insulating complex attic geometries. The installation technique drastically alters the performance profile of the material.
Achieving Target Density in Enclosed Cavities
For enclosed wall cavities, cellulose must be installed using the dense-pack method, not open-blow. Dense-packing requires specialized blowing machines equipped with restrictor plates to build back-pressure in the hose. The target installed density for stabilized cellulose in vertical walls is 3.5 lbs/ft³. At this density, the material resists settling completely and reduces air infiltration through the wall cavity by up to 30%.
'Proper dense-pack cellulose installation requires monitoring the hose pressure and cavity fill rate. If the installer moves the fill tube too quickly, voids are created behind the wall netting or drywall, leading to severe thermal bypasses.' — Building Science Corporation guidelines on enclosure retrofits.
The Two-Hole Retrofit Method
When retrofitting existing drywall, drill two 2.5-inch holes per stud bay: one 12 inches from the ceiling, and one 12 inches from the floor. Insert the blow tube to the bottom of the cavity and fill upward. The top hole acts as an exhaust vent for displaced air, ensuring the cavity packs tightly from the bottom up without creating an air pocket at the top plate.
Critical Failure Modes Across All Insulation Types
Even premium materials fail when subjected to poor field execution. Use this troubleshooting matrix to diagnose and correct common installation defects during the pre-drywall inspection phase.
| Observed Symptom (IR Thermography) | Primary Cause | Required Corrective Action |
|---|---|---|
| Cold streaks at stud locations | Thermal bridging; lack of continuous exterior insulation. | Install minimum R-5 rigid foam ci over exterior sheathing. |
| Dark, dirty spots on interior drywall | Thermal tracking; air leaks carrying dust through unsealed top plates. | Air-seal top and bottom plates with acoustic sealant or spray foam before insulating. |
| Uniform cold patches in attic | Blown-in insulation settling or wind-washing from unvented soffits. | Install wind baffles at eaves; top off cellulose to achieve 3.5 lb/ft³ density. |
| Localized hot/cold spots mid-cavity | Batt compression around electrical boxes or plumbing lines. | Split the batt to fit around the obstacle; fill gaps with minimal-expansion canned foam. |
Cost and Labor Matrix by Material (2026 Estimates)
Understanding the installed cost of the different kinds of insulation materials is vital for budgeting. The following matrix reflects national averages for material and professional labor per square foot of wall/ceiling area.
| Insulation Material | Application Type | Material Cost (per sq ft) | Installed Cost (per sq ft) |
|---|---|---|---|
| Fiberglass Batts (R-15) | Standard 2x4 Framing | $0.60 - $0.90 | $1.50 - $2.20 |
| Mineral Wool Batts (R-23) | Standard 2x6 Framing | $1.10 - $1.50 | $2.40 - $3.10 |
| ccSPF (2.0 lb, 3 inches) | Open Cavities / Rim Joists | $2.50 - $3.50 | $4.50 - $6.50 |
| Polyiso Rigid Board (2 in.) | Exterior Continuous (ci) | $1.40 - $1.90 | $2.80 - $3.80 |
| Dense-Pack Cellulose | Enclosed Wall Retrofit | $0.80 - $1.20 | $2.20 - $3.00 |
Selecting the right insulation is only the first step. By applying these precise installation techniques, contractors and builders ensure that the theoretical R-values on the product label translate into real-world energy efficiency, structural durability, and occupant comfort.
Written by
David NakamuraDavid Nakamura is a licensed architect (AIA) and construction technology writer focused on sustainable building methods, mass timber engineering, and high-performance building envelopes. He holds a Master of Architecture from the University of Washington and is a certified Passive House Consultant (CPHC). David spent eight years at the Seattle firm Mithun, where he led the design of three LEED Platinum projects, before founding his own practice specializing in net-zero residential design. He serves on the editorial advisory board of GreenBuilder Magazine and has authored peer-reviewed papers on cross-laminated timber (CLT) connections for the Journal of Structural Engineering. In his spare time, David teaches woodworking at Pratt Fine Arts Center and kayaks the Puget Sound.
More from David Nakamura
View all
Construction Cost
Labor Cost to Build a Deck Per Sq Ft: 2026 Installation Guide
Discover the exact labor cost to build a deck per sq ft in 2026. This installation guide breaks down contractor rates, complexity factors, and hidden fees.
Aug 4, 2026

Construction Cost
How Much Does It Cost to Build a 3 Bedroom House? Financing Guide
Learn exactly how much it costs to build a 3 bedroom house and explore 2026 financing options, construction loan types, and budget frameworks for your build.
Aug 4, 2026

Construction Cost
Cost to Build a Tennis Court: 2026 Guide
How much does it cost to build a tennis court in 2026? Breakdowns for asphalt, concrete, and synthetic surfaces plus fencing and lighting.
Jul 30, 2026