Selection Framework: Finding the Best Sound Insulation Material
Master our 4-step selection framework to choose the best sound insulation material. Compare STC ratings, costs, and specific product models for 2026.

The Acoustic Reality: Why 'Best' Depends on the Noise Source
There is no single 'best' sound insulation material because sound is not a monolith. It is kinetic energy that travels through air and solid structures in different frequency waves. A material that excels at stopping high-frequency airborne noise (like television dialogue) will often fail completely against low-frequency impact noise (like bass from a subwoofer or heavy footsteps). To select the right material, you must first categorize the noise profile you are fighting.
- Airborne Noise: Voices, music, and traffic. Requires high mass and airtight sealing to block.
- Impact Noise: Footsteps, dropped objects, and furniture dragging. Requires decoupling and resilient isolation.
- Structure-Borne Noise: HVAC vibrations, plumbing water hammer, and elevator motors. Requires vibration isolation at the source.
The most common mistake in acoustic design is confusing absorption with isolation. The Noise Reduction Coefficient (NRC) measures how much sound a material absorbs to reduce echo within a room (e.g., acoustic foam). The Sound Transmission Class (STC) measures how much sound a material blocks from passing through a barrier. If your goal is to stop noise from leaving or entering a room, NRC ratings are irrelevant; you must optimize for STC and decoupling. For deeper metrics, the National Research Council Canada provides exhaustive testing data on assembly STC and IIC ratings.
The Material Matrix: Top Contenders and Specifications
Below is a comparative matrix of the most effective soundproofing materials used in modern construction, including current 2026 market pricing and specific applications.
| Material / Product Model | Primary Function | STC Contribution | Best Application | Approx. Cost (per sq. ft.) |
|---|---|---|---|---|
| Rockwool Safe'n'Sound (3.5") | Cavity Absorption | +4 to +6 STC | Interior stud cavities to dampen resonance | $0.65 - $0.80 |
| Owens Corning 703 (2") | Surface Absorption | N/A (NRC 0.95) | Room acoustic treatment / bass traps | $1.20 - $1.50 |
| Mass Loaded Vinyl (1 lb) | Mass Addition | +5 to +8 STC | Layered behind drywall or under flooring | $1.40 - $1.70 |
| Green Glue Compound | Viscoelastic Damping | +8 to +12 STC | Between two layers of 5/8" drywall | $1.10 - $1.30 |
| GenieClip RST | Structural Decoupling | +10 to +15 STC | Isolating drywall from framing for low-freq | $3.50 per clip |
The 4-Step Selection Framework
Rather than picking a single material, professional acousticians use a layered assembly approach. Follow this framework to build your wall, ceiling, or floor system.
Step 1: Diagnose the Frequency Profile
Low-frequency sounds (20Hz - 250Hz) carry immense kinetic energy and easily bypass standard insulation. If you are soundproofing a home theater, recording studio, or a bedroom above a living room with a subwoofer, you must prioritize decoupling and mass. If you are simply dividing two office spaces to block speech (mid-to-high frequencies, 500Hz - 2000Hz), cavity absorption and airtight sealing will suffice.
Step 2: Select the Cavity Fill
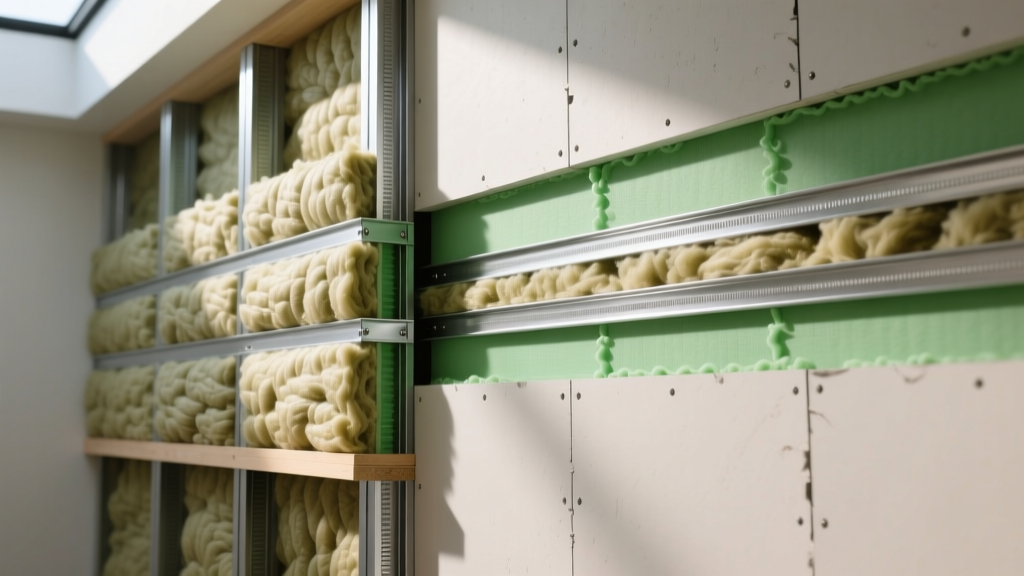
Never leave a stud cavity empty; it acts as a resonant drum. While standard fiberglass batts (like Owens Corning Kraft-faced) are designed for thermal R-value, they lack the density and flow resistivity required for acoustics. Mineral wool is the superior choice. Rockwool Safe'n'Sound is engineered with a specific density (approx. 2.5 lbs per cubic foot) that creates friction, converting sound waves into trace amounts of heat. Install it snugly, but do not compress it, as compression reduces its acoustic trapping volume.
Step 3: Implement Decoupling
If the drywall is screwed directly to the wood or metal studs, sound vibrations will travel through the rigid connection (flanking). You must break this mechanical link.
Hierarchy of Decoupling:
1. Isolation Clips and Hat Channel (Best): Systems like GenieClip RST or WhisperClips provide the lowest resonant frequency, making them ideal for low bass.
2. Resilient Channel (Good): A cheaper, springy metal track. Must be installed perfectly horizontally; a single misplaced screw that pierces the channel into the stud will short-circuit the entire system.
3. Staggered or Double Stud Walls (Good but space-heavy): Building two separate frames that do not touch.
Step 4: Add Mass and Damping
The final barrier requires mass. Standard 1/2" drywall is insufficient for high-performance rooms. Upgrade to 5/8" Type X gypsum board. For maximum isolation, use a constrained layer damping (CLD) approach: sandwich a viscoelastic compound like Green Glue Noiseproofing Compound between two layers of 5/8" drywall. As the sound waves vibrate the drywall, the Green Glue shears, converting the mechanical energy into heat. According to Green Building Advisor, this single step can yield a higher STC gain than doubling the wall thickness.
Common Failure Modes and Edge Cases
Even the best materials will fail if the installation ignores the physics of air leakage. Sound behaves like water; if air can pass through a gap, sound will pass through it.
A wall with an STC 60 rating will perform at STC 40 if you ignore flanking paths. The most common culprits are back-to-back electrical outlets on shared walls, unsealed perimeter joints where the drywall meets the floor, and recessed lighting cans. Always use acoustic putty pads behind electrical boxes and apply a heavy bead of ASTM C919 compliant acoustic sealant at all perimeters.
- Electrical Boxes: Never place electrical boxes back-to-back on a soundproofed partition. Offset them by at least 24 inches and wrap them in acoustic putty pads.
- HVAC Ductwork: Rigid metal ducts will transmit voice and motor noise between rooms. Use flexible, insulated duct connectors (canvas or neoprene) where the duct meets the register, and line the inside of the duct with 1" acoustic duct liner (like Johns Manville Spiracoustic) for the first 5 feet after the plenum.
- Doors: A solid core wood door (STC ~35) is mandatory. Hollow core doors (STC ~20) will ruin a wall assembly. Furthermore, you must install an automatic door bottom (drop seal) and perimeter weatherstripping to seal the air gaps.
Quick-Reference Decision Tree
Use this conditional framework to finalize your material shopping list based on your specific project constraints:
- IF you are soundproofing a standard bedroom wall against normal conversation -> USE Rockwool Safe'n'Sound in standard 2x4 studs, single layer 5/8" drywall, and acoustic sealant at the edges. (Target STC: 50)
- IF you are soundproofing a home theater or music room against heavy bass -> USE Rockwool in the cavity, GenieClip RST isolation clips with 25-gauge hat channel, and two layers of 5/8" drywall with Green Glue. (Target STC: 60+)
- IF you are treating impact noise from a floor above -> DO NOT rely on ceiling insulation alone. You must treat the floor above with an impact mat (like rubber underlayment or cork) to improve the Impact Insulation Class (IIC). If ceiling access is the only option, use blown-in cellulose or dense mineral wool combined with resilient channels to decouple the ceiling drywall.
- IF you are trying to fix room echo for recording vocals -> STOP looking at STC materials. Purchase Owens Corning 703 or 705 rigid fiberglass panels, wrap them in breathable fabric, and mount them at primary reflection points. (Target NRC: 0.90+)
For comprehensive assembly details and tested fire/sound ratings, always cross-reference your material choices with the USG Sound Control Design Guide to ensure your specific wall or ceiling configuration meets both acoustic and building code requirements.
Written by
Sarah WhitfieldSarah Whitfield is a chartered quantity surveyor (MRICS) and construction cost analyst with 15 years of experience in material pricing, procurement strategy, and project budgeting. She earned her degree in Construction Management from the University of Reading (UK) and has worked on projects ranging from $2M custom homes to $180M mixed-use developments across North America and Europe. Sarah currently leads cost estimating for BuildMat Insight, maintaining a proprietary database of 4,000+ material price points updated quarterly. She is a frequent contributor to RSMeans cost data panels and has presented at the International Cost Engineering Council (ICEC) congress. Based in Denver, CO, Sarah is an avid trail runner and volunteer mentor for Women in Construction.
More from Sarah Whitfield
View all
Wood & Lumber
What Are the Different Types of Wood? A Builder's Guide
Compare structural softwoods, finish hardwoods, and engineered lumber. Analyze Janka ratings, MOE values, and 2026 pricing for construction.
Aug 4, 2026

Walls & Panels
Steel Framing vs Wood Framing: Corrosion and Moisture Defense
Compare steel framing vs wood framing for moisture resistance. Learn about galvanized coatings, condensation risks, and corrosion protection strategies.
Jul 21, 2026

Stone & Masonry
How to Cut Stone Veneer: Wet Saw vs Grinder Comparison
Compare the best tools for cutting stone veneer. We review wet saws, angle grinders, and chop saws to help you achieve clean, chip-free cuts.
Jul 21, 2026