Flawless Stone Veneer Accent Wall Installation: Step-by-Step Pro Guide
Learn how to install a stone veneer accent wall with our pro step-by-step guide. Covers prep, mortar mixing, layout, and sealing for a flawless finish.

Substrate Requirements and Weight Limitations
Installing a stone veneer accent wall over standard interior drywall is a frequent cause of structural failure. Natural stone and high-density manufactured stone veneer (MSV) typically weigh between 10 and 15 pounds per square foot. Standard 1/2-inch gypsum drywall is not rated to support this sustained shear load, leading to delamination and catastrophic wall collapse. According to the International Masonry Institute, interior accent walls must utilize a cementitious backer board or a properly framed and lathed masonry substrate to ensure long-term adhesion and load distribution.
Tools and Materials Checklist
Professional results require specialized masonry tools and specific mortar formulations. Do not substitute standard thin-set or Type N mortar for veneer applications.
- Substrate: 1/2-inch cement backer board, 1-5/8-inch corrosion-resistant backer board screws.
- Weather/Moisture Barrier: Grade D building paper or 15-lb asphalt felt (required if the wall backs an exterior envelope or unconditioned space).
- Lath: 2.5 lb/sq yd galvanized expanded metal lath (ASTM C847 compliant).
- Fasteners: 1-inch galvanized roofing nails or corrosion-resistant staples for lath attachment.
- Mortar: Polymer-modified veneer stone mortar (e.g., ProSpec Veneer Stone Mortar or QUIKRETE Veneer Stone Mortar). These contain latex additives for superior vertical bond strength.
- Tools: 10-inch wet saw with a continuous-rim diamond blade, hawk, 3/8-inch V-notch trowel, margin trowel, pointing trowel, mortar bag, stiff nylon brush, and a 4-foot level.
Phase 1: Substrate Preparation and Lath Installation
Begin by securing the 1/2-inch cement backer board to the wall studs. Space screws every 8 inches along the studs and 12 inches in the field. Ensure all seams are tight and taped with alkali-resistant fiberglass mesh tape, coated with a thin layer of veneer mortar.
Applying the Metal Lath
Metal lath provides the mechanical key necessary for the scratch coat to grip the wall. Unroll the galvanized expanded metal lath horizontally across the wall. The lath must be installed with the correct side facing out; run your hand over the mesh—it should feel like shingles on a roof, catching your hand when you move it upward. Overlap horizontal seams by 1 inch and vertical seams by 2 inches. Fasten the lath to the underlying studs (not just the backer board) using galvanized nails or staples every 6 inches. The lath should feel rigid and tight against the wall with no bowing or spongy spots.
Phase 2: Mixing and Applying the Scratch Coat
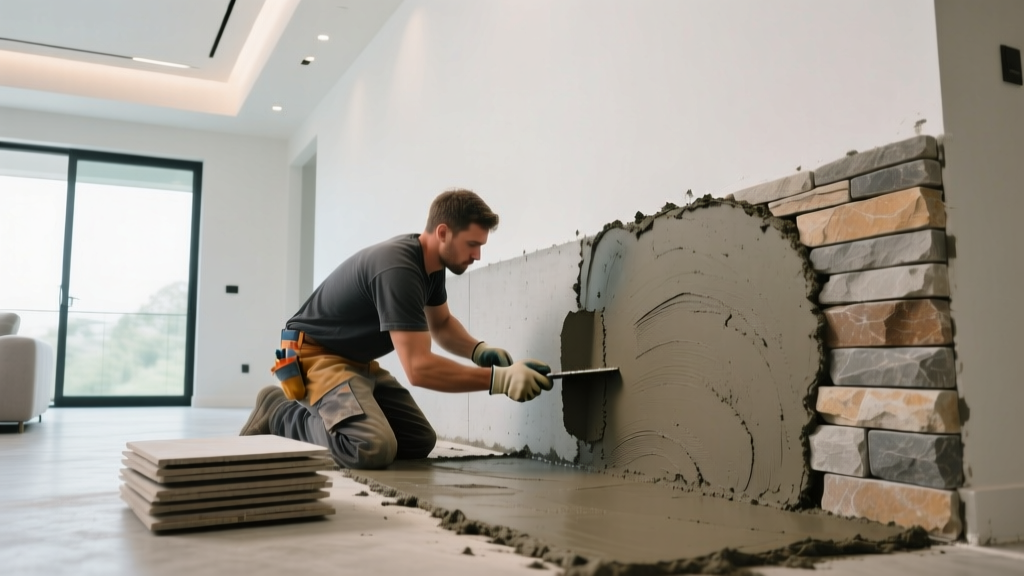
The scratch coat is a 1/2-inch layer of mortar applied over the lath that creates a stable, uniform base for the stone. Mix the polymer-modified veneer mortar to a thick, peanut-butter-like consistency. It must hold its shape on the trowel without slumping.
- Press and Key: Using a flat trowel, forcefully press the mortar through the lath mesh to ensure complete encapsulation of the metal.
- Build Thickness: Apply additional mortar to achieve a uniform 1/2-inch thickness over the entire surface.
- Scarify: While the mortar is still wet, use a notched trowel or a scratch rake to create deep horizontal grooves across the entire surface. These horizontal ridges provide the mechanical grip for the final stone-setting mortar.
Phase 3: Dry Layout and Stone Application
Never begin setting stone directly from the box. Empty 10 to 15 square feet of stone onto the floor and perform a dry layout. Mix stones from different boxes to ensure a balanced distribution of color variations and sizes. Arrange corner pieces first, ensuring alternating long and short legs to mimic natural masonry bonding patterns.
Setting the Stone
Always start at the bottom of the wall and work upward, installing corner pieces before flat pieces. Apply a 1/2-inch layer of veneer mortar to the back of each stone (buttering). Press the stone firmly into the scratch coat, wiggling it slightly to squeeze out excess mortar and ensure full contact. Maintain a 1/2-inch to 1-inch joint spacing for grouted profiles, or push stones tightly together for a dry-stack appearance. Use a 4-foot level frequently to ensure your courses remain plumb and level. When cutting is required, use a 10-inch wet saw with a continuous-rim diamond blade to prevent chipping the edges of manufactured or natural stone.
Phase 4: Grouting, Tooling, and Cleaning
For installations requiring mortar joints, wait until the setting mortar has firmed up (usually 30 to 60 minutes, depending on ambient temperature). Fill a canvas mortar bag with grout-consistency veneer mortar and pipe it into the joints, much like icing a cake. Avoid smearing mortar on the face of the stone.
Once the joint mortar reaches a 'thumbprint hard' consistency (firm enough to hold a thumbprint without sticking), use a pointing trowel or a jointing tool to compress and smooth the joints. This compression increases the density and weather resistance of the joint.
Critical Cleaning Protocols
Never use muriatic acid, wire brushes, or high-pressure washers to clean stone veneer. Acid will etch the surface of manufactured stone and cause iron oxidation (rust stains) in natural limestone and sandstone. Instead, wait 24 hours after tooling, then use a stiff nylon brush and clean water to remove any accidental mortar smears. For stubborn stains, use a specialized masonry cleaner approved by the stone manufacturer.
Troubleshooting Common Installation Failures
Understanding failure modes is critical for ensuring the longevity of your stone veneer accent wall. The International Code Council outlines strict adherence to masonry veneer weight and anchorage limits to prevent these exact scenarios.
| Failure Mode | Root Cause | Professional Fix |
|---|---|---|
| Stone Delamination | Applying stone over painted drywall or failing to butter the back of the stone completely. | Remove fallen stone, scrape substrate to bare backer board, reapply lath, and ensure 100% mortar coverage on the stone back. |
| White Efflorescence Staining | Excess moisture in the wall cavity migrating through the mortar, bringing soluble salts to the surface. | Ensure proper vapor barriers are installed behind the backer board. Brush off dry efflorescence; do not use water until the wall is fully cured. |
| Mortar Joint Cracking | Joints were tooled while the mortar was too wet, or the mortar mix lacked polymer modifiers. | Rake out cracked joints to a depth of 1/4 inch and repoint using a polymer-modified mortar, tooling only when thumbprint hard. |
| Color Bleeding / Staining | Using acid-based cleaners or failing to seal porous natural stone in high-moisture areas. | Apply a breathable, siloxane-based penetrating masonry sealer after a 28-day full cure period. |
Cost Breakdown: 50-Square-Foot Accent Wall
Budgeting accurately requires accounting for both visible materials and hidden substrate components. The following breakdown reflects current material costs for a 50-square-foot interior accent wall using mid-range manufactured stone veneer.
| Material Category | Specific Product / Spec | Estimated Cost |
|---|---|---|
| Cement Backer Board | 1/2-inch Durock (approx. 6 sheets) | $120 - $150 |
| Metal Lath & Fasteners | 2.5 lb galvanized lath (3 rolls) + staples | $85 - $110 |
| Veneer Mortar | Polymer-modified (approx. 6 x 80lb bags) | $180 - $240 |
| Stone Veneer Material | Mid-range MSV (55 sq ft to account for 10% waste) | $450 - $850 |
| Consumables & Tools | Diamond blade, mortar bag, sponges, sealer | $90 - $130 |
| Total Estimated Material Cost (DIY) | $925 - $1,480 | |
Professional installation labor typically adds $12 to $18 per square foot, bringing the total turnkey cost for a 50-square-foot project to between $1,525 and $2,380. Investing in proper substrate preparation and polymer-modified mortars prevents costly tear-outs and ensures the accent wall remains a permanent, structural-grade architectural feature.
Written by
Sarah WhitfieldSarah Whitfield is a chartered quantity surveyor (MRICS) and construction cost analyst with 15 years of experience in material pricing, procurement strategy, and project budgeting. She earned her degree in Construction Management from the University of Reading (UK) and has worked on projects ranging from $2M custom homes to $180M mixed-use developments across North America and Europe. Sarah currently leads cost estimating for BuildMat Insight, maintaining a proprietary database of 4,000+ material price points updated quarterly. She is a frequent contributor to RSMeans cost data panels and has presented at the International Cost Engineering Council (ICEC) congress. Based in Denver, CO, Sarah is an avid trail runner and volunteer mentor for Women in Construction.
More from Sarah Whitfield
View all
Wood & Lumber
What Are the Different Types of Wood? A Builder's Guide
Compare structural softwoods, finish hardwoods, and engineered lumber. Analyze Janka ratings, MOE values, and 2026 pricing for construction.
Aug 4, 2026

Walls & Panels
Steel Framing vs Wood Framing: Corrosion and Moisture Defense
Compare steel framing vs wood framing for moisture resistance. Learn about galvanized coatings, condensation risks, and corrosion protection strategies.
Jul 21, 2026

Stone & Masonry
How to Cut Stone Veneer: Wet Saw vs Grinder Comparison
Compare the best tools for cutting stone veneer. We review wet saws, angle grinders, and chop saws to help you achieve clean, chip-free cuts.
Jul 21, 2026