Mastering the Art of Gluing Stone Veneer for High-End Interior Design
Discover how gluing stone veneer transforms modern interiors. Explore design applications, premium adhesive selections, and flawless installation techniques.

The Design Revolution: Why Adhesive-Set Veneer Dominates Modern Interiors
The integration of natural and manufactured stone into interior architecture has shifted dramatically. Gone are the days when stone cladding required massive structural footings, thick mortar beds, and specialized masonry crews. Today, the technique of gluing stone veneer directly to interior substrates has unlocked a new era of biophilic design, allowing architects and homeowners to wrap kitchen islands, clad elevator shafts, and build floor-to-ceiling fireplace surrounds with materials weighing less than 15 pounds per square foot. As highlighted in recent material trend analyses by Architectural Record, the demand for tactile, organic textures in minimalist and contemporary spaces has made thin stone veneer a premier design element.
However, the aesthetic success of these installations relies entirely on the unseen chemistry of the adhesive bond. Gluing stone veneer is not merely about sticking heavy rocks to a wall; it is a precise discipline of load distribution, moisture management, and chemical compatibility. A failed bond does not just mean a fallen stone—it means a ruined design vision and thousands of dollars in collateral damage to adjacent millwork and flooring.
Choosing the Right Adhesive for Your Design Vision
The term 'glue' is a colloquialism that covers three distinct chemical categories in stone installation. Selecting the wrong category for your specific stone porosity and substrate is the leading cause of installation failure. According to guidelines from the Masonry Veneer Manufacturers Association (MVMA), the adhesive must be matched to both the weight of the veneer and the environmental conditions of the room.
| Adhesive Category | Industry Standard / Type | Best Design Application | Cure Time & Sag Resistance |
|---|---|---|---|
| Polymer-Modified Thinset | ANSI A118.15 (Improved Modified Dry-Set) | Wet areas (bathrooms), exterior accents, heavy natural stone over cement board. | 24-48 hours; High non-sag properties for vertical stacking. |
| Polyurethane Construction Adhesive | ASTM C552 / High-Grab Polyurethane | Interior dry zones, lightweight manufactured panels, MDF or drywall substrates (with proper prep). | Initial grab in 30 mins; Full cure in 24 hours. |
| Epoxy Mortar | ANSI A118.3 | High-heat zones, commercial kitchens, bonding to non-porous surfaces like glass or steel. | 12-24 hours; Zero moisture transmission. |
Signature Design Applications and Installation Nuances
Gluing stone veneer allows for complex geometries and seamless transitions that traditional masonry cannot achieve. Here is how top-tier installers approach the most sought-after design features.
The Floating Kitchen Island Wrap
Wrapping a kitchen island base in ledgestone or geometric mosaic veneer creates a striking visual anchor. The challenge here is the transition from the vertical face to the horizontal overhang of the countertop. When gluing stone veneer to the vertical substrate (typically 1/2-inch cement backer board like Durock Next Gen), installers must leave a precise 1/8-inch expansion gap at the top where the stone meets the countertop. This gap is later filled with a color-matched, high-quality silicone sealant rather than grout or caulk, allowing the island structure and the stone cladding to expand and contract independently without cracking the veneer face.
Floor-to-Ceiling Fireplace Surrounds
A continuous stone wall draws the eye upward, but gravity is the enemy of fresh adhesive. For installations exceeding 8 feet in height, the 'bottom-up' approach is mandatory. Installers must use a high-non-sag thinset (ANSI A118.15) and employ a ledger board—a temporary horizontal support screwed into the wall at the 4-foot mark. The bottom half is glued and allowed to cure for 24 hours. The ledger is then removed, and the top half is completed. For the area immediately surrounding the firebox, technical data sheets from Laticrete specify that adhesives must be rated for continuous thermal exposure up to 212°F (100°C) to prevent the bond from degrading during prolonged fires.
The 'Invisible Seam' Technique: Layout and Gluing Execution
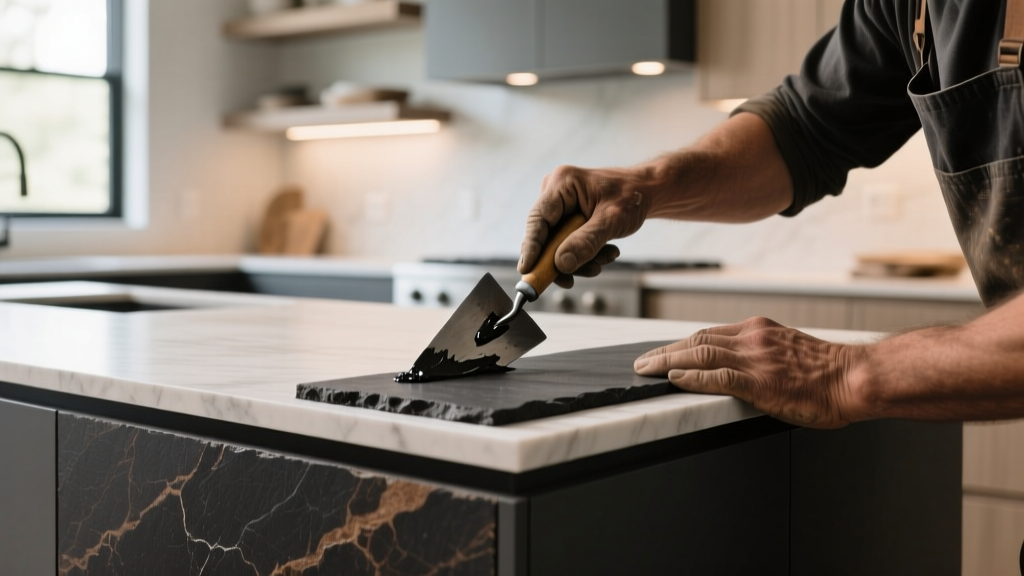
The difference between a DIY-looking wall and a bespoke architectural feature lies in the layout and the gluing execution. To achieve a custom, monolithic appearance, follow this exact workflow:
- The Dry-Lay and Blend: Open a minimum of three boxes of veneer and dry-lay 25 square feet on the floor. Natural stone varies wildly in hue and thickness. Blending from multiple boxes ensures no single color band dominates the wall.
- Substrate Scoring: If using a smooth cement backer board, score the surface with a wire brush or coarse sandpaper to open the pores, ensuring the thinset achieves a mechanical lock.
- Back-Buttering (The Golden Rule): Never rely solely on 'dot-and-dab' or troweling the wall. Apply a thin, flat layer of adhesive to the back of every single stone (back-buttering), then comb the wall substrate with a 1/2-inch x 1/2-inch square-notched trowel. This guarantees 95% adhesive coverage, eliminating hollow voids where moisture could pool and freeze in exterior applications.
- Managing the Squeeze-Out: When pressing the stone into the combed adhesive, push firmly and twist slightly. If adhesive squeezes out into the joint, do not wipe it with a wet sponge while wet—this will smear the pigment into the stone's porous face. Allow it to dry to a crumbly consistency, then brush it out with a dry, stiff-bristle brush.
Common Design-Killing Mistakes When Gluing Stone Veneer
Many well-meaning contractors apply a stone sealer to the veneer before installation to protect it from adhesive stains. This is a catastrophic error when gluing stone veneer. Sealers penetrate the pores and create a hydrophobic barrier, which prevents water-based thinsets and adhesives from achieving a mechanical bond. The stones will literally fall off the wall once the adhesive cures. Always seal the stone after installation and jointing, using a breathable, penetrating siloxane sealer.
Another frequent failure mode is ignoring the 'lip' effect. Manufactured stone veneers often have slight thickness variations. If an installer does not keep a straight edge or level handy to tap down protruding stones while the adhesive is wet, the final wall will cast harsh, uneven shadows under modern LED lighting, ruining the intended sleek aesthetic.
'Great stone design is not about the individual rock; it is about the shadow lines and the rhythm of the joints. The adhesive is simply the silent partner that holds that rhythm in place.' — Senior Architectural Specifier, Commercial Interiors.
2026 Cost Breakdown for Premium Veneer Projects
Budgeting for a high-end stone veneer project requires looking beyond the per-square-foot cost of the stone itself. The ancillary materials and specialized labor dictate the final investment.
- Premium Natural Thin Veneer: $11.00 - $18.00 per sq. ft. (e.g., Oklahoma Ledgestone, Swiss Alpine).
- High-Performance Thinset (ANSI A118.15): $55.00 - $75.00 per 50 lb. bag (covers approx. 40 sq. ft. at 1/2-inch notch).
- Cement Backer Board & Fasteners: $2.50 - $3.50 per sq. ft.
- Specialized Masonry Labor: $14.00 - $24.00 per sq. ft., depending on pattern complexity (stacked bond requires more cutting and fitting than running bond).
When executed with precision, gluing stone veneer bridges the gap between raw, natural beauty and refined, modern architecture. By respecting the chemistry of the adhesives and the geometry of the layout, designers can create interior spaces that are not only visually breathtaking but structurally enduring.
Written by
David NakamuraDavid Nakamura is a licensed architect (AIA) and construction technology writer focused on sustainable building methods, mass timber engineering, and high-performance building envelopes. He holds a Master of Architecture from the University of Washington and is a certified Passive House Consultant (CPHC). David spent eight years at the Seattle firm Mithun, where he led the design of three LEED Platinum projects, before founding his own practice specializing in net-zero residential design. He serves on the editorial advisory board of GreenBuilder Magazine and has authored peer-reviewed papers on cross-laminated timber (CLT) connections for the Journal of Structural Engineering. In his spare time, David teaches woodworking at Pratt Fine Arts Center and kayaks the Puget Sound.
More from David Nakamura
View all
Construction Cost
Labor Cost to Build a Deck Per Sq Ft: 2026 Installation Guide
Discover the exact labor cost to build a deck per sq ft in 2026. This installation guide breaks down contractor rates, complexity factors, and hidden fees.
Aug 4, 2026

Construction Cost
How Much Does It Cost to Build a 3 Bedroom House? Financing Guide
Learn exactly how much it costs to build a 3 bedroom house and explore 2026 financing options, construction loan types, and budget frameworks for your build.
Aug 4, 2026

Construction Cost
Cost to Build a Tennis Court: 2026 Guide
How much does it cost to build a tennis court in 2026? Breakdowns for asphalt, concrete, and synthetic surfaces plus fencing and lighting.
Jul 30, 2026