How Do You Install Stone Veneer? Technical Specs & Methods
Learn how do you install stone veneer with exact technical specs, mortar mix ratios, lath requirements, and ASTM standards for wood and CMU substrates.

Understanding how do you install stone veneer requires moving beyond basic aesthetic placement and mastering the structural and moisture-management specifications that prevent catastrophic failure. Manufactured and natural stone veneer systems are non-load-bearing; they rely entirely on the mortar bond to the substrate and the metal lath to transfer sheer loads to the building frame. Improper mix ratios, inadequate fastener penetration, or missing weather-resistive barriers (WRB) lead to delamination, efflorescence, and structural rot.
Substrate Preparation & Weather-Resistive Barriers (WRB)
The foundation of any stone veneer installation is the moisture management layer. For wood-framed structures, building codes typically mandate a dual-layer WRB system to protect the sheathing from moisture that inevitably migrates through the porous stone and mortar matrix.
Dual-Layer WRB Specifications
- First Layer (Inner): A code-approved housewrap (e.g., Tyvek CommercialWrap) or Grade D building paper (ASTM D226) applied directly over the OSB or plywood sheathing.
- Second Layer (Outer): Grade D asphalt-impregnated felt paper (ASTM D226, 60-minute minimum rating). This sacrificial layer acts as a bond-breaker and secondary drainage plane, allowing moisture to channel downward behind the lath.
Per ASTM C1063, a corrosion-resistant weep screed must be installed at the base of all exterior walls. Maintain a minimum clearance of 4 inches (100 mm) above grade, or 2 inches (50 mm) above paved surfaces like concrete walks or driveways. Omitting the weep screed or burying it in soil traps hydrostatic pressure, guaranteeing moisture intrusion and stone blow-offs during freeze-thaw cycles.
Metal Lath and Fastening Schedules
The metal lath provides the mechanical key for the mortar. For stone veneer, you must use expanded metal lath conforming to ASTM C847. Standard diamond mesh used for interior plaster is insufficient for the sheer weight of exterior stone.
Lath Material and Weight
Specify minimum 2.5 lb/sq yd (1.36 kg/sq m) self-furring, galvanized expanded metal lath. The 'self-furring' dimples hold the mesh approximately 1/4 inch away from the WRB, ensuring the scratch coat mortar fully encapsulates the back of the lath rather than pressing flat against the building paper.
Fastener Penetration and Spacing
Fasteners must be corrosion-resistant (hot-dipped galvanized or stainless steel). The critical metric is not just the fastener length, but the penetration depth into the structural framing.
- Wood Studs: Fasteners must penetrate the wood stud by a minimum of 1 inch (25 mm). Typically, this requires 1-inch to 1-1/2-inch roofing nails or staples with 3/4-inch crowns.
- Spacing: Fasten lath maximum 6 inches (150 mm) on center vertically and 16 inches (400 mm) on center horizontally. Overlap horizontal edges by 1 inch and vertical edges by 2 inches.
Mortar Mix Ratios and Chemistry
The mortar used for both the scratch coat and the setting bed must meet ASTM C270 standards. Type S mortar is the industry standard for exterior stone veneer due to its high tensile bond strength and flexibility, which accommodates thermal expansion and structural deflection better than rigid Type M mixes.
Exact Type S Mortar Proportions (by Volume)
| Ingredient | Volume Ratio | Technical Function |
|---|---|---|
| Type I/II Portland Cement | 1 Part | Provides primary compressive and tensile strength. |
| Hydrated Lime (Type S) | 1/2 Part | Increases workability, water retention, and autogenous healing. |
| Damp, Loose Masonry Sand | 4.5 Parts | Acts as the aggregate skeleton; must be free of organic matter. |
| Potable Water | To Plasticity | Activates hydration; mix should hold its shape on a trowel. |
While field-mixing allows for precise quality control, pre-blended Type S mortar bags (e.g., SPEC MIX or Sakrete) are often preferred on modern job sites to eliminate volumetric batching errors. If using pre-blended bags, strictly adhere to the manufacturer's water volume limits. Adding excess water to increase workability drastically reduces the ultimate PSI and bond strength of the cured mortar.
Scratch Coat Application and Curing
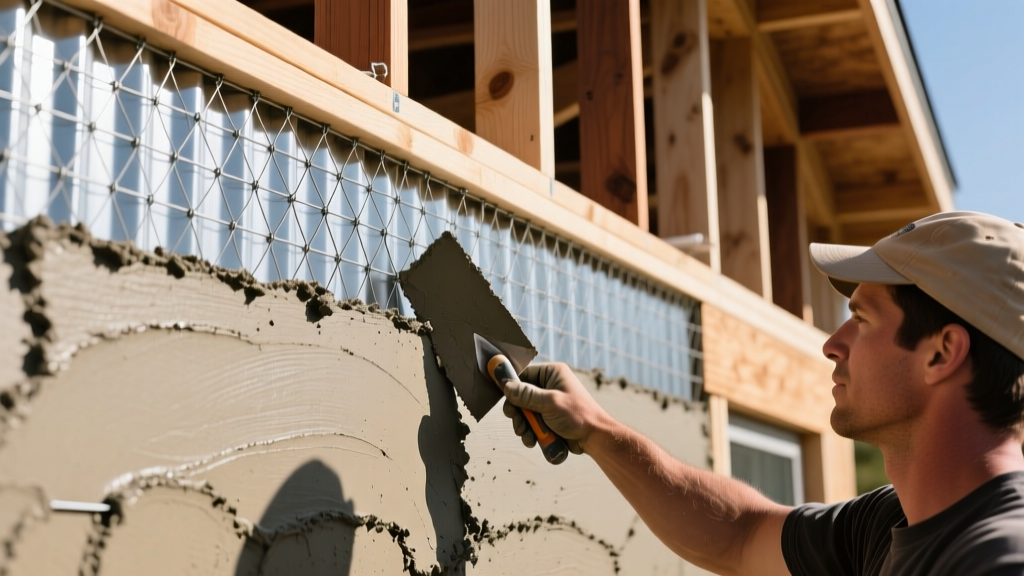
How do you install stone veneer successfully? The secret lies in the scratch coat. The scratch coat is the 1/2-inch (13 mm) thick layer of mortar forced completely through the metal lath and scored to provide a mechanical tooth for the setting bed.
- Encapsulation: Use a flat trowel to press the mortar aggressively through the lath dimples until it touches the WRB. This prevents 'shadowing' and ensures the lath is fully encased, preventing rust.
- Scoring: While the mortar is still thumbprint-hard, score it horizontally with a coarse-toothed rake. Horizontal scoring is critical; vertical scoring channels water directly down the wall cavity.
- Curing Time: The scratch coat must moist-cure for a minimum of 48 hours. In high-heat or low-humidity environments, mist the wall with water twice daily to prevent rapid moisture loss, which causes plastic shrinkage cracking and weakens the Portland cement hydration process.
Substrate-Specific Installation Matrix
The installation methodology shifts drastically depending on the structural substrate. Below is the technical matrix for the three most common exterior wall assemblies.
| Specification | Wood Framing (2x4 / 2x6) | CMU Block (8-inch Hollow) | Poured Concrete Wall |
|---|---|---|---|
| WRB Requirement | Dual-layer (Housewrap + Grade D Felt) | None required (CMU is the WRB if sealed/parged) | None required (if surface is clean and unsealed) |
| Metal Lath | Required (2.5 lb galvanized) | Required (pinned with concrete nails or powder-actuated tools) | Optional (can bond directly if concrete is rough/porous) |
| Fasteners | Galvanized roofing nails/staples (1" penetration) | Hardened masonry nails or Tapcon screws | Powder-actuated pins or wedge anchors |
| Setting Bed Thickness | 1/2" to 1" | 1/2" to 1" | 1/4" to 1/2" (if no lath used) |
Common Failure Modes and Technical Troubleshooting
Even when following basic instructions, installers frequently encounter systemic failures. According to defect analyses compiled by InterNACHI, the majority of stone veneer callbacks are related to moisture mismanagement rather than aesthetic flaws.
1. Delamination and Stone Blow-Offs
Cause: Failure to back-butter the stones, or applying the setting bed to a scratch coat that has been left exposed to the elements for weeks without re-wetting. Dust and efflorescence on the scratch coat act as a bond-breaker.
Fix: Always dampen the cured scratch coat before applying the setting bed. Apply a 1/4-inch layer of mortar to the back of every individual stone (back-buttering) before pressing it into the wall setting bed. Do not 'dot and dab' the corners.
2. Severe Efflorescence (White Staining)
Cause: Soluble salts within the mortar or stone are dissolved by trapped moisture and drawn to the surface via capillary action. This is almost always a symptom of missing weep screeds, improper flashing at roof-to-wall intersections, or using unwashed, salt-laden masonry sand in the mix.
Fix: Ensure all horizontal transitions (windows, doors, rooflines) feature Z-flashing that extends over the WRB. Use only ASTM C144 compliant washed masonry sand. If efflorescence occurs, dry-brush the area; do not use muriatic acid, which can etch manufactured stone pigments and accelerate future salt migration.
3. Corner Cracking and Joint Separation
Cause: Lack of control joints in long wall runs or failing to wrap lath continuously around corners.
Fix: Metal lath must wrap around exterior and interior corners by a minimum of 16 inches on both sides. Never terminate lath exactly at the corner edge. For wall runs exceeding 30 feet, integrate ASTM C1063 compliant casing beads and control joints to isolate structural movement.
Written by
Elena RodriguezElena Rodriguez is a civil engineer and technical writer specializing in concrete technology, masonry systems, and ASTM/ACI compliance. She earned her B.S. in Civil Engineering from Texas A&M University and spent a decade at a materials testing laboratory, performing over 2,000 concrete compressive strength tests and masonry prism evaluations. Elena is an ACI-certified Field Testing Technician (Grade I) and a member of ASTM Committee C12 on Natural Building Stone. She currently consults on forensic engineering cases involving concrete failures and moisture intrusion. Based in San Antonio, TX, Elena is a proud member of the Society of Women Engineers (SWE) and coaches her daughter's FIRST Robotics team.
More from Elena Rodriguez
View all
Walls & Panels
Cost Analysis: Light Gauge Steel Framing Advantages and Disadvantages
Evaluate light gauge steel framing advantages and disadvantages through a strict cost analysis lens, comparing material, labor, and lifecycle expenses.
Aug 4, 2026

Walls & Panels
Gypsum Board Types: Exact Specifications, Thickness & Dimensions
Compare standard, Type X, and moisture-resistant gypsum board types. Get exact specifications, thicknesses, dimensions, and ASTM standards for your project.
Aug 4, 2026

Fire Resistance
Best Fire-Resistant Outdoor Decking Materials: 2026 Buyer Guide
Discover the best fire-resistant outdoor decking materials for 2026. Compare Class A PVC, aluminum, and hardwood options for WUI compliance and safety.
Aug 4, 2026