How to Nail Up Stone Veneer: Mortarless Install Guide
Learn how to nail up stone veneer using mortarless polyurethane and lightweight panels. Step-by-step instructions, tools, and cost breakdowns.

The Reality of Nailing Stone Veneer
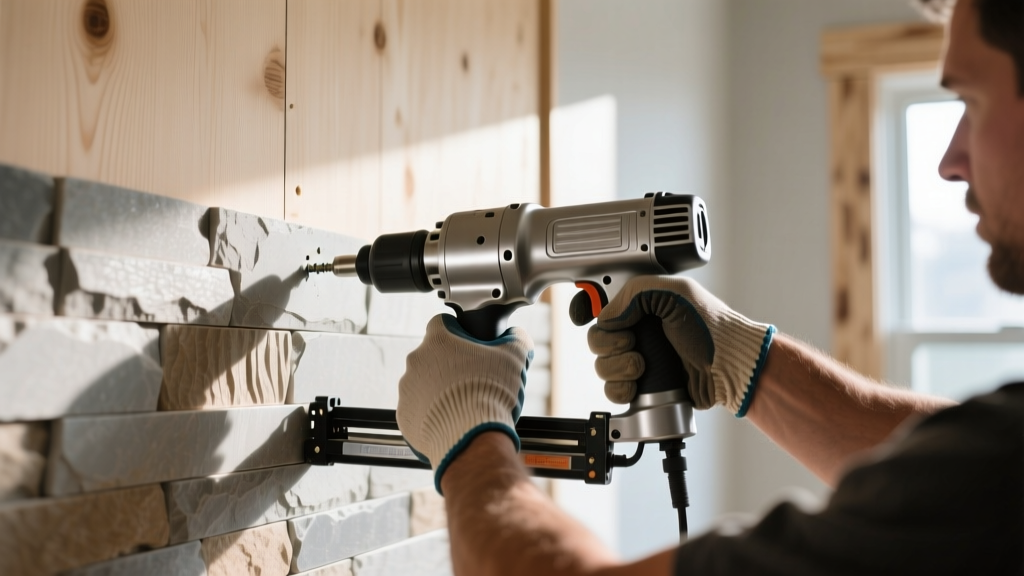
When homeowners and contractors ask if they can nail up stone veneer, the answer depends entirely on the material composition. Traditional natural stone and standard cementitious manufactured stone veneer (MSV) weigh between 10 to 15 pounds per square foot and require a structural scratch coat, metal lath, and Type S mortar. You cannot nail these heavy masonry products to a wall. However, the modern building materials market has introduced high-density polyurethane and MDF-backed stone panels that weigh less than 1.5 pounds per square foot. These mortarless systems are specifically engineered with nailing flanges, allowing you to literally nail up stone veneer directly to wood studs, OSB, plywood, or existing drywall.
Learning how to nail up stone veneer properly requires understanding substrate preparation, the correct adhesive-to-fastener ratio, and thermal expansion management. This guide details the exact specifications for installing interlocking, mortarless stone panels in 2026.
Which Stone Veneer Systems Accept Nails?
Before purchasing materials, verify that your chosen product is rated for mechanical fastening. Below is a comparison matrix of common stone veneer types and their installation requirements.
| Material Type | Weight (per sq ft) | Can You Nail It? | Required Substrate | Best Application |
|---|---|---|---|---|
| High-Density Polyurethane (e.g., GenStone, NextStone) | 1.0 - 1.5 lbs | Yes (Direct to studs/sheathing) | OSB, Plywood, Drywall, Metal | Exterior & Interior |
| MDF-Backed Stone Slices | 2.5 - 4.0 lbs | Yes (With heavy-duty adhesive) | Drywall, Plywood (Interior only) | Interior Accent Walls |
| Cementitious MSV (Traditional) | 10.0 - 15.0 lbs | No (Requires mortar/lath) | CMU, Plywood + Lath + Scratch | Exterior Facades, Fireplaces |
| Natural Thin Stone Veneer | 7.0 - 12.0 lbs | No (Requires mortar/lath) | CMU, Plywood + Lath + Scratch | High-end Exterior/Interior |
Essential Tools and Fastener Specifications
To achieve a secure, weather-tight bond on polyurethane panels, you must combine mechanical fasteners with a high-tack structural adhesive. Relying on nails alone will cause panel bowing due to thermal expansion; relying on adhesive alone risks detachment if the substrate is compromised.
- Fasteners: 1.5-inch to 2-inch hot-dipped galvanized or stainless steel siding nails (15-gauge or 16-gauge). Do not use electroplated nails, as they will rust and bleed through the polyurethane finish.
- Adhesive: Loctite PL Premium 3x Polyurethane Construction Adhesive or Liquid Nails Fuze*It Max. Standard latex adhesives lack the initial grab required for vertical applications.
- Nailer: Pneumatic or cordless 15-gauge finish nailer (for trim and flanges) or a siding nailer for the flat fields of large panels.
- Cutting Tools: Miter saw with a fine-tooth carbide-tipped blade (60-tooth or higher) to prevent chipping the faux-mortar joints. A jigsaw with a fine-tooth metal blade is required for outlet cutouts.
- Layout Tools: Chalk line, 4-foot level, and a tape measure.
Step-by-Step: How to Nail Up Stone Veneer Panels
The following procedure aligns with the GenStone installation guidelines and general industry standards for interlocking polyurethane architectural panels.
Step 1: Substrate Preparation and Flashing
For exterior applications, ensure the wall is wrapped in a weather-resistive barrier (WRB) like Tyvek. Install a Z-flashing or weep screed at the base of the wall to prevent moisture from wicking up behind the panels. For interior applications over painted drywall, lightly score the paint with 80-grit sandpaper where the adhesive will be applied to ensure a mechanical bond to the gypsum, not just the paint layer.
Step 2: Establishing the Level Line
Polyurethane panels feature interlocking shiplap or tongue-and-groove edges. If your first row is out of level, the error will compound across the wall. Snap a chalk line exactly 1/2 inch above your weep screed or baseboard. This gap allows for panel expansion and prevents the bottom edge from resting directly in standing water or dirt.
Step 3: Adhesive and Fastener Application
Apply a continuous 3/8-inch bead of polyurethane construction adhesive to the back of the panel in an 'S' or 'W' pattern. Keep the adhesive at least 1 inch away from the interlocking edges to prevent squeeze-out from ruining the faux-mortar seams. Press the panel firmly against the wall. Immediately drive galvanized nails through the designated nailing flanges into the wall studs (spaced 16 or 24 inches on center).
Step 4: Interlocking and Advancing the Rows
Slide the next panel into the interlocking edge of the first. Use a rubber mallet to gently tap the panels together, ensuring a tight seam. Stagger your vertical seams by at least 12 inches between rows to avoid a repetitive, grid-like appearance. According to NextStone installation specifications, cutting the first panel of every third row in half naturally creates a randomized, organic stone pattern.
Cost Analysis: Mortarless vs. Traditional Masonry
While the per-square-foot material cost of polyurethane panels is higher than basic cementitious MSV, the elimination of masonry labor, metal lath, and mortar drastically reduces the total installed cost.
| Cost Factor | Mortarless Polyurethane Panels | Traditional Cementitious MSV |
|---|---|---|
| Material Cost (per sq ft) | $11.00 - $15.00 | $6.00 - $9.00 |
| Adhesive / Mortar / Lath | $0.75 - $1.25 | $3.00 - $5.00 |
| Labor Cost (per sq ft) | $2.00 - $4.00 (DIY or Carpenter) | $10.00 - $16.00 (Mason required) |
| Total Installed Cost | $13.75 - $20.25 | $19.00 - $30.00 |
| Installation Time (100 sq ft) | 4 - 6 Hours | 2 - 3 Days (including curing) |
Troubleshooting Edge Cases and Failure Modes
Even with lightweight panels, improper technique leads to visible defects. Address these common failure modes during your installation:
- Panel Bowing in Direct Sunlight: Polyurethane expands when exposed to UV and heat. If you nail the panels too tightly without leaving the manufacturer-specified 1/8-inch expansion gap at the ends of the runs, the panels will buckle outward. Always follow the specific thermal expansion chart provided by the manufacturer.
- Adhesive Squeeze-Out: If PL Premium squeezes into the faux-stone joints, do not wipe it with a wet rag, which will smear the pigment. Allow the adhesive to cure for 2 hours until it becomes gummy, then carefully slice it out with a utility knife.
- Substrate Bleed-Through: When installing over dark plywood or OSB, the dark color can sometimes show through the micro-gaps in the panel seams. Paint the substrate with a flat, exterior-grade primer matching the color of the panel's mortar joints before installation.
- Corner Piece Misalignment: Outside corners require specialized interlocking corner pieces. Install the corner pieces before the field panels. This allows you to slide the flat panels into the corner flanges, hiding the cut edges of the field panels entirely.
Mastering how to nail up stone veneer using modern polyurethane systems bridges the gap between high-end masonry aesthetics and rapid, cost-effective carpentry. By adhering to strict fastener schedules, utilizing structural polyurethane adhesives, and respecting thermal expansion tolerances, you can achieve a permanent, weather-resistant stone facade in a single afternoon.
Written by
Sarah WhitfieldSarah Whitfield is a chartered quantity surveyor (MRICS) and construction cost analyst with 15 years of experience in material pricing, procurement strategy, and project budgeting. She earned her degree in Construction Management from the University of Reading (UK) and has worked on projects ranging from $2M custom homes to $180M mixed-use developments across North America and Europe. Sarah currently leads cost estimating for BuildMat Insight, maintaining a proprietary database of 4,000+ material price points updated quarterly. She is a frequent contributor to RSMeans cost data panels and has presented at the International Cost Engineering Council (ICEC) congress. Based in Denver, CO, Sarah is an avid trail runner and volunteer mentor for Women in Construction.
More from Sarah Whitfield
View all
Wood & Lumber
What Are the Different Types of Wood? A Builder's Guide
Compare structural softwoods, finish hardwoods, and engineered lumber. Analyze Janka ratings, MOE values, and 2026 pricing for construction.
Aug 4, 2026

Walls & Panels
Steel Framing vs Wood Framing: Corrosion and Moisture Defense
Compare steel framing vs wood framing for moisture resistance. Learn about galvanized coatings, condensation risks, and corrosion protection strategies.
Jul 21, 2026

Stone & Masonry
How to Cut Stone Veneer: Wet Saw vs Grinder Comparison
Compare the best tools for cutting stone veneer. We review wet saws, angle grinders, and chop saws to help you achieve clean, chip-free cuts.
Jul 21, 2026