Stone Veneer Fireplace Installation: The Complete Material Guide
Master stone veneer fireplace installation with our complete material guide. Compare natural vs. manufactured stone, costs, and step-by-step methods.

Material Selection Matrix: Natural vs. Manufactured vs. Faux
Selecting the correct veneer material dictates your framing requirements, mortar chemistry, and overall budget. While natural stone offers unmatched geological authenticity, manufactured concrete veneer provides consistent sizing and reduced structural load. High-density polyurethane serves as a lightweight alternative for non-masonry substrates.
| Material Type | Weight (lbs/sq ft) | Material Cost (2026) | Substrate Requirement | Heat Resistance |
|---|---|---|---|---|
| Natural Stone (e.g., Fieldstone, Ledger) | 25 - 40 lbs | $15.00 - $32.00 | Reinforced masonry or heavy-duty steel stud | Exceptional (Non-combustible) |
| Manufactured Concrete Veneer | 10 - 15 lbs | $8.00 - $16.00 | Wood/steel stud with cement backer board | Excellent (Non-combustible) |
| High-Density Polyurethane (Faux) | 1 - 2 lbs | $11.00 - $18.00 | Drywall, plywood, or OSB | Poor (Requires 36" clearance to firebox) |
Substrate Preparation & Framing Requirements
Adhered masonry veneer (AMV) relies entirely on the shear strength of the substrate and the mechanical bond of the mortar. Standard 1/2-inch drywall is entirely unacceptable for cementitious stone veneer; the moisture from the mortar will degrade the gypsum core, and the paper facing lacks the shear capacity to support 15+ lbs per square foot.
For interior fireplace surrounds, frame the chase using 2x4 or 2x6 dimensional lumber at 16 inches on center. Sheath the entire surround with 1/2-inch cement backer board, such as USG Durock or James Hardie HardieBacker 500. Fasten the backer board using corrosion-resistant alkali-resistant (AR) glass fiber mesh tape and cement board screws spaced every 8 inches along the studs.
Mortar Selection & Mixing Protocols
The mortar used for stone veneer fireplace installation must balance compressive strength with workability and adhesion. Do not use standard bricklaying mortar or dry-set thinset without polymer modification.
Type N vs. Type S Mortar
For interior manufactured stone veneer weighing less than 15 lbs/sq ft, Type N mortar (1 part Portland cement, 1 part hydrated lime, 6 parts masonry sand) is the industry standard. It yields approximately 750 psi compressive strength and offers superior workability, allowing you to adjust the stones before the initial set.
If you are installing heavy natural stone (over 20 lbs/sq ft) or extending the veneer to an exterior chimney chase, upgrade to Type S mortar (1 part Portland cement, 1/2 part lime, 4.5 parts sand). Type S achieves 1,800 psi compressive strength and provides the necessary shear bond for heavier geological materials. According to the Masonry Veneer Manufacturers Association (MVMA), all mortar must be mixed to a consistent, workable slump that holds its shape on a trowel held at a 90-degree angle.
Polymer-Modified Thin-Set Alternative
For thin-profile stone veneers (under 1 inch thick), ANSI A118.4 or ANSI A118.15 polymer-modified thin-set mortars can be used over properly prepared cement board. These eliminate the need for a traditional scratch coat and metal lath, reducing installation time by up to 30%. However, they require a perfectly flat substrate and are unforgiving regarding adjustment time.
Step-by-Step Installation Sequence
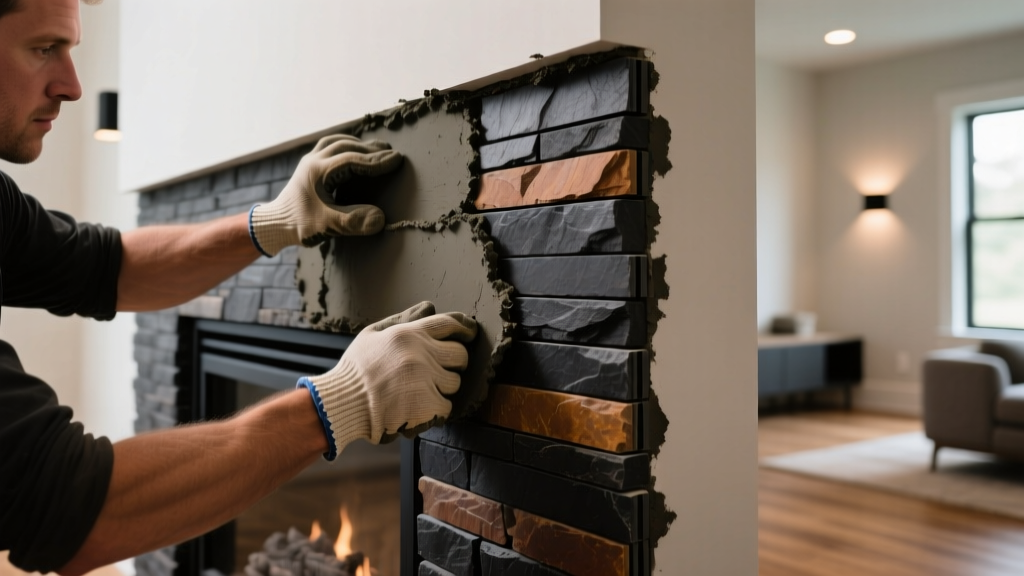
Proper sequencing prevents mortar skinning and ensures a cohesive visual pattern. Follow this exact workflow for cementitious veneers over metal lath and scratch coats.
- Weather Barrier & Lath Application: Staple Grade D building paper or 6-mil polyethylene over the framing. Attach 2.5 lb self-furring galvanized expanded metal lath using staples or nails spaced 6 inches apart on studs. Ensure horizontal overlaps of 2 inches and vertical overlaps of 1 inch.
- The Scratch Coat: Apply a 1/2-inch layer of Type S or Type N mortar over the lath using a notched trowel. Scarify the surface horizontally with a stiff-bristled brush to create deep grooves for mechanical locking. Cure the scratch coat for 24 to 48 hours, misting lightly to prevent rapid moisture loss and shrinkage cracking.
- Dry Layout & Pattern Mapping: Unbox multiple cartons of stone and lay them out on the floor. Blend sizes, colors, and textures to avoid clustering identical stones. Cut stones using a 10-inch wet saw with a continuous rim diamond blade to minimize chipping.
- Install Corner Pieces First: Begin at the bottom corners of the fireplace surround. Apply a 1/2-inch layer of mortar to the substrate and heavily back-butter the entire back of the corner stone. Press firmly until mortar squeezes out on all sides. Corners dictate the sightlines for the entire installation.
- Field Stone Application: Work from the bottom up. Apply mortar to the scratch coat and back-butter every single stone. For stones larger than 36 square inches, back-buttering is mandatory to achieve 100% coverage and prevent hollow spots that lead to delamination.
- Jointing & Pointing: Maintain consistent 1/2-inch to 1-inch joints for standard stacked or grouted profiles. Once the mortar becomes thumbprint-hard (usually 45-90 minutes), tool the joints with a pointing trowel or grout bag. Never use a wet sponge to clean cementitious stone, as it will smear pigment into the porous surface.
2026 Cost Breakdown & Labor Estimates
Budgeting for a stone veneer fireplace requires accounting for hidden substrate costs and specialized masonry labor. The following estimates reflect national averages for a standard 50-square-foot fireplace surround (including hearth and chimney chase face) in 2026.
| Cost Category | Manufactured Stone | Natural Stone | Notes & Variables |
|---|---|---|---|
| Material (Veneer Only) | $400 - $800 | $750 - $1,600 | Premium natural ledgers cost 3x more than basic manufactured fieldstone. |
| Substrate & Consumables | $150 - $250 | $200 - $350 | Includes cement board, metal lath, mortar mix, and diamond saw blades. |
| Professional Masonry Labor | $1,250 - $2,000 | $2,000 - $3,500 | Natural stone requires more cutting, fitting, and structural shoring. |
| Total Estimated Project Cost | $1,800 - $3,050 | $2,950 - $5,450 | Excludes demolition of existing masonry or gas line rerouting. |
Troubleshooting Common Failure Modes
Even with premium materials, environmental factors and improper technique can compromise the installation. Refer to the National Concrete Masonry Association (NCMA) guidelines for the following remediation strategies:
- Efflorescence (White Powdery Staining): Caused by water-soluble salts migrating to the surface. Fix: Dry-brush the deposits. Prevent future occurrences by ensuring the masonry is fully cured before applying a breathable, penetrating silane/siloxane sealer. Never use film-forming acrylic sealers, which trap moisture inside the stone.
- Stone Delamination (Falling Off): Usually the result of failing to back-butter large stones, applying mortar to a dusty substrate, or installing in temperatures below 40°F (4°C). Fix: Remove loose stones, chip away the old mortar down to the scratch coat, clean the substrate with a wire brush, and reset using a polymer-modified mortar.
- Mortar Shrinkage Cracking: Occurs when the scratch coat dries too quickly or the mortar mix contains too much water. Fix: Rake out cracked joints to a depth of 1/2 inch and repoint with a stiffer, lower-slump mortar mix. Mist the surrounding area to control the curing rate.
Written by
Sarah WhitfieldSarah Whitfield is a chartered quantity surveyor (MRICS) and construction cost analyst with 15 years of experience in material pricing, procurement strategy, and project budgeting. She earned her degree in Construction Management from the University of Reading (UK) and has worked on projects ranging from $2M custom homes to $180M mixed-use developments across North America and Europe. Sarah currently leads cost estimating for BuildMat Insight, maintaining a proprietary database of 4,000+ material price points updated quarterly. She is a frequent contributor to RSMeans cost data panels and has presented at the International Cost Engineering Council (ICEC) congress. Based in Denver, CO, Sarah is an avid trail runner and volunteer mentor for Women in Construction.
More from Sarah Whitfield
View all
Wood & Lumber
What Are the Different Types of Wood? A Builder's Guide
Compare structural softwoods, finish hardwoods, and engineered lumber. Analyze Janka ratings, MOE values, and 2026 pricing for construction.
Aug 4, 2026

Walls & Panels
Steel Framing vs Wood Framing: Corrosion and Moisture Defense
Compare steel framing vs wood framing for moisture resistance. Learn about galvanized coatings, condensation risks, and corrosion protection strategies.
Jul 21, 2026

Stone & Masonry
How to Cut Stone Veneer: Wet Saw vs Grinder Comparison
Compare the best tools for cutting stone veneer. We review wet saws, angle grinders, and chop saws to help you achieve clean, chip-free cuts.
Jul 21, 2026