Mastering Veneer Stone Mortar: Mixing, Application, and Pro Tips
Learn the exact mixing ratios, application techniques, and troubleshooting steps for polymer-modified veneer stone mortar to ensure lasting adhesion.

The Chemistry of Adhesion: Why Standard Mortar Fails
Unlike structural masonry, which relies on the compressive strength of mortar to bear vertical loads, stone veneer is a non-structural cladding. Its survival depends entirely on the tensile bond strength between the stone, the veneer stone mortar, and the substrate. Standard Type N or basic masonry cements are engineered for compression, not adhesion. When subjected to the thermal cycling, wind shear, and moisture fluctuations of modern exterior envelopes, standard mortars frequently delaminate.
To meet the demands of contemporary building codes and the National Veneer Masonry Association (NVMA) installation standards, modern formulations utilize polymer-modified veneer stone mortar. These blends incorporate redispersible polymer powders (RPP) and specialized cellulose ethers. The polymers create a flexible, high-tensile matrix that bridges micro-cracks, while the ethers retain water longer, ensuring complete cement hydration even when applied to highly absorbent manufactured stones or dense natural granites.
Selecting the Right Veneer Stone Mortar for Your Project
Choosing the correct product dictates the longevity of your installation. Below is a functional comparison of the three primary mortar categories used in stone cladding as of 2026.
| Mortar Type | Composition & Additives | Best Application | Bond Strength |
|---|---|---|---|
| Polymer-Modified Veneer Mortar | Portland cement, graded sand, RPP polymers, water-retention agents. | Interior/Exterior manufactured and natural stone veneer (Industry Standard). | High (Exceeds 400 psi tensile) |
| Type S Mortar | 2 parts Portland cement, 1 part lime, 9 parts sand. | Exterior scratch coats over metal lath; structural masonry. | Moderate (High compressive, low tensile) |
| Type N Mortar | 1 part Portland cement, 1 part lime, 6 parts sand. | Interior pointing and jointing only. Never for setting veneer. | Low |
For the actual setting of the stone, a pre-blended, polymer-modified veneer stone mortar (such as QUIKRETE® Veneer Stone Mortar or SPEC MIX® Stone Veneer Mortar) is mandatory for exterior applications and highly recommended for interior feature walls to prevent sagging.
Step-by-Step Mixing Protocol for Maximum Bond Strength
The physical properties of polymer-modified mortars are highly sensitive to water ratios and mixing times. Over-watering breaks the polymer chains, resulting in a weak, crumbly bed that will inevitably fail. Follow this strict protocol for an 80 lb (36.2 kg) bag:
- Prep the Equipment: Use a heavy-duty 1/2-inch drill with a mud-mixer paddle. Standard drill motors will burn out before achieving a homogeneous mix.
- Add Water First: Pour exactly 4.5 quarts of clean, potable water into a 5-gallon bucket. Never add water to the dry powder; add powder to the water to prevent dry clumps at the bottom.
- Incorporate the Powder: Slowly add the 80 lb bag of veneer stone mortar while the drill is running at a low speed (approx. 300 RPM).
- Initial Mix (3 Minutes): Mix until all dry pockets are eliminated. Scrape the sides and bottom of the bucket with a margin trowel.
- The Slaking Period (5 Minutes): Stop mixing and let the mortar rest. This 5-minute slaking period is non-negotiable. It allows the cellulose ethers to fully dissolve and the polymers to activate, drastically improving workability and water retention.
- Remix (2 Minutes): Remix the batch without adding any additional water. If the consistency is too stiff, add a maximum of 2 ounces of water and remix. The final product should hold a 2-inch peak when pulled up with a trowel (a "stand-up" test).
The Scratch Coat vs. Setting Bed: Application Techniques
A successful stone veneer installation requires a two-tier mortar system: the scratch coat to bond to the substrate, and the setting bed to bond to the stone.
Applying the Scratch Coat
Assuming you have properly installed a weather-resistive barrier (WRB) and 2.5 lb/sq yd self-furring galvanized wire lath per The Masonry Society guidelines, you are ready for the scratch coat. While some manufacturers allow direct application over specific approved substrates, a scratch coat remains the gold standard for exterior longevity.
- Thickness: Apply a 3/4-inch thick layer of Type S mortar or polymer-modified veneer stone mortar using a square-notch trowel.
- Scoring: While the mortar is still plastic (thumbprint-hard), score the surface horizontally with a coarse-bristle brush or a scratch rake. Horizontal grooves provide a mechanical key for the setting bed and help prevent vertical water channeling behind the stone.
- Curing: Allow the scratch coat to cure for a minimum of 24 to 48 hours before applying the setting bed. Mist the scratch coat lightly with water if ambient temperatures exceed 80°F to prevent rapid moisture loss.
Buttering and Setting the Stone
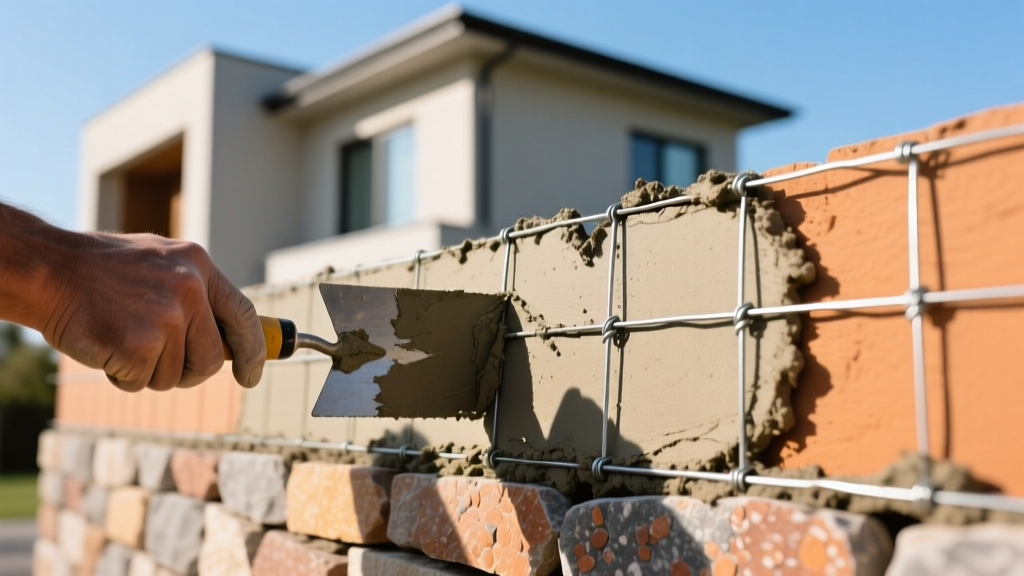
The setting bed is where the specific properties of veneer stone mortar shine. Apply a 1/2-inch layer of fresh mortar directly over the cured scratch coat using a masonry trowel. Work in small sections (no more than 10 square feet at a time) to prevent the mortar from skinning over before the stone is placed.
The Back-Buttering Mandate: Every single stone must be back-buttered. Use a trowel to scrape a 1/8-inch layer of mortar onto the back of the stone, ensuring the mortar is forced into any pores or clefts. Press the stone firmly into the wall bed with a slight twisting motion until mortar squeezes out uniformly around the perimeter. This peripheral squeeze-out is your visual confirmation of 100% edge adhesion, which is critical for preventing moisture infiltration behind the cladding.
Common Failure Modes and Troubleshooting
Even with premium materials, poor site practices lead to catastrophic failures. Use this diagnostic matrix to identify and correct issues during the installation process.
| Symptom | Root Cause | Corrective Action |
|---|---|---|
| Stone slides or sags before initial set. | Mortar over-watered; ambient temperature too high; stone too heavy for bed thickness. | Reduce water ratio. Use temporary bracing (shoring) for heavy natural stones. Work in cooler morning hours. |
| White, powdery efflorescence on stone face. | Water trapped behind veneer; lack of weep screeds; using unbuffered acid cleaners. | Ensure weep screeds are clear at the base. Dry-brush efflorescence. Never use muriatic acid on manufactured stone. |
| Mortar joints crumble when tooled. | Tooling joints too early (before mortar is thumbprint hard) or too late (fully cured). | Tool joints exactly when the mortar yields to moderate thumb pressure, typically 30-60 minutes after pointing. |
| Delamination at the lath interface. | Lath installed backwards (dimples not facing out); scratch coat applied too thin. | Tear down and reinstall. Self-furring lath must have the dimples pressing against the WRB to hold the lath 1/4" off the wall. |
Curing, Jointing, and Environmental Constraints
The chemical curing process of veneer stone mortar is highly dependent on environmental conditions. Installation must only occur when ambient and surface temperatures are between 40°F (4°C) and 90°F (32°C). If temperatures are forecasted to drop below 40°F within 48 hours of installation, you must employ heated enclosures and use warm water (up to 120°F) for mixing. Cold-weather masonry practices, as outlined by the Portland Cement Association, dictate that freezing mortar expands and permanently destroys the cementitious matrix.
For the final jointing, do not use the leftover setting bed mortar if it has begun to stiffen. Instead, mix a dedicated batch of pointing mortar or a Type N/S mortar specifically tinted to match your design specifications. Pack the joints tightly using a pointing trowel and a jointing tool, compacting the mortar to eliminate air pockets. Once the joints are tooled and the mortar has fully cured (typically 28 days for maximum strength, though walk-away time is 72 hours), apply a breathable, silane-siloxane penetrating sealer to the stone and mortar joints to repel bulk water while allowing internal moisture vapor to escape.
Written by
Priya KapoorPriya Kapoor is a real estate market analyst and construction economics researcher with expertise in housing affordability, development feasibility, and infrastructure investment. She holds a Master of Regional Planning from Cornell University and previously worked as a senior analyst at CBRE's Investment Properties group, where she modeled returns for $4B in mixed-use development pipelines. Priya now runs an independent research practice advising developers, municipalities, and REITs on construction cost forecasting and market timing. She publishes the quarterly "BuildMat Market Pulse" report tracking material price indices across 12 commodity categories. Based in Austin, TX, Priya serves on the board of Habitat for Humanity Austin and is a marathon runner.
More from Priya Kapoor
View all
Construction Cost
Cost to Build a 1600 Sq Ft Home in 2026: Full Breakdown
Accurate 2026 cost to build a 1600 sq ft home—material, labor, and regional pricing breakdowns included. Plan your budget with real-time estimates.
Aug 11, 2026

Wood & Lumber
Name the Types of Wood for Pressure Treatment and Preservation
Learn how to name the types of wood best suited for pressure treatment. Compare species treatability, chemical retention levels, and 2026 preservation costs.
Aug 4, 2026

Stone & Masonry
Stone Veneer Suppliers Lindenhurst: 2026 Cost Analysis
Analyze 2026 stone veneer costs in Lindenhurst, NY. Compare local supplier pricing, delivery fees, and Suffolk County installation labor rates.
Aug 4, 2026