Technical Specs for Veneer Stone Walls: Loads and Clearances
Master the technical specifications for veneer stone walls. Learn exact weight loads, moisture barrier requirements, and structural clearance limits.

Structural Load Capacities and Weight Limits
Adhered masonry veneer is classified as a non-structural exterior or interior cladding. According to the International Building Code (IBC) and guidelines published by The Masonry Society, the underlying structural framing must support the dead load of the veneer stone walls without exceeding specific deflection limits. The maximum allowable deflection for the backing wall or framing system is typically L/240, where L is the length of the span. Exceeding this deflection causes the rigid mortar matrix to crack, leading to unit detachment and moisture infiltration.
When calculating dead loads, contractors must differentiate between manufactured and natural stone products, as their densities vary significantly. Manufactured stone veneer (MSV) is composed of Portland cement, lightweight aggregates, and iron oxide pigments, making it considerably lighter than quarried natural stone.
| Material Classification | Average Dead Load (psf) | Max Deflection Limit | Standard Framing Requirement |
|---|---|---|---|
| Manufactured Stone Veneer (MSV) | 10 - 15 lbs / sq ft | L/240 | 2x4 wood studs @ 16" OC or 20-gauge steel |
| Natural Stone Veneer (Limestone/Sandstone) | 15 - 25 lbs / sq ft | L/240 | 2x6 wood studs @ 16" OC or 16-gauge steel |
| Natural Stone Veneer (Granite/Slate) | 25 - 35+ lbs / sq ft | L/360 | Engineered framing or structural masonry backup |
For multi-story commercial applications, the cumulative dead load of veneer stone walls must be transferred to the foundation via intermittent structural shelf angles or relieving shelves at every floor level. The IBC restricts the maximum height of adhered veneer supported solely by wood framing to 30 feet above the foundation, unless engineered steel ledger systems are integrated.
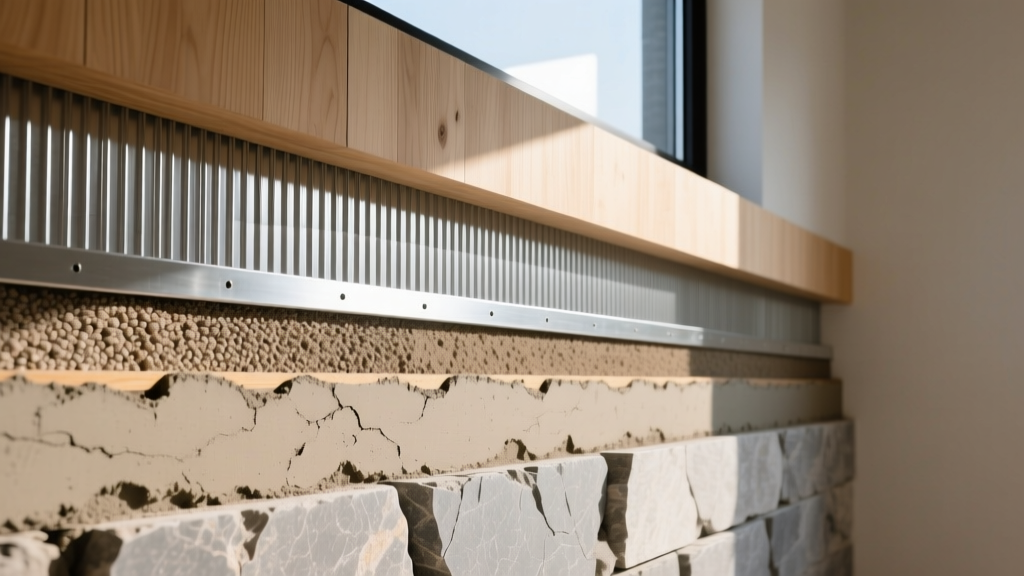
Moisture Management and Weather-Resistive Barriers (WRB)
Moisture entrapment is the primary failure mode for exterior veneer stone walls. Because cementitious mortars and stone units are highly porous, they absorb rainwater and hold it against the substrate. The International Code Council (ICC) mandates strict Weather-Resistive Barrier (WRB) configurations to prevent hydrostatic pressure from degrading the sheathing and wall cavity.
Applying adhered stone veneer directly over a single layer of synthetic housewrap (like Tyvek) is a critical code violation in most jurisdictions. The mortar scratch coat can bond to the synthetic wrap, tearing it during thermal expansion and compromising the drainage plane. Always use a dimpled drainage mat or the code-mandated two-layer felt paper system.
For exterior wood-frame construction, the standard technical specification requires one of the following WRB assemblies behind the metal lath:
- Option A (Traditional): Two independent layers of Grade D asphalt felt paper (ASTM D226, 60-minute rating). The first layer acts as the primary drainage plane, while the second layer sacrifices itself to the mortar scratch coat.
- Option B (Modern Drainage Mat): One layer of code-approved synthetic housewrap, covered by a 3/8-inch or 1/2-inch dimpled polypropylene drainage mat (e.g., Mortairvent or Keene Driwall). This creates a physical capillary break and an air gap, accelerating wall drying.
Lath, Scratch Coat, and Mortar Specifications
The mechanical bond between the substrate and the veneer stone relies entirely on the lath and mortar assembly. The Portland Cement Association provides baseline mix designs, but site conditions often dictate specific admixtures.
1. Metal Lath Installation
Use minimum 2.5 lb/sq yd self-furring, galvanized woven wire mesh or welded wire lath (ASTM C847). The self-furring dimples must hold the mesh 1/4-inch away from the WRB, ensuring the scratch coat fully encapsulates the wire. Fasten the lath using 1.5-inch galvanized roofing nails or 1.25-inch corrosion-resistant screws with lath washers, penetrating directly into the structural studs (not just the OSB/plywood sheathing) at a maximum spacing of 6 inches on center vertically and 16 inches on center horizontally.
2. The Scratch Coat Matrix
The scratch coat must be applied at a minimum thickness of 1/2-inch, completely covering the lath. Use Type S mortar for the scratch coat to ensure high tensile strength and flexibility. The standard volumetric mix ratio for Type S mortar is:
- 1 part Portland Cement (ASTM C150 Type I/II)
- 1/2 part Hydrated Lime (ASTM C207 Type S)
- 4.5 parts Damp, Loose Masonry Sand (ASTM C144)
While the scratch coat is still plastic, score it horizontally with a coarse rake or stiff brush to create deep grooves. This mechanical key is essential for the setting bed to grip. Allow the scratch coat to cure for a minimum of 24 to 48 hours, keeping it moist by misting with water to prevent rapid drying and shrinkage cracking.
3. Setting Bed and Pointing
Apply a 1/2-inch to 3/4-inch setting bed of Type S or Type N mortar to the back of each stone unit (back-buttering) and press firmly into a fresh mortar bed on the wall. Maintain joint widths between 1/2-inch and 1-inch, depending on the stone profile. Never use acidic cleaners to remove mortar smears from the stone face, as this can trigger efflorescence by driving soluble salts deep into the masonry pores.
Mandatory Clearances and Weep Hole Placement
Improper ground and roof clearances lead to capillary action, drawing groundwater and snowmelt directly into the bottom course of the veneer stone walls. This causes freeze-thaw spalling in cold climates and persistent efflorescence in humid regions. Adhere strictly to the following minimum clearance specifications:
- Exposed Soil Grade: Minimum 4 inches of clear space between the bottom of the stone veneer and the finished soil grade.
- Paved Surfaces / Concrete Flatwork: Minimum 2 inches of clear space above driveways, patios, or walkways.
- Rooflines and Gutters: Minimum 2 inches of clearance above shingles or metal roofing to prevent water damming and allow for roof maintenance.
- Decking Surfaces: Minimum 1/2 inch clearance above wooden or composite deck boards to ensure adequate airflow and prevent rot.
At the base of all exterior veneer stone walls, a corrosion-resistant weep screed (ASTM C847 minimum 0.019-inch thick galvanized steel) must be installed. The weep screed must feature minimum 3/32-inch diameter weep holes spaced no more than 33 inches apart to allow trapped moisture behind the WRB to drain out of the wall cavity.
Expansion and Control Joint Parameters
While adhered veneer stone walls are relatively thin, they are subject to thermal expansion, moisture expansion (in the clay backup or concrete block), and structural deflection. Control joints must be detailed in accordance with ASTM C1063 to isolate the veneer from structural movement.
Install continuous, sealed control joints in the veneer assembly at the following critical locations:
- Where the backing structure changes material (e.g., transitioning from wood framing to CMU or steel).
- At floor line transitions in multi-story construction where shelf angles are utilized.
- At the intersection of differing architectural planes, such as inside and outside corners, unless specifically engineered with interlocking corner units.
- To limit continuous wall panels to a maximum area of 144 square feet, with a maximum length-to-height ratio not exceeding 3:1.
Control joints must be backed by a closed-cell polyethylene foam rod and sealed with a high-performance, non-staining polyurethane or silicone sealant (ASTM C920 Class 25 or higher). Never bridge a structural control joint in the backup wall with continuous stone veneer; the joint must carry through the entire cladding assembly to the exterior face.
Written by
David NakamuraDavid Nakamura is a licensed architect (AIA) and construction technology writer focused on sustainable building methods, mass timber engineering, and high-performance building envelopes. He holds a Master of Architecture from the University of Washington and is a certified Passive House Consultant (CPHC). David spent eight years at the Seattle firm Mithun, where he led the design of three LEED Platinum projects, before founding his own practice specializing in net-zero residential design. He serves on the editorial advisory board of GreenBuilder Magazine and has authored peer-reviewed papers on cross-laminated timber (CLT) connections for the Journal of Structural Engineering. In his spare time, David teaches woodworking at Pratt Fine Arts Center and kayaks the Puget Sound.
More from David Nakamura
View all
Construction Cost
Labor Cost to Build a Deck Per Sq Ft: 2026 Installation Guide
Discover the exact labor cost to build a deck per sq ft in 2026. This installation guide breaks down contractor rates, complexity factors, and hidden fees.
Aug 4, 2026

Construction Cost
How Much Does It Cost to Build a 3 Bedroom House? Financing Guide
Learn exactly how much it costs to build a 3 bedroom house and explore 2026 financing options, construction loan types, and budget frameworks for your build.
Aug 4, 2026

Construction Cost
Cost to Build a Tennis Court: 2026 Guide
How much does it cost to build a tennis court in 2026? Breakdowns for asphalt, concrete, and synthetic surfaces plus fencing and lighting.
Jul 30, 2026