How to Repair Outdoor Siding Water Proof Wrap Material Properly
Learn how to diagnose, patch, and replace damaged outdoor siding water proof wrap material with expert protocols, material comparisons, and cost data.

Diagnosing Weather-Resistant Barrier Failures
The weather-resistant barrier (WRB) is the critical secondary drainage plane behind your exterior cladding. When this outdoor siding water proof wrap material fails, moisture bypasses the siding and infiltrates the structural sheathing, leading to OSB delamination, mold proliferation, and compromised framing. Identifying WRB failure requires moving beyond visual siding inspections and utilizing diagnostic building science tools.
Moisture Meter Thresholds and Infrared Thermography
Pin-type moisture meters (such as the Delmhorst J-2000 or Protimeter Timbermaster) are essential for quantifying substrate saturation. Wood moisture content (WMC) readings above 16% behind the WRB indicate active water intrusion and a high probability of fungal growth. Readings between 12% and 15% warrant further investigation via infrared thermography. FLIR thermal imaging cameras detect thermal anomalies caused by wet insulation or damp sheathing; wet areas typically appear cooler than dry surroundings during summer months due to evaporative cooling, and warmer during winter due to increased thermal conductivity.
According to the Department of Energy, maintaining a continuous air and water barrier is paramount for structural longevity and energy efficiency. If diagnostic tools confirm localized saturation, the exterior cladding must be carefully removed to expose and repair the compromised wrap.
Selecting the Right Outdoor Siding Water Proof Wrap Material
Repairing a damaged WRB requires matching the patch material to the existing system or upgrading to a higher-performance membrane if the original wrap is obsolete or severely degraded. Modern building codes, including the 2024 IECC, increasingly mandate drainable WRBs in high-rainfall climate zones.
| Material | Type | Permeability (Perms) | Cost per Sq. Ft. | Best Repair Use Case |
|---|---|---|---|---|
| DuPont Tyvek HomeWrap | Standard Non-Woven | 58 | $0.18 - $0.22 | Standard patching in low-to-moderate rainfall zones. |
| Benjamin Obdyke HydroGap | Drainable Spunbond | 68 | $0.35 - $0.42 | Upgrading flat wraps behind stucco, cedar, or fiber cement. |
| Henry Blueskin VP100 | Self-Adhered Membrane | 25 | $0.85 - $1.10 | Sealing high-risk penetrations, window bucks, and bottom plates. |
| Prosoco R-Guard FastFlash | Fluid-Applied | 18 | $1.20 - $1.50 | Complex geometries, irregular sheathing gaps, and deep reveals. |
When executing a repair, never mix incompatible chemistries. For instance, applying a fluid-applied acrylic membrane over an existing asphalt-impregnated felt paper will result in adhesion failure. Always verify the manufacturer's compatibility matrix before integrating new outdoor siding water proof wrap material with legacy substrates.
Step-by-Step Patching and Seaming Protocol
Proper installation of a WRB patch relies on strict shingle-lapping principles to ensure gravity sheds water outward, never inward. Follow this protocol for structural remediation:
- Expose and Assess: Remove the affected siding courses. Inspect the underlying OSB or plywood. If rot or delamination exceeds 10% of the surface area, cut out and replace the structural sheathing before addressing the wrap.
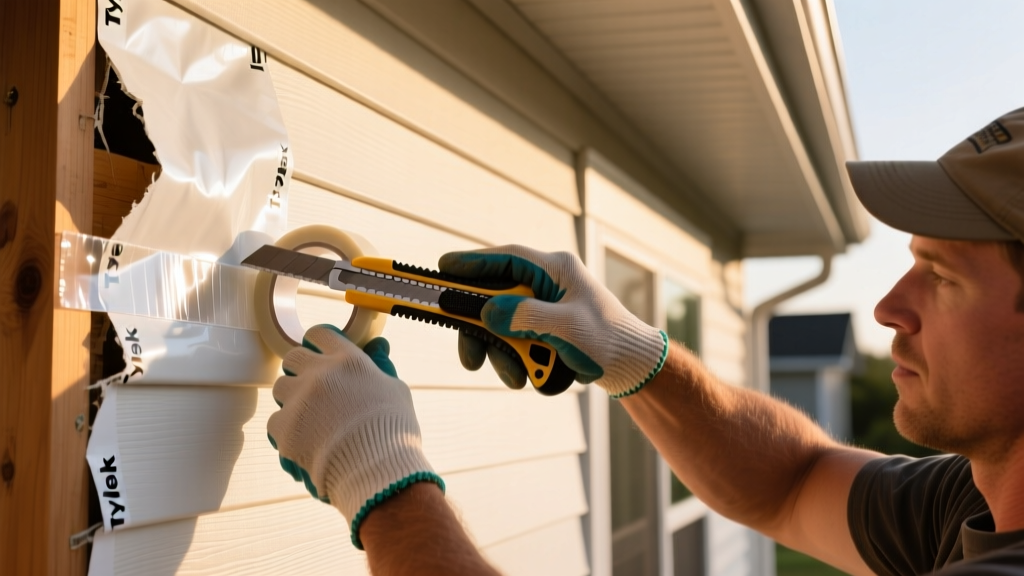
- Excise the Damaged Wrap: Using a sharp utility knife, cut out the torn or degraded section of the existing wrap. Make the top cut in an inverted 'V' or horizontal line, ensuring you do not cut into the sheathing.
- Prepare the Substrate: Clean the exposed sheathing and existing wrap edges with a stiff brush to remove dust, sawdust, and debris. Acrylic tapes will not adhere to dusty OSB.
- Install the Patch: Cut your replacement wrap to size. Slide the top edge of the patch under the existing upper WRB course (minimum 6-inch overlap). The bottom edge of the patch must lap over the existing lower WRB course (minimum 2-inch overlap). Side laps require a minimum 6-inch overlap.
- Tape the Seams: Seal all perimeter edges and seams using a code-listed, AAMA 711-13 compliant acrylic flashing tape (e.g., DuPont Tyvek Tape, Huber Zip System Tape, or Siga Fentrim). Apply firm, even pressure with a J-roller to activate the adhesive and ensure a continuous seal.
Flashing Integration and Edge Cases
The most common point of failure for outdoor siding water proof wrap material is not the field of the wall, but the integration with penetrations and terminations. When repairing wrap around windows, doors, and deck ledgers, the WRB must integrate seamlessly with rigid flashing.
For window repairs, implement the 'shingle-lap' method: the side WRB must overlap the side flanges of the window nailing fin, the bottom WRB must overlap the bottom fin, and the top WRB must overlap the top fin. If you are repairing a bottom-edge termination, ensure the wrap extends over the weep screed by at least 2 inches, but never wraps behind the weep screed, as this traps water inside the wall cavity. The Building Science Corporation emphasizes that managing hydrostatic pressure at these transitions is the primary function of a properly detailed drainage plane.
Repairing Tears from Fastener Over-Driving
Siding installers frequently over-drive nails or staples, tearing the wrap and creating direct pathways for wind-driven rain. If the field of the wrap is riddled with fastener tears, localized patching is insufficient. In these scenarios, apply a fluid-applied WRB (like Prosoco R-Guard Cat 5) directly over the damaged housewrap. Fluid-applied membranes bridge small tears and encapsulate errant fasteners, restoring the air and water barrier without requiring a full tear-off.
2026 Cost Breakdown for WRB Remediation
Remediation costs vary drastically based on the extent of the damage, the type of cladding being removed, and the accessibility of the work area. Below is a current cost matrix for professional WRB repair services:
- Localized Patching (Up to 100 sq. ft.): $350 – $600. Includes siding removal, sheathing treatment, wrap patching, and siding reinstallation.
- Sectional Re-Wrap (100 - 500 sq. ft.): $2.25 – $3.50 per sq. ft. Required when an entire wall plane exhibits systemic moisture intrusion.
- Full Envelope Tear-Off and Re-Wrap: $3.80 – $5.50 per sq. ft. Necessary during complete siding replacement or catastrophic envelope failure.
- Fluid-Applied Membrane Upgrade: Add $1.10 – $1.60 per sq. ft. to labor and material costs for transitioning from sheet goods to fluid-applied systems.
Note that scaffolding erection, lead-safe work practices (on pre-1978 homes), and disposal of rotted sheathing will add 15% to 25% to the base estimates above.
Frequently Asked Questions
Can I install new siding over a repaired wrap without replacing the whole barrier?
Yes, provided the existing wrap is largely intact, free of UV degradation (which occurs after 120-150 days of sun exposure), and the repaired sections are properly shingle-lapped and taped. If the original wrap is brittle or heavily faded, a full tear-off is required to guarantee code compliance.
Does building code require a drainable wrap for all siding types?
While the International Residential Code (IRC) mandates a water-resistive barrier behind all exterior veneers, specific drainable gaps (like the 1mm to 1.5mm gaps provided by Benjamin Obdyke HydroGap or Cedar Breather) are strictly required by code in certain jurisdictions when installing absorbent claddings like stucco, manufactured stone veneer, or untreated wood over OSB sheathing.
How long does acrylic flashing tape last compared to the wrap itself?
High-quality, AAMA 711-13 compliant acrylic tapes (such as Siga Fentrim or Zip System Tape) are engineered to match or exceed the 50-year lifespan of premium non-woven WRBs. However, their longevity is entirely dependent on proper surface preparation; applying tape to dusty, wet, or frozen sheathing will reduce the functional lifespan to less than five years.
Written by
Sarah WhitfieldSarah Whitfield is a chartered quantity surveyor (MRICS) and construction cost analyst with 15 years of experience in material pricing, procurement strategy, and project budgeting. She earned her degree in Construction Management from the University of Reading (UK) and has worked on projects ranging from $2M custom homes to $180M mixed-use developments across North America and Europe. Sarah currently leads cost estimating for BuildMat Insight, maintaining a proprietary database of 4,000+ material price points updated quarterly. She is a frequent contributor to RSMeans cost data panels and has presented at the International Cost Engineering Council (ICEC) congress. Based in Denver, CO, Sarah is an avid trail runner and volunteer mentor for Women in Construction.
More from Sarah Whitfield
View all
Wood & Lumber
What Are the Different Types of Wood? A Builder's Guide
Compare structural softwoods, finish hardwoods, and engineered lumber. Analyze Janka ratings, MOE values, and 2026 pricing for construction.
Aug 4, 2026

Walls & Panels
Steel Framing vs Wood Framing: Corrosion and Moisture Defense
Compare steel framing vs wood framing for moisture resistance. Learn about galvanized coatings, condensation risks, and corrosion protection strategies.
Jul 21, 2026

Stone & Masonry
How to Cut Stone Veneer: Wet Saw vs Grinder Comparison
Compare the best tools for cutting stone veneer. We review wet saws, angle grinders, and chop saws to help you achieve clean, chip-free cuts.
Jul 21, 2026