The Ultimate Vinyl Siding Material List: A Selection Framework
Master your exterior project with our comprehensive vinyl siding material list. Use this selection framework to choose panels, trims, and fasteners.
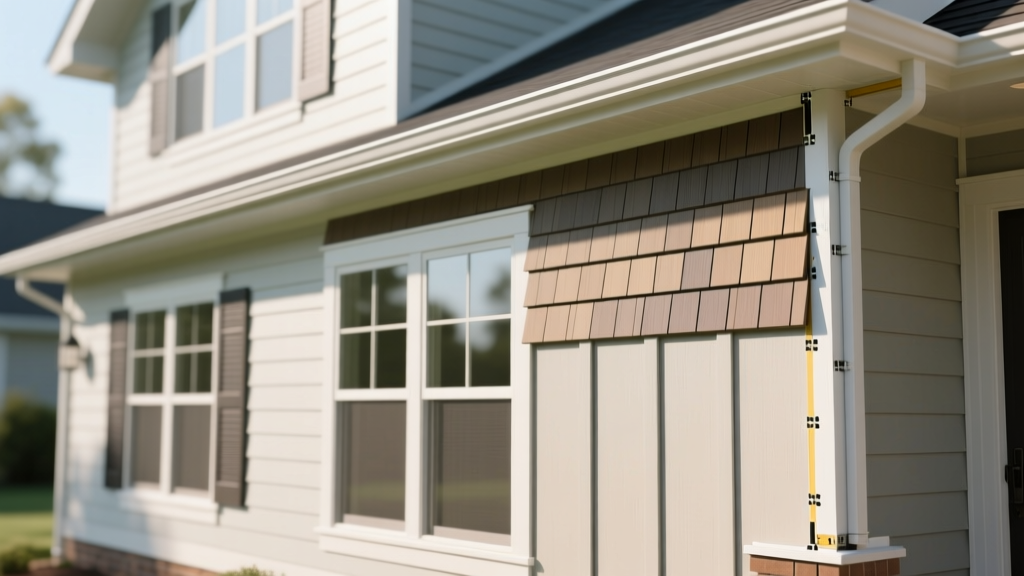
The Core Philosophy of the Vinyl Siding Material List
Most junior estimators and DIY homeowners make a critical error when planning an exterior renovation: they calculate the square footage of the wall planes and order an equivalent amount of siding panels. This approach guarantees mid-project delays, compromised water management, and voided manufacturer warranties. A professional vinyl siding material list is not merely a tally of panels; it is a comprehensive selection framework encompassing the entire weather-resistive barrier (WRB), structural attachment ecosystem, and thermal expansion management system.
To build a resilient, code-compliant exterior, you must source materials that meet ASTM D3679 (Standard Specification for Rigid Poly(Vinyl Chloride) (PVC) Siding) and integrate them into a cohesive drainage plane. Below is the definitive selection framework for procuring every component required for a premium vinyl siding installation.
Phase 1: Weather Barrier and Substrate Preparation
Vinyl siding is a cladding system, not a waterproof barrier. It is designed to shed the bulk of rainwater while allowing air circulation behind the panels to dry out any moisture that penetrates. The materials you select for the substrate dictate the longevity of the wall assembly.
Water-Resistive Barrier (WRB) Selection
- Standard House Wrap: For standard residential builds, a non-woven polyolefin wrap like DuPont Tyvek HomeWrap provides excellent liquid water resistance while maintaining high vapor permeability (58 perms).
- Drainable Wraps: In high-rainfall zones or when installing insulated vinyl siding (which restricts rear ventilation), upgrade to a drainable WRB with integrated spacer gaps, such as Tyvek CommercialWrap or Benjamin Obdyke HydroGap. This creates a capillary break and a 1mm to 1.5mm drainage channel.
Flashing and Seam Tapes
According to the Building Science Corporation, the majority of moisture intrusion occurs at penetrations, not through the field of the siding. Your material list must include:
- Acrylic Flashing Tape: 4-inch to 6-inch wide UV-resistant acrylic tape (e.g., Zip System Tape or Vycor Pro) for sealing WRB seams and window flanges.
- Z-Flashing: Galvanized steel or PVC Z-flashing for horizontal trim transitions, particularly where siding meets stone veneer or brick wainscoting.
- Kick-Out Flashing: Mandatory at roof-to-wall intersections to divert water away from the siding cavity and into the gutter.
Vinyl siding profiles have open corrugations at the bottom edge. If your material list does not include perforated metal or PVC closure strips (often called bug stops or weep hole screens) for the starter strip, you are inviting carpenter ants and wasps to nest in the wall cavity. Always order 10% more linear footage of closure strips than your starter strip requirement.
Phase 2: Panel Selection Matrix
When selecting the primary cladding, thickness, profile, and backing are the three variables that determine impact resistance, shadow lines, and thermal performance.
Thickness and Grade Specifications
Panel thickness is measured in mils (thousandths of an inch). The industry baseline is .040 inches, but this builder-grade material is prone to sagging on long runs and cracking under impact.
- .042 - .044 inches: Mid-grade residential. Acceptable for standard walls but requires strict 16-inch stud spacing for adequate support.
- .046 - .048 inches: Premium architectural grade (e.g., Mastic Quest or CertainTeed CedarBoards). Offers superior rigidity, deeper shadow lines, and higher wind-load ratings (often exceeding 180 mph).
Insulated vs. Hollow-Back Siding
Hollow-back vinyl is the traditional standard. However, insulated vinyl siding features a contoured EPS (expanded polystyrene) foam backing laminated to the panel. The ENERGY STAR Insulated Siding Guidelines note that while the foam adds an R-value of roughly 2.0 to 3.5, its primary structural benefit is filling the void behind the PVC. This eliminates the hollow sound of traditional siding, increases impact resistance by up to 300%, and allows for longer panel runs without buckling.
Phase 3: The Trim and Accessory Framework
The transition points are where a siding job either looks custom or looks cheap. Your material list must account for every termination point.
Essential Trim Inventory
| Trim Component | Function | Selection Criteria & Sizing |
|---|---|---|
| Starter Strip | Locks the bottom edge of the first course of siding. | Must match the lock mechanism of the chosen panel brand. Do not mix brands here. |
| J-Channel | Receives siding edges around windows, doors, and soffits. | Use 3/4-inch for standard windows; use 1-inch if adding exterior rigid foam insulation. |
| Corner Posts | Covers outside and inside 90-degree wall transitions. | Standard 5-inch or 6-inch widths. Fluted corners add architectural depth but cost 20% more. |
| Undersill Trim | Secures cut panels under windows and at soffits. | Essential for a tight fit. Includes built-in weep channels to drain condensation. |
| Utility Trim | Finishes the top edge of the final course at the soffit line. | Often paired with finish trim to create a clean, concealed top lock. |

Phase 4: Fastener Specifications and Thermal Dynamics
Vinyl expands and contracts significantly with temperature fluctuations. A 12-foot panel can expand by up to 5/8 of an inch between winter and summer. The Vinyl Siding Institute (VSI) mandates specific fastener protocols to accommodate this thermal movement.
The Fastener Material List
- Nail Type: Electro-galvanized steel or aluminum roofing nails. Never use bare steel or staples, which will rust and stain the PVC or fail to hold under wind uplift.
- Dimensions: 3/8-inch minimum head diameter, 1/8-inch shank diameter.
- Length: 1-1/2 inches for standard installations (penetrating the wood sheathing and stud by at least 3/4 inch). Upgrade to 2-inch or 2-1/2-inch nails if installing over rigid foam insulation or furring strips.
When estimating fastener quantities, calculate one nail every 16 inches in the center of the nailing hem. Crucially, the nail head must not be driven flush. Leave a 1/32-inch gap between the nail head and the PVC hem. If the nail is driven tight, the panel cannot slide laterally during thermal expansion, resulting in severe buckling and waviness across the facade.
Comprehensive Material Estimation Table
Use this framework to calculate your procurement quantities. Always factor in a waste percentage based on the complexity of the facade.
| Material Category | Unit of Measure | Waste / Overage Factor | Procurement Rule of Thumb |
|---|---|---|---|
| Siding Panels | Squares (100 sq ft) | 10% (Simple) to 15% (Complex) | Calculate total wall area, subtract windows/doors, add waste factor. |
| Starter Strip | Linear Feet | 5% | Measure total perimeter of the structure at the foundation line. |
| J-Channel | Linear Feet | 10% | Measure perimeter of all windows, doors, and soffit transitions. |
| Corner Posts | Linear Feet | 5% | Measure vertical height of all outside and inside corners. |
| House Wrap | Rolls (usually 9x150 ft) | 15% (for overlaps) | Calculate total wall area and add 15% for horizontal/vertical laps. |
| Fasteners (Nails) | Pounds | 10% | Approx. 1.5 lbs of 1-1/2" roofing nails per square of siding. |
Common Procurement Failures to Avoid
Even with a perfect material list, execution errors during purchasing can derail a project. Avoid these three critical mistakes:
1. Mixing Dye Lots
PVC siding color is extruded through the entire thickness of the panel (for premium lines) or capped. However, slight color variations occur between manufacturing runs. If you order 40 squares of siding and realize you are 3 squares short, ordering from a different dye lot will result in visible color banding on the facade. Always order your overage upfront from the same lot number, and store the excess in a climate-controlled garage to prevent UV fading before use.
2. Ignoring Soffit and Fascia Integration
Your vinyl siding material list must integrate with your soffit system. If you are using concealed-vent soffit panels, ensure your utility trim and F-channel selections are deep enough to accommodate the specific profile of the soffit material. Mismatched trim depths lead to exposed raw edges and compromised attic ventilation.
3. Underestimating Sealant Requirements
While vinyl siding relies on overlapping for water management, specific termination points require sealant. Do not use standard silicone, which does not adhere well to PVC and cannot be painted. Your material list must include 2 to 4 tubes of high-quality, paintable polyurethane or advanced polymer sealant (such as OSI Quad Max) for sealing J-channels to window frames and corner posts to masonry transitions.
Written by
David NakamuraDavid Nakamura is a licensed architect (AIA) and construction technology writer focused on sustainable building methods, mass timber engineering, and high-performance building envelopes. He holds a Master of Architecture from the University of Washington and is a certified Passive House Consultant (CPHC). David spent eight years at the Seattle firm Mithun, where he led the design of three LEED Platinum projects, before founding his own practice specializing in net-zero residential design. He serves on the editorial advisory board of GreenBuilder Magazine and has authored peer-reviewed papers on cross-laminated timber (CLT) connections for the Journal of Structural Engineering. In his spare time, David teaches woodworking at Pratt Fine Arts Center and kayaks the Puget Sound.
More from David Nakamura
View all
Construction Cost
Labor Cost to Build a Deck Per Sq Ft: 2026 Installation Guide
Discover the exact labor cost to build a deck per sq ft in 2026. This installation guide breaks down contractor rates, complexity factors, and hidden fees.
Aug 4, 2026

Construction Cost
How Much Does It Cost to Build a 3 Bedroom House? Financing Guide
Learn exactly how much it costs to build a 3 bedroom house and explore 2026 financing options, construction loan types, and budget frameworks for your build.
Aug 4, 2026

Construction Cost
Cost to Build a Tennis Court: 2026 Guide
How much does it cost to build a tennis court in 2026? Breakdowns for asphalt, concrete, and synthetic surfaces plus fencing and lighting.
Jul 30, 2026