Repairing Ceiling Sag: Understanding the Weight of 5 8 Gypsum Board
Learn how the weight of 5 8 gypsum board affects ceiling deflection. Expert troubleshooting steps for repairing sagging, cracked joints, and heavy drywall.

The Physics of Ceiling Deflection and Dead Load
Ceiling deflection is rarely just a cosmetic issue; it is a structural warning. When diagnosing sagging, cracked joints, or fastener pops in commercial or high-end residential builds, the sheer mass of the ceiling assembly is often the primary culprit. Understanding the exact weight of 5 8 gypsum board is critical for determining why a ceiling is failing and how to engineer a permanent repair.
Standard 5/8-inch gypsum board is dense and heavy, designed primarily for fire resistance (Type X) and acoustic dampening. However, this mass exerts a continuous gravitational pull on the framing members. According to the Gypsum Association's GA-216 guidelines, ceiling joists and trusses must be sized to support the dead load of the ceiling assembly without exceeding a deflection limit of L/240. When the dead load approaches this threshold, even minor environmental changes—like seasonal humidity spikes—can trigger visible sagging.
Data Highlight: 5/8-Inch Board Weight Profiles (4x12 Sheet)
- Standard 5/8" Type X: ~110 lbs (2.3 lbs/sq ft)
- Ultralight 5/8" Type X: ~82 lbs (1.7 lbs/sq ft) — A 25% reduction in dead load.
- Moisture-Saturated 5/8": 140+ lbs (Can exceed 3.0 lbs/sq ft)
Troubleshooting Matrix: Identifying Weight-Induced Failures
Not all ceiling defects stem from excessive weight. Use this diagnostic matrix to isolate whether the weight of 5 8 gypsum board is the root cause of the failure, or if the issue lies in framing movement or installation errors.
| Symptom | Root Cause | Weight Factor |
|---|---|---|
| Uniform sagging between joists (belly) | Joists spaced 24" OC with board installed parallel to framing. | High. The mass pulls the unsupported core downward. |
| Ridge cracking at butt joints | Truss uplift or differential deflection between adjacent joists. | Moderate. Heavy boards resist bending, transferring stress to joints. |
| Fastener pops (screw heads breaking paper) | Withdrawal failure due to dead load exceeding screw shear capacity. | High. Constant downward pull fatigues the gypsum core around the screw. |
| Localized drooping near HVAC vents | Condensation or minor leaks increasing board mass. | Extreme. Moisture multiplies the base weight of the board. |
Step-by-Step Repair Protocol for Overloaded Ceilings
When the structural framing is sound but the ceiling is sagging due to the sheer mass of the material, pushing the board back up and adding more screws is a temporary fix. The gypsum core has already fractured microscopically, and the paper face is delaminated. A proper repair requires material substitution and framing reinforcement.
- Assess and Remove the Compromised Section: Cut out the sagging drywall at least 16 inches past the visible deflection on all sides, ensuring you land on the center of a joist or blocking. Use a rotary tool to avoid damaging the underlying wiring or HVAC ducts.
- Reinforce the Framing Matrix: If the original framing was spaced at 24 inches on center (OC) and the heavy board was installed parallel to the joists, install 1x3 wood furring strips or resilient hat channels perpendicular to the joists at 16 inches OC. This creates a secondary support grid that distributes the dead load across multiple truss chords.
- Calculate the New Dead Load: Before installing the patch, verify the truss capacity. If the ceiling already carries multiple layers of drywall, plaster, or heavy acoustic textures, the original framing may be maxed out. Consult the American Wood Council's span tables to verify the joists can handle the replacement material.
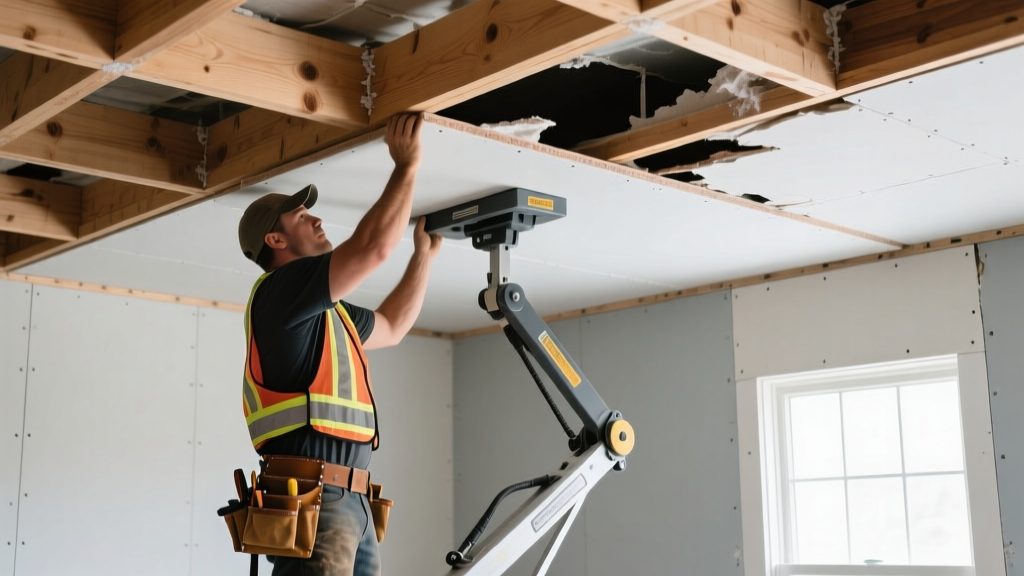
- Install Ultralight 5/8-Inch Type X: Replace the standard heavy board with an ultralight 5/8-inch fire-rated alternative (such as USG Sheetrock UltraLight Panels Firecode X). These boards utilize a specialized aerated gypsum core and fiberglass mesh, reducing the weight of 5 8 gypsum board by up to 25% while maintaining the exact same 1-hour fire rating per ASTM E119. A 4x12 ultralight sheet weighs roughly 82 lbs compared to 110 lbs for standard, drastically reducing the continuous gravitational pull on the framing.
- Fasten with Precision: Use #6 coarse-thread drywall screws, 1-5/8 inches in length. Space them 12 inches OC along the field and 8 inches OC on the edges. Ensure the screw head dimples the paper without breaking it, maximizing the withdrawal resistance.
Fastener Pull-Through and Adhesive Failure
When troubleshooting nail or screw pops on a ceiling, inspectors often blame seasonal temperature changes. However, in assemblies utilizing standard 5/8-inch drywall, fastener failure is frequently a direct result of dead load fatigue. A standard #6 drywall screw driven into a spruce-pine-fir (SPF) joist has a withdrawal resistance of roughly 130 lbs per inch of penetration.
If the board was installed without construction adhesive, the entire weight of 5 8 gypsum board is supported solely by the friction and shear strength of the fasteners. Over time, the constant downward force causes the gypsum core around the screw shank to slowly pulverize. This enlarges the hole, reduces friction, and eventually allows the screw head to pull through the paper face.
Repair Strategy: For localized fastener pops caused by weight fatigue, do not just re-drive the screw. Drive a new screw 2 inches away from the popped fastener into solid core material, then inject a high-tack, elastomeric drywall adhesive (like Green Glue or PL Premium Polyurethane) into the gap between the board and the joist. The adhesive cures to form a structural bond that transfers the dead load from the screws to the continuous glue line, permanently halting the downward creep.
The Hidden Multiplier: Moisture Intrusion
Gypsum (calcium sulfate dihydrate) is inherently hygroscopic. In environments with high ambient humidity, or in the event of a minor, undetected roof leak, the gypsum core will absorb moisture from the air or direct water contact. This absorption fundamentally alters the structural dynamics of the ceiling.
When standard 5/8-inch drywall absorbs moisture, its mass can increase by 25% to 40%. A 110 lb sheet can quickly become a 150 lb liability. This sudden spike in the weight of 5 8 gypsum board exceeds the design load of standard residential ceiling trusses, leading to rapid, catastrophic deflection. Furthermore, moisture degrades the bond between the paper face and the gypsum core, reducing the board's flexural strength by more than half.
Moisture-Specific Troubleshooting Steps
- Moisture Meter Testing: Use a pin-type moisture meter on the sagging area. Readings above 12% indicate moisture intrusion. Standard drywall must be replaced if it has been wet; it cannot be dried and reused safely.
- Switch to Glass Mat Gypsum: If the sagging is occurring in a high-humidity zone (e.g., above an indoor pool, commercial kitchen, or unconditioned attic space), replace the paper-faced drywall with fiberglass-mat faced gypsum board (such as Georgia-Pacific DensGlass). The fiberglass mat does not absorb moisture, preventing the weight multiplication effect and maintaining structural rigidity even at 90% relative humidity.
- Vapor Barrier Verification: Ensure a continuous polyethylene vapor barrier (minimum 6-mil) is installed between the drywall and the framing in cold climates to prevent interior moisture from migrating into the cold ceiling cavity and condensing on the back of the gypsum board.
Written by
Marcus ChenMarcus Chen is a licensed structural engineer (PE) and building materials analyst with over 12 years of experience across residential, commercial, and industrial construction. He holds a Master of Science in Civil Engineering from UC Berkeley and spent six years at Thornton Tomasetti before transitioning to independent consulting and technical writing. Marcus specializes in material selection for seismic-prone regions, concrete reinforcement strategies, and lifecycle cost analysis. His work has been cited by the American Concrete Institute (ACI) and the Structural Engineers Association of California (SEAOC). When he is not on a job site or at his desk, you will find him hiking the Sierra Nevada or restoring a 1920s craftsman bungalow in Oakland, CA.
More from Marcus Chen
View all
Construction Cost
How Much Did the Eiffel Tower Cost to Build?
How much did the Eiffel Tower cost to build in 1889? We adjust for inflation and compare its budget to modern skyscraper construction.
Aug 4, 2026

Fire Resistance
What Is a Fire Resistant Material? Testing & Certification Guide
Discover what is a fire resistant material through ASTM and UL testing. Learn how fire ratings, certifications, and assemblies work in construction.
Aug 4, 2026

Construction Cost
How Much Did the Burj Khalifa Cost to Build?
How much did the Burj Khalifa cost to build? We break down the $1.5B project and extract 5 money-saving strategies for your next build.
Jul 30, 2026