How Dimensions of Gypsum Board Affect Installation Techniques
Learn how the dimensions of gypsum board dictate framing, fastening, and finishing techniques for flawless drywall installation.

The Core Matrix: Standard Dimensions of Gypsum Board
The physical dimensions of gypsum board are not arbitrary manufacturing choices; they are engineered to align with standard wood and steel framing spacings (16-inch and 24-inch on-center). Selecting the wrong dimension for a specific framing layout or environmental condition leads to structural sagging, fastener pops, and excessive finishing labor. According to the Gypsum Association, matching board thickness, width, and length to the underlying substrate is the first critical step in any drywall installation.
| Thickness | Standard Widths | Available Lengths | Primary Installation Application |
|---|---|---|---|
| 1/4-inch | 48 in. | 8 ft. - 12 ft. | Curved walls, skimming over existing plaster, double-layer systems. |
| 3/8-inch | 48 in. | 8 ft. - 10 ft. | Double-layer residential partitions, remodeling over existing surfaces. |
| 1/2-inch | 48 in., 54 in. | 8 ft. - 16 ft. | Standard single-layer residential walls and ceilings (16 in. OC framing). |
| 5/8-inch | 48 in., 54 in. | 8 ft. - 16 ft. | Commercial partitions, fire-rated assemblies (Type X), 24 in. OC ceilings. |
Thickness Variations and Fastening Protocols
Thickness directly dictates the fastening schedule, screw length, and framing tolerance. Installing 1/2-inch board on 24-inch on-center (OC) ceiling joists using standard fastening protocols will result in visible sagging within 12 to 18 months due to gravity and ambient humidity, unless a specialized "no-sag" 1/2-inch product is utilized.
1/4-Inch and 3/8-Inch: The Overlay and Curve Techniques
Quarter-inch board lacks the structural rigidity to span open framing. It must be installed over a solid backing or an existing layer of drywall/plaster. When installing 1/4-inch board for curved walls (minimum radius typically 10 feet for dry bending, 5 feet for wet bending), fasteners must be spaced no more than 6 inches apart on studs and 8 inches on intermediate framing. For double-layer systems, the 3/8-inch base layer is typically attached with 1-inch screws, while the face layer is secured with 1-5/8-inch screws, ensuring the second layer penetrates the wood framing by at least 5/8-inch.
1/2-Inch vs. 5/8-Inch: Structural and Fire-Rated Fastening
Standard 1/2-inch gypsum board requires 1-1/4-inch coarse-thread drywall screws for wood framing and 1-inch fine-thread screws for 25-gauge steel studs. Fastener spacing is strictly regulated: maximum 16 inches on-center in the field and 8 inches on the edges for ceilings; 16 inches in the field and 12 inches on edges for walls. USG installation guidelines mandate that for 5/8-inch Type X fire-rated board, screw length must increase to 1-5/8-inch to ensure adequate penetration and maintain the 1-hour or 2-hour fire resistance rating tested under ASTM E119.
Never install standard 1/2-inch gypsum board perpendicular to ceiling joists spaced 24 inches on-center. The board will deflect between joists over time. If 24-inch OC framing is present, you must upgrade to 5/8-inch board or specify a high-strength 1/2-inch ceiling board engineered with reinforced fiberglass mats to resist sagging.
Width Constraints: The 48-Inch Standard vs. the 54-Inch Advantage
While 48-inch wide boards are the industry default, 54-inch wide boards represent a massive efficiency gain for specific room geometries. The 54-inch dimension was engineered specifically to address 9-foot ceilings (108 inches total height).
- The 48-Inch Problem: On a 9-foot ceiling installed horizontally, two 48-inch boards cover 96 inches, leaving a 12-inch gap. This requires ripping a 12-inch strip from a third board, creating two horizontal butt joints (which lack tapered edges and are notoriously difficult to finish invisibly).
- The 54-Inch Solution: Two 54-inch boards stacked horizontally equal exactly 108 inches. This completely eliminates the horizontal butt joint and the need to rip narrow strips, reducing finishing labor by up to 30% on 9-foot ceiling projects.
When installing 54-inch boards horizontally, the framing must still be 16 or 24 inches OC. However, installers must ensure that the horizontal seam falls precisely on the center of a framing member or is backed with a continuous 1x4 furring strip to prevent edge deflection during taping.
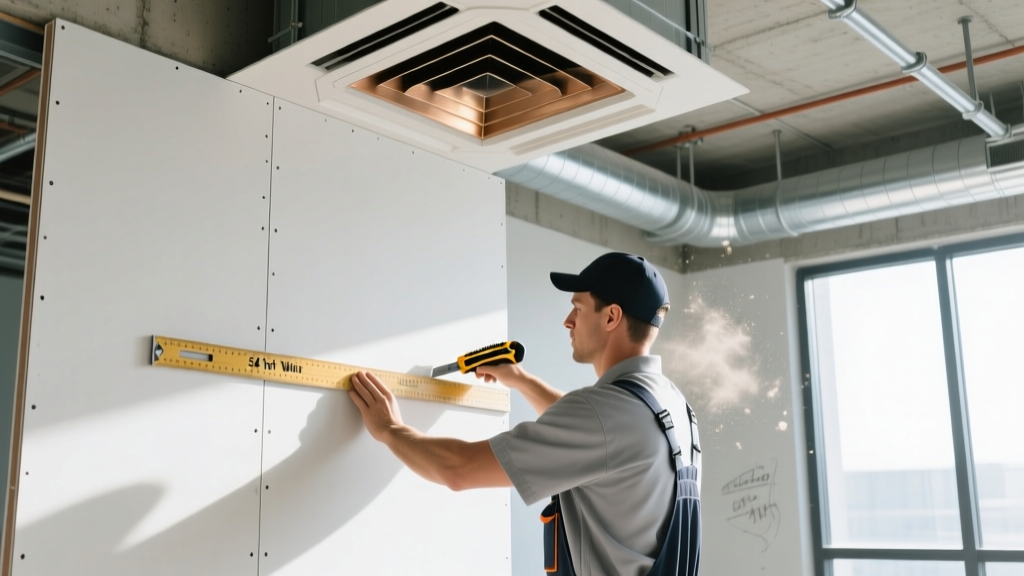
Length Logistics: Managing 8-Foot to 16-Foot Sheets
Gypsum board length determines the frequency of butt joints. Because the short ends of gypsum board are blunt (non-tapered), every butt joint requires a wide, skill-intensive feathering process to hide the hump. Minimizing butt joints is the primary driver for selecting longer boards.
Decision Framework: Selecting Board Length by Room Size
- Rooms under 120 sq. ft. (e.g., standard 10x12 bedroom): Use 12-foot boards. A 10x12 room requires exactly four 12-foot boards per wall, resulting in zero vertical butt joints.
- Large open-concept areas (walls exceeding 14 feet): Use 16-foot boards. While 16-foot sheets weigh over 110 lbs (for 5/8-inch) and require mechanical panel lifters and three-person crews, they eliminate mid-wall seams that would otherwise require extensive level-5 skim coating to hide.
- Corridors and hallways: Always run boards parallel to the long axis of the hallway. Use continuous lengths to avoid transverse butt joints in narrow, highly lit areas where shadows will expose imperfect taping.
Advanced Cutting and Fitting Techniques by Dimension
The dimensions of the board dictate the cutting methodology. Scoring and snapping works efficiently for cuts up to 4 feet in length. For longer rip cuts on 12-foot or 16-foot boards, scoring the face paper and attempting to snap the core often results in a jagged, uneven edge that ruins the factory taper.
For long rip cuts on 5/8-inch board, professional installers utilize a drywall router with a 1/4-inch single-flute bit, guided by a straightedge or a router base plate riding against the adjacent wall. When cutting 54-inch boards to fit around complex HVAC registers, the "blind cut" technique is required: apply lipstick or transfer marker to the register flange, press the board against it to transfer the outline, and cut the opening with a keyhole saw, ensuring a 1/8-inch expansion gap around the metal ductwork.
Common Installation Failures Linked to Dimensional Mismanagement
Ignoring the relationship between board dimensions and environmental or structural factors leads to predictable callbacks. Industry manufacturers like CertainTeed emphasize that dimensional stability is compromised when installation protocols are violated.
| Failure Mode | Dimensional Cause | Corrective Installation Technique |
|---|---|---|
| Framing Telegraphing | Using 1/2-inch board over uneven 24-inch OC framing. | Switch to 5/8-inch board for rigidity, or shim framing to within 1/8-inch tolerance before hanging. |
| Edge Blisters | Butt joints falling between framing members (floating joints). | Ensure all blunt ends land on a stud/joist, or install proprietary butt-joint backing clips to create a recessed floating seam. |
| Corner Cracking | Leaving a gap larger than 1/4-inch at inside corners due to inaccurate length cuts. | Pre-measure and factory-cut ends should be kept at corners; score-cut ends should be placed in the field where they can be tapered. |
Mastering the dimensions of gypsum board requires looking beyond the tape measure. It demands an understanding of how a 54-inch width alters ceiling seam placement, how a 5/8-inch thickness changes screw penetration requirements, and how a 16-foot length eliminates the most vulnerable joints in a drywall assembly. By aligning material dimensions with precise framing and fastening techniques, installers ensure a monolithic, crack-free finish that meets both structural and aesthetic standards.
Written by
James ThorntonJames Thornton is a construction industry veteran with 25 years of hands-on experience in wood framing, lumber grading, and residential building codes. He started as a framing carpenter in rural Oregon, earned his ICC Residential Building Inspector certification, and eventually became a senior plan reviewer for the City of Portland Bureau of Development Services. James holds a B.S. in Wood Science & Technology from Oregon State University and is a certified lumber grader through the West Coast Lumber Inspection Bureau (WCLIB). He has inspected over 3,000 residential construction sites and authored the city's internal guide on advanced framing techniques (2x6 at 24" O.C.). James lives in Bend, OR, where he builds custom timber-frame cabins and competes in lumberjack sports.
More from James Thornton
View all
Insulation
Best Home Insulation Materials: Complete 2026 Guide
Compare top home insulation materials for 2026. Find R-values, installed costs per square foot, and best uses for fiberglass, spray foam, and mineral wool.
Aug 4, 2026

Sustainable Building
Certify Your Green Building Material for LEED and WELL
Step-by-step guide to certifying a green building material for LEED v5 and WELL v2. Master EPDs, HPDs, and VOC limits for 2026 project specifications.
Aug 4, 2026

Stone & Masonry
Veneer Stacked Stone Panels: Interior Design & Style Showcase
Discover how veneer stacked stone panels transform interiors. Explore modern design profiles, material pairings, and technical installation specs.
Aug 4, 2026