Troubleshooting Drywall Repairs: Matching Gypsum Board Size
Fix bulging or recessed drywall patches. Learn how to match gypsum board size, thickness, and edge profiles for flawless, code-compliant wall repairs.

The Hidden Culprit Behind Failed Drywall Patches: Size Mismatches
When a drywall patch fails, contractors and DIYers typically blame the joint compound, the tape, or the finishing technique. However, the most common root cause of visible seams, bulging patches, and structural sagging in repaired walls is a fundamental mismatch in gypsum board size. While length and width dictate how much area a panel covers, it is the precise thickness and edge profile that determine whether a repair will disappear into the surrounding wall or telegraph through the paint for decades. According to the Gypsum Association, dimensional tolerances in gypsum board manufacturing are strict, but the real challenge lies in matching modern production sizes to older, settled, or previously modified framing. Troubleshooting these size discrepancies requires moving beyond visual estimation and utilizing precise measurement tools, specialized shimming techniques, and an understanding of edge geometry.
Thickness Tolerances: Troubleshooting the Most Common Repair Flaw
Gypsum board thickness is not a suggestion; it is a structural and fire-rating requirement. The standard thicknesses available in the North American market are 1/4-inch (6.4mm), 3/8-inch (9.5mm), 1/2-inch (12.7mm), and 5/8-inch (15.9mm). When repairing a damaged section, substituting a 1/2-inch board for a 5/8-inch ceiling creates a 1/8-inch recess. While a novice might attempt to fill this 1/8-inch gap entirely with joint compound, doing so violates the Association of the Wall and Ceiling Industry (AWCI) guidelines for maximum compound thickness, inevitably leading to shrinkage cracks, map-cracking, and a heavy, sagging patch.
Conversely, installing a 5/8-inch patch into a 1/2-inch wall creates a bulge that cannot be sanded down without exposing the paper face of the drywall. To troubleshoot a recessed patch where the wrong thickness was already installed, do not rely on mud. Instead, remove the patch and install 1/8-inch lauan wood shims or specialized high-density foam drywall shims directly to the backing studs or joists before re-securing the correct 5/8-inch board. If the patch is already taped and mud is applied, you must route out the center of the patch using a drywall router with a 1/4-inch flush-trim bit to reduce the gypsum core thickness, leaving only the face paper and a thin layer of backing to sit flush with the surrounding 1/2-inch wall.
Never substitute 1/2-inch standard gypsum board for 5/8-inch Type X fire-rated board when repairing a garage ceiling or multi-family partition wall. Doing so compromises the 1-hour fire resistance rating mandated by the International Building Code (IBC), creating a severe life-safety hazard and liability issue.
Standard Gypsum Board Sizes vs. Repair Applications
Understanding the exact dimensional specifications of gypsum board is critical for selecting the right material for specific repair scenarios. The table below outlines standard sizes, their actual manufactured dimensions, and their specific repair use cases.
| Nominal Thickness | Actual Thickness | Standard Panel Sizes | Primary Repair Application | Tolerance Fix Strategy |
|---|---|---|---|---|
| 1/4" (6.4mm) | 0.25" | 4' x 8' | Curved walls, arches, skim-coating over existing damaged plaster. | Layer two sheets with adhesive for 1/2" equivalence. |
| 3/8" (9.5mm) | 0.375" | 4' x 8' | Patching older pre-1970s homes, double-layer renovations. | Shim with 1/8" lath to match modern 1/2" walls. |
| 1/2" (12.7mm) | 0.50" | 4' x 8', 4' x 10', 4' x 12' | Standard interior wall patches, residential ceiling repairs. | Sand high spots; use setting compound for low spots. |
| 5/8" (15.9mm) | 0.625" | 4' x 8', 4' x 12' | Fire-rated assemblies, soundproofed partitions, commercial ceilings. | Never compromise; remove and replace if incorrect size used. |
Tapered vs. Square Edges: Why Edge Profile Ruins Flat Repairs
Beyond thickness, the edge profile of the gypsum board size you choose dictates the success of the finishing stage. Nearly all 4x8 sheets sold at big-box retailers feature Tapered Edges (TE). The long edges are recessed by approximately 1/16-inch to allow joint tape and compound to sit flush with the face paper. This is ideal for joining two full sheets together. However, when cutting a small 12x12 inch patch from the center of a TE board, all four sides of your patch will lack this taper, effectively creating a square edge that sits proud of the tapered seam areas, or worse, you might cut a patch that includes only a partial taper, creating an uneven, wavy transition.
For small to medium patches (under 24 inches), a Square Edge (SE) board is vastly superior. SE boards have no recessed edges, meaning a cut patch will sit perfectly flush on all sides with the surrounding wall's face paper. Because SE boards are harder to find in standard retail stores, professional contractors often source them from specialized USG Corporation suppliers or order them in bulk. If you are forced to use a TE board for a small patch, you must manually route a shallow bevel onto all four cut edges using a drywall rasp or router to mimic the factory taper, ensuring the joint compound has a physical recess to lock into without building up above the wall plane.
Step-by-Step Troubleshooting Guide for Bulging and Recessed Patches
If you are evaluating an existing repair that is failing due to size mismatches, follow this diagnostic and corrective workflow:
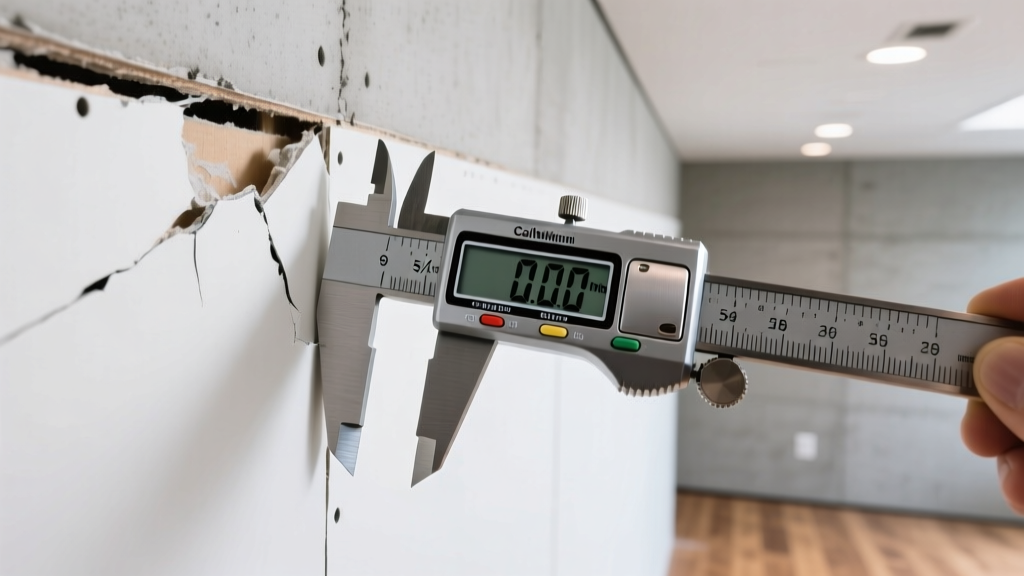
- Measure with Precision: Do not use a standard tape measure. Use a digital caliper to measure the exposed edge of the existing wall board and the installed patch. A difference of even 1/16-inch will telegraph under side-lighting.
- Identify the Failure Mode: Run a 12-inch drywall taping knife flat across the patch. If the knife rocks, the patch is too thick (bulging). If light passes under the center of the knife, the patch is too thin (recessed).
- Correcting a Bulge (Over-sized Thickness): If the patch is 5/8" in a 1/2" wall, score the face paper of the patch and carefully peel it back. Use a drywall rasp to aggressively shave down the exposed gypsum core until the caliper reads exactly 0.50 inches. Re-glue the face paper with PVA adhesive, or simply apply a layer of fiberglass mesh tape and a high-build setting compound like Durabond 45 to re-establish the face.
- Correcting a Recess (Under-sized Thickness): If the patch is 1/2" in a 5/8" ceiling, drive 1-1/4" drywall screws through the patch into the joists to temporarily hold it. Score the perimeter with a utility knife, pry the patch out, and staple 1/8-inch lauan wood shims to the joists. Re-install a properly sized 5/8" Type X patch.
- Pre-Fill the Gaps: Before applying any tape, pre-fill any gaps wider than 1/4-inch between the patch and the existing wall with a 20-minute setting compound. Standard drying-type joint compound will shrink and crack if used to bridge large sizing gaps.
Expert Sourcing: Where to Find Odd-Sized and Specialty Repair Boards
One of the greatest frustrations in drywall repair is sourcing the correct gypsum board size for non-standard applications. Big-box stores typically only stock 1/2-inch TE boards in 4x8 dimensions. For specialized repairs, you must look to professional lumber yards and architectural supply houses. For repairing curved walls or arches, 1/4-inch flexible gypsum board is required; this board features a specialized fiberglass mesh backing that allows it to bend around radii as tight as 32 inches without snapping the core. For repairing small, damaged areas where cutting a full sheet is wasteful, many suppliers now sell pre-cut 2x2 or 2x4 patch panels. These are often manufactured with square edges specifically for repair work, eliminating the tapered-edge headache entirely. Always verify the manufacturing date on specialty boards, as gypsum cores can degrade and become brittle if stored in unconditioned warehouses for extended periods, compromising the integrity of your repair.
Written by
Priya KapoorPriya Kapoor is a real estate market analyst and construction economics researcher with expertise in housing affordability, development feasibility, and infrastructure investment. She holds a Master of Regional Planning from Cornell University and previously worked as a senior analyst at CBRE's Investment Properties group, where she modeled returns for $4B in mixed-use development pipelines. Priya now runs an independent research practice advising developers, municipalities, and REITs on construction cost forecasting and market timing. She publishes the quarterly "BuildMat Market Pulse" report tracking material price indices across 12 commodity categories. Based in Austin, TX, Priya serves on the board of Habitat for Humanity Austin and is a marathon runner.
More from Priya Kapoor
View all
Construction Cost
Cost to Build a 1600 Sq Ft Home in 2026: Full Breakdown
Accurate 2026 cost to build a 1600 sq ft home—material, labor, and regional pricing breakdowns included. Plan your budget with real-time estimates.
Aug 11, 2026

Wood & Lumber
Name the Types of Wood for Pressure Treatment and Preservation
Learn how to name the types of wood best suited for pressure treatment. Compare species treatability, chemical retention levels, and 2026 preservation costs.
Aug 4, 2026

Stone & Masonry
Stone Veneer Suppliers Lindenhurst: 2026 Cost Analysis
Analyze 2026 stone veneer costs in Lindenhurst, NY. Compare local supplier pricing, delivery fees, and Suffolk County installation labor rates.
Aug 4, 2026