Gypsum Board Edge Trim Dimensions & Material Specifications
Master gypsum board edge trim specifications with exact dimensions for J-beads, L-beads, and corner profiles to ensure flawless drywall finishes.

Technical Overview of Gypsum Board Edge Trim
Selecting the correct gypsum board edge trim requires precise alignment between the trim profile, the panel thickness, and the environmental conditions of the installation. Edge trim—encompassing J-beads, L-beads, U-beads (reveals), and bullnose profiles—serves as the critical termination point for drywall systems. When dimensions are mismatched or material specifications are ignored, the result is predictable: edge cracking, fastener pop-outs, shadowing through the paint, and in commercial builds, the invalidation of UL fire-rated assemblies.
This guide details the exact metallurgical, dimensional, and installation specifications required for gypsum board edge trim, referencing ASTM C1047 (Standard Specification for Accessories for Gypsum Wallboard) and manufacturer technical data from USG Architectural Products.
Material Specifications & Metallurgical Standards
Edge trim is manufactured in three primary material classes, each with distinct physical properties that dictate where and how they should be used.
Galvanized Steel Trim
Steel trim remains the industry standard for commercial and high-abuse residential applications. Per ASTM C1047, steel accessories must be formed from hot-dipped galvanized steel sheet conforming to ASTM A653.
- Base Metal Thickness: Standard duty is 0.015 inches (approx. 28 gauge); heavy-duty impact-resistant profiles require 0.021 inches (approx. 24 gauge).
- Zinc Coating: Minimum G60 designation (0.60 ounces of zinc per square foot of surface area) to prevent rust bleed-through when covered with alkaline joint compound.
- Yield Strength: Minimum 33,000 psi to resist deformation during the taping and mudding process.
Rigid Vinyl (PVC) Trim
Vinyl trim is specified for high-humidity environments, coastal regions, and curved wall terminations where steel would corrode or fail to bend.
- Wall Thickness: Minimum 0.040 inches for structural rigidity; premium impact-resistant vinyl reaches 0.060 inches.
- Flexural Modulus: Typically 350,000 to 400,000 psi, allowing the bead to absorb minor structural deflections without permanent deformation.
- Thermal Expansion: PVC expands at approximately 28 x 10⁻⁶ in/in/°F. This is nearly four times the expansion rate of steel (6.5 x 10⁻⁶ in/in/°F). Installers must leave a 1/4-inch expansion gap at floor and ceiling intersections for every 10 linear feet of vinyl trim to prevent bowing.
Paper-Faced Trim
Paper-faced trims feature a 130# kraft paper face bonded to a vinyl or steel core. The paper integrates seamlessly with the gypsum panel's face paper, eliminating the 'photographing' effect where the metal edge casts a shadow under certain lighting conditions. The core must maintain a minimum thickness of 0.015 inches to provide a true, straight arris.
Never substitute standard 1/2-inch edge trim on a 5/8-inch Type X fire-rated gypsum board assembly. Using undersized trim exposes the unprotected core at the termination point, violating UL Design U419 and similar fire-stop assemblies. Always match the trim depth exactly to the board thickness specified in the UL directory.
Dimensional Breakdown by Profile Type
The dimensional accuracy of the flange and the bead depth determines the volume of joint compound required and the final visual quality of the edge. Below is the standard dimensional matrix for mud-on and nail-on edge trims.
| Profile Type | Flange Width | Bead/Reveal Depth | Compatible Board Thickness | Application Method |
|---|---|---|---|---|
| J-Bead (Square Edge) | 1-1/16" | 1/2" or 5/8" | 1/2", 5/8" | Mud-on or Nail-on |
| L-Bead (Tear Drop) | 1-1/16" or 3/4" | 1/2" or 5/8" | 1/2", 5/8" | Mud-on (1-1/16"), Nail-on (3/4") |
| U-Bead (Reveal) | 1-1/16" | 1/2", 5/8", 3/4" | 1/2", 5/8" | Mud-on |
| Bullnose (Radius) | 1-1/16" | 3/8", 1/2", 3/4" radius | 1/2", 5/8" | Mud-on |
Flange Width Selection: Mud-On vs. Nail-On
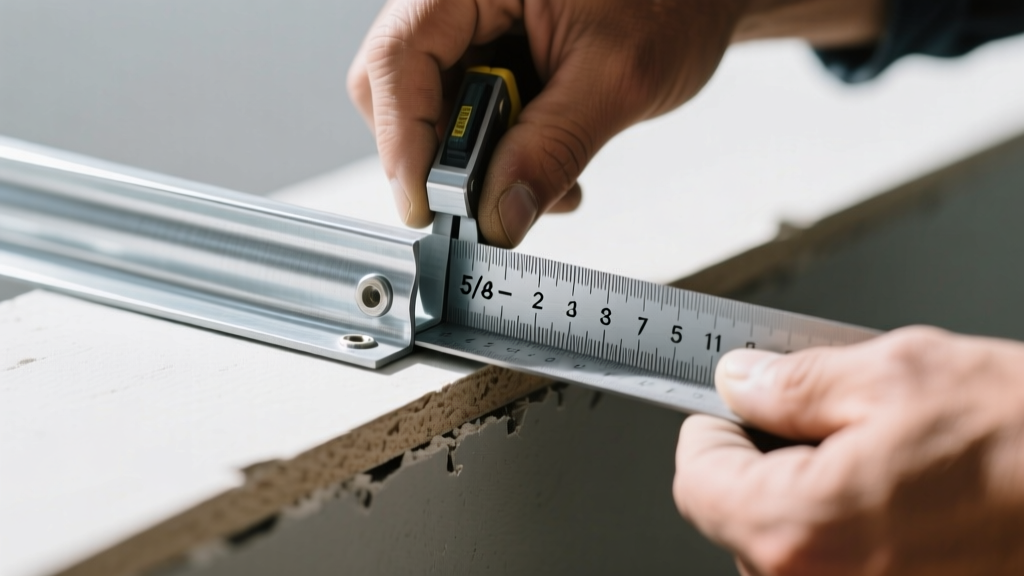
The distinction between mud-on and nail-on flanges is critical for structural integrity. Nail-on L-beads require a minimum 3/4-inch flange to provide adequate surface area for 7/16-inch galvanized staples or 1-1/8-inch drywall screws. If a 1-1/16-inch mud-on flange is mechanically fastened, the fastener head will sit too close to the arris (the corner edge), causing the metal to deform and creating a visible ridge that cannot be hidden with joint compound.
Mud Yield and Finishing Calculations
Understanding the volumetric requirements of different edge trims prevents material shortages and ensures consistent drying times. Joint compound shrinks as it cures; therefore, deeper profiles require multiple coats to prevent edge-cracking due to shrinkage tension.
For every 100 linear feet of trim, calculate your joint compound requirements as follows:
• Standard J-Bead / L-Bead: ~1.5 gallons of taping compound, ~1.0 gallon of topping compound.
• 3/4" Reveal (U-Bead): ~2.5 gallons of taping compound (the deep reveal requires heavy backfilling to support the outer flange).
• 3/4" Bullnose: ~2.0 gallons of taping compound. Use a specialized radius trowel to maintain the exact curvature without flattening the profile.
When finishing bullnose trims, the radius dimension dictates the tooling. A 3/8-inch radius requires a flexible 4-inch taping knife to feather the inside curve, while a 3/4-inch radius can be finished with a standard 6-inch or 8-inch broad knife. Attempting to use a stiff, wide knife on a tight 3/8-inch radius will result in flat-spotting, destroying the shadow-line effect intended by the architect.
Fastening Specifications and Tolerances
Even the most precisely dimensioned gypsum board edge trim will fail if the fastening schedule is ignored. The Gypsum Association outlines strict tolerances for securing edge accessories to framing and substrate.
Mechanical Fastening (Nail-On Profiles)
- Fastener Type: 1-1/8-inch drywall screws for steel studs; 7/16-inch crown, 1-1/2-inch long galvanized staples for wood framing.
- Spacing: Maximum 9 inches on center along the flange.
- Edge Distance: Fasteners must be placed no less than 1/4-inch from the edge of the flange to prevent tearing the metal or vinyl.
- Countersinking: Screw heads must be driven flush or slightly dimpled into the flange without breaking the paper face of the underlying gypsum board. A protruding screw head on an L-bead flange will require an additional 1/16-inch of joint compound across the entire wall to feather out, drastically increasing material costs and sanding time.
Adhesive and Mud-On Installation
For mud-on profiles, the trim is embedded directly into a continuous ribbon of taping compound. The compound must be applied at a minimum thickness of 1/16-inch beneath the entire flange. Air pockets left under the flange will result in 'drummy' spots that crack under minor structural vibration. For vinyl trims, a spray adhesive (specifically formulated for PVC) can be used to hold the bead in place while the joint compound cures, eliminating the need for mechanical fasteners and reducing the risk of rust bleed.
Common Failure Modes from Dimensional Mismatches
Field failures in drywall terminations are rarely due to defective materials; they are almost exclusively the result of dimensional mismatches during procurement and installation.
- The 'Shadow Line' Defect: Occurs when a 1/2-inch J-bead is forced onto a 5/8-inch board. The installer attempts to bridge the 1/8-inch gap with joint compound. Because compound shrinks upon drying, the thick edge layer pulls away from the trim, creating a hairline crack parallel to the edge.
- Reveal Collapse: When installing U-bead reveals adjacent to heavy doors or elevator shafts, the 1/2-inch reveal depth lacks the structural mass to resist impact. Specifying a 3/4-inch deep reveal with a heavy-duty 0.021-inch steel core prevents the reveal from crushing when struck by carts or equipment.
- Vinyl Bowing: As noted in the thermal expansion section, failing to cut vinyl trim 1/4-inch short of the ceiling track in a 10-foot run will cause the trim to buckle outward when the building's HVAC system cycles and the ambient temperature rises.
By strictly adhering to the dimensional matrices and material specifications outlined above, contractors and specifiers can eliminate edge-related callbacks, maintain fire-rating compliance, and deliver architecturally precise drywall terminations.
Written by
David NakamuraDavid Nakamura is a licensed architect (AIA) and construction technology writer focused on sustainable building methods, mass timber engineering, and high-performance building envelopes. He holds a Master of Architecture from the University of Washington and is a certified Passive House Consultant (CPHC). David spent eight years at the Seattle firm Mithun, where he led the design of three LEED Platinum projects, before founding his own practice specializing in net-zero residential design. He serves on the editorial advisory board of GreenBuilder Magazine and has authored peer-reviewed papers on cross-laminated timber (CLT) connections for the Journal of Structural Engineering. In his spare time, David teaches woodworking at Pratt Fine Arts Center and kayaks the Puget Sound.
More from David Nakamura
View all
Construction Cost
Labor Cost to Build a Deck Per Sq Ft: 2026 Installation Guide
Discover the exact labor cost to build a deck per sq ft in 2026. This installation guide breaks down contractor rates, complexity factors, and hidden fees.
Aug 4, 2026

Construction Cost
How Much Does It Cost to Build a 3 Bedroom House? Financing Guide
Learn exactly how much it costs to build a 3 bedroom house and explore 2026 financing options, construction loan types, and budget frameworks for your build.
Aug 4, 2026

Construction Cost
Cost to Build a Tennis Court: 2026 Guide
How much does it cost to build a tennis court in 2026? Breakdowns for asphalt, concrete, and synthetic surfaces plus fencing and lighting.
Jul 30, 2026