Gypsum Board Installation Cost Breakdown & Selection Guide 2026
Discover the exact 2026 gypsum board installation cost per square foot. Compare material grades, labor rates, and hidden expenses for your drywall project.
The Real Economics of Drywall: Beyond the Sheet Price
Calculating the true gypsum board installation cost requires looking far beyond the sticker price of a 4x8 panel at the lumber yard. In 2026, the total installed cost is a composite of material grade, site logistics, fastener density, and—most significantly—the specified finishing level. While a standard sheet of 1/2-inch regular gypsum board might retail for $12 to $15, the labor to hang, tape, mud, and sand that same sheet to a Level 4 finish will multiply the material cost by a factor of four to six.
According to the Gypsum Association, selecting the correct board type for the specific environmental and structural demands of a room prevents catastrophic failure modes like mold remediation or fire code violations, which dwarf initial installation savings. This guide deconstructs the exact pricing variables, labor rates, and material matrices you need to budget accurately for residential and commercial drywall projects.
2026 Material Cost Matrix by Gypsum Board Type
Material selection dictates the baseline of your budget. Prices below reflect 2026 national averages for 4x8-foot sheets (32 square feet) purchased in standard builder quantities, excluding local delivery surcharges and regional lumber market fluctuations.
| Board Type | Thickness | Avg Sheet Price | Cost Per Sq Ft | Primary Application & Standard |
|---|---|---|---|---|
| Standard (Regular) | 1/2" | $12.00 - $15.00 | $0.38 - $0.47 | Interior walls/ceilings in dry areas (ASTM C1396) |
| Type X (Fire-Rated) | 5/8" | $16.00 - $21.00 | $0.50 - $0.66 | Garages, furnace rooms, multi-family separations |
| Moisture/Mold Resistant | 1/2" | $18.00 - $26.00 | $0.56 - $0.81 | Bathrooms, laundry rooms (Green/Purple facing) |
| Glass Mat (Tile Backer) | 1/2" | $24.00 - $32.00 | $0.75 - $1.00 | Wet areas, commercial showers, exterior soffits |
| Acoustic / Soundboard | 1/2" to 5/8" | $28.00 - $42.00 | $0.88 - $1.31 | Home theaters, bedroom partitions (viscoelastic polymer core) |
Labor Rates and Productivity Variables
Drywall labor is typically bifurcated into two distinct phases: hanging (fastening the boards to the framing) and finishing (taping, applying joint compound, and sanding). The Bureau of Labor Statistics tracks drywall installer wages, but real-world subcontractor pricing includes overhead, insurance, and profit margins, pushing the effective labor rate higher than base hourly wages.
Hanging Costs
- Walls: $0.40 to $0.70 per square foot. Crews can typically hang 1,500 to 2,500 square feet per day depending on room complexity.
- Ceilings: $0.60 to $1.10 per square foot. Ceiling work requires mechanical lifts, increases physical fatigue, and slows productivity by roughly 30% compared to vertical walls.
Finishing Costs
Finishing is where the budget expands. A skilled taper charges based on the specified finish level (detailed in the next section). Expect to pay between $1.20 and $3.50 per square foot for finishing, depending on whether the project requires a standard Level 4 paint-ready finish or a Level 5 skim coat for high-gloss lighting conditions.
Hidden Cost Drivers in Gypsum Board Selection
Contractors often submit bids that appear low, only to issue change orders for site-specific variables. When evaluating a bid or estimating a DIY project, factor in these hidden gypsum board installation cost drivers:
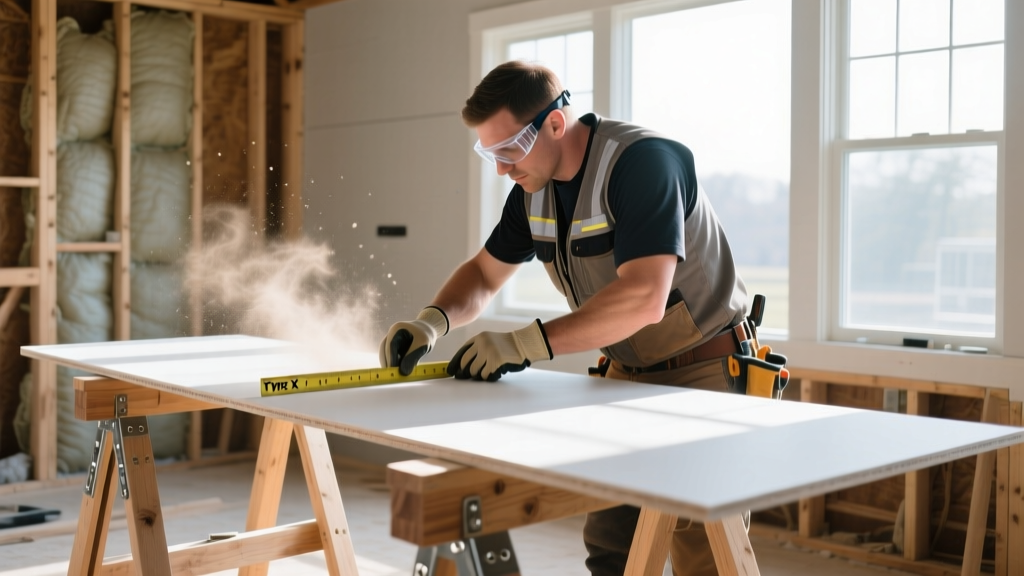
- Waste Factor: Standard rectangular rooms generate a 7% to 10% waste factor. Complex geometries with multiple corners, soffits, and window cutouts push waste to 15%. Always multiply your net square footage by 1.10 or 1.15 before purchasing materials.
- Consumables and Fasteners: Joint compound, paper or fiberglass mesh tape, corner bead, and drywall screws add approximately $0.12 to $0.18 per square foot to the total project cost. Specialty acoustic sealants and sound-damping clips will add another $0.50+ per square foot.
- Scaffolding and Equipment: For vaulted ceilings, stairwells, or commercial spaces exceeding 10 feet in height, scaffolding rental or hydraulic lift operation adds $0.10 to $0.25 per square foot.
- Dust Containment and Disposal: Sanding joint compound generates immense particulate matter. Using HEPA-filtered dust extraction systems (like the Hyde Dust Control system) adds a slight equipment premium but saves thousands in post-construction cleaning. Dumpster fees for drywall offcuts and mud buckets average $400 to $600 per 20-yard roll-off container.
The Finishing Level Multiplier
The Gypsum Association defines six levels of drywall finish. Specifying the wrong level is the most common cause of budget overruns and client disputes. Here is how finishing levels impact the final gypsum board installation cost.
| Finish Level | Description | Cost Adder (per sq ft) | When to Specify |
|---|---|---|---|
| Level 1 | Tape in joints, no mud over tape. | $0.40 - $0.60 | Plenums, above drop ceilings, concealed areas. |
| Level 2 | Tape embedded in mud, one coat over fasteners. | $0.70 - $0.90 | Garages, warehouses, areas where appearance is secondary. |
| Level 3 | Two coats of mud over joints/fasteners. | $1.00 - $1.30 | Walls receiving heavy texture or commercial wallcoverings. |
| Level 4 | Three coats, sanded smooth. Standard residential finish. | $1.40 - $2.00 | Standard residential walls, flat or eggshell paint. |
| Level 5 | Level 4 plus a full skim coat of mud over the entire board. | $2.50 - $3.50+ | Glossy paints, critical lighting (skylights, wall sconces). |
Decision Framework: Matching Board Grade to Project Budget
Use this framework to allocate your budget efficiently across different zones of a building. Not every wall requires premium materials.
Zone A: High-Moisture & Wet Areas (Bathrooms, Laundry)
Selection: Glass Mat Gypsum Board (e.g., Georgia-Pacific DensShield or USG Fiberock).
Rationale: While the material cost is nearly double that of standard green board, glass mat boards feature a water-resistant core and a fiberglass facing that eliminates the paper food source for mold. In a tiled shower surround, standard paper-faced moisture-resistant board will eventually delaminate if water penetrates the grout. The $150 premium for glass mat in a standard bathroom prevents $15,000 mold remediation disasters.
Zone B: Fire Separation Assemblies (Garages, Multi-Family Demising Walls)
Selection: 5/8-inch Type X Gypsum Board.
Rationale: Type X boards contain glass fibers and other additives that hold the calcined gypsum core together under extreme heat, achieving a 1-hour fire rating per ASTM E119. Do not attempt to substitute two layers of 1/2-inch standard board for a single layer of 5/8-inch Type X unless the specific UL assembly design explicitly permits it; the labor cost of hanging and finishing two layers will obliterate any material savings.
Zone C: Acoustic Privacy Zones (Bedrooms, Home Offices, Media Rooms)
Selection: Constrained-layer damping boards (e.g., CertainTeed SilentFX or USG QuietRock).
Rationale: These boards feature a viscoelastic polymer sandwiched between two thin gypsum cores. They cost roughly $45 to $60 per 4x8 sheet. However, installing a single layer of acoustic board on standard wood studs achieves an STC (Sound Transmission Class) rating of 50+. Achieving that same rating with standard board requires staggered studs, resilient channels, and multiple layers of standard drywall, which increases both material and labor costs significantly.
Expert Tips for Controlling Drywall Expenses
- Optimize Framing for Drywall Dimensions: Instruct framers to space studs at 16 inches on-center and ensure window/door headers align with standard 48-inch or 54-inch board widths. This minimizes "rips" (longitudinal cuts) and reduces the linear footage of taping required.
- Pre-Condition the Materials: Gypsum board must acclimate to the interior temperature and humidity of the building for at least 48 hours before hanging and finishing. Installing and taping cold boards in a heated space will cause the joints to "nail pop" and crack as the gypsum core expands, requiring expensive warranty callbacks.
- Consolidate Fastener Patterns: Adhere strictly to the manufacturer's fastening schedule (typically screws every 8 inches on ceilings and 12 inches on walls for wood framing). Over-screwing creates more dimples that the taper must fill with joint compound, increasing mud consumption and sanding time without adding structural value.
By understanding the interplay between board chemistry, labor productivity, and finish specifications, project managers and homeowners can accurately forecast the true gypsum board installation cost. Prioritizing the correct material grade for the specific environmental zone ensures long-term durability without artificially inflating the initial construction budget.
Written by
James ThorntonJames Thornton is a construction industry veteran with 25 years of hands-on experience in wood framing, lumber grading, and residential building codes. He started as a framing carpenter in rural Oregon, earned his ICC Residential Building Inspector certification, and eventually became a senior plan reviewer for the City of Portland Bureau of Development Services. James holds a B.S. in Wood Science & Technology from Oregon State University and is a certified lumber grader through the West Coast Lumber Inspection Bureau (WCLIB). He has inspected over 3,000 residential construction sites and authored the city's internal guide on advanced framing techniques (2x6 at 24" O.C.). James lives in Bend, OR, where he builds custom timber-frame cabins and competes in lumberjack sports.
More from James Thornton
View all
Insulation
Best Home Insulation Materials: Complete 2026 Guide
Compare top home insulation materials for 2026. Find R-values, installed costs per square foot, and best uses for fiberglass, spray foam, and mineral wool.
Aug 4, 2026

Sustainable Building
Certify Your Green Building Material for LEED and WELL
Step-by-step guide to certifying a green building material for LEED v5 and WELL v2. Master EPDs, HPDs, and VOC limits for 2026 project specifications.
Aug 4, 2026

Stone & Masonry
Veneer Stacked Stone Panels: Interior Design & Style Showcase
Discover how veneer stacked stone panels transform interiors. Explore modern design profiles, material pairings, and technical installation specs.
Aug 4, 2026