How to Repair Gypsum Board: Pro Methods for Holes, Cracks & Dents
Master how to repair gypsum board with pro techniques for nail pops, hairline cracks, and large holes. Includes exact compound types and patching steps.

Assessing the Damage: Categorizing Gypsum Board Failures
Gypsum board repairs fail when the wrong joint compound or tape is matched to the stress level of the damage. Before mixing any mud, categorize the failure into one of three structural tiers. Micro-fractures and hairline cracks are typically caused by building settlement or thermal expansion. Fastener failures, commonly known as nail pops or screw pops, occur when the wood framing shrinks or twists, pulling away from the gypsum core. Impact holes range from minor doorknob dents to large-scale structural breaches requiring rigid backing. According to USG's official drywall installation and finishing resources, treating a structural movement crack with standard drying-type compound guarantees a callback, as the material lacks the tensile strength to bridge active joints.
Material Selection: Setting-Type vs. Drying-Type Compounds
The most critical decision in gypsum board repair is selecting the correct joint compound. Drying-type compounds cure through water evaporation, meaning they shrink and require multiple coats. Setting-type compounds cure via a chemical reaction, resulting in a rock-hard, shrink-free finish that can be painted the same day.
| Compound Type | Brand Example | Cure Mechanism | Set/Dry Time | Best Use Case | Sandability |
|---|---|---|---|---|---|
| Setting-Type (Heavyweight) | USG DuraBond 90 | Chemical | 90 Minutes | Deep fills, structural backing, first coat over mesh tape | Poor (Very hard) |
| Setting-Type (Lightweight) | USG Easy Sand 45 | Chemical | 45 Minutes | Patching holes, quick repairs, filling nail pops | Moderate |
| Drying-Type (All-Purpose) | Sheetrock Plus 3 | Evaporation | 24 Hours | Topcoats, final skim coats, embedding paper tape | Excellent |
Precision Fixes: Nail Pops and Hairline Cracks
Nail pops are rarely caused by the nail itself backing out; they are caused by the lumber stud twisting or shrinking away from the gypsum panel. Simply hammering the nail back in is a temporary fix that will re-pop within weeks.
The Twin-Screw Method for Nail Pops
- Locate the center of the pop and drive a 1-1/4 inch Type W coarse-thread drywall screw exactly 2 inches above and 2 inches below the original fastener.
- Drive the screws until they slightly dimple the paper face without breaking it.
- Use a nail set and hammer to drive the original popped nail deep into the framing, locking the panel tightly against the stud.
- Fill the three dimples with a setting-type compound like Easy Sand 45. Because the panel is now mechanically locked by the twin screws, the compound will not crack under framing stress.
Raking and Taping Hairline Cracks
For hairline cracks, do not simply smear compound over the surface. Use a 5-in-1 painter's tool to rake out the crack into a V-groove, removing loose gypsum and paper fibers. Fill the V-groove with DuraBond 90. Once set, apply a thin layer of all-purpose compound and embed USG Perf-A-Tape paper tape. Paper tape offers superior tensile strength compared to fiberglass mesh for preventing crack recurrence.
Structural Rebuilding: Patching Holes from 4 to 12 Inches
Impact holes larger than 4 inches require a rigid backing system. The 'California Patch' (butterfly patch) works for holes up to 6 inches, but for anything larger, a cleat-backed patch is mandatory to prevent the repaired section from flexing when pushed.
Never use self-adhesive fiberglass mesh tape with standard drying-type all-purpose compound. The drying compound shrinks as water evaporates, pulling the mesh inward and causing 'blistering' or 'ridging' along the seam. If you use mesh tape (like FibaTape), you must embed it with a setting-type compound (DuraBond or Easy Sand) which does not shrink during its chemical cure. For detailed taping protocols, refer to Fine Homebuilding's comprehensive drywall patching guide.
Step-by-Step Cleat Backing Installation
- Use a drywall saw to cut the damaged area into a perfect square or rectangle. This makes measuring and cutting the replacement gypsum board significantly easier.
- Cut two strips of 1x3 pine or 1/2-inch plywood that are 3 inches longer than the height of your hole.
- Insert the wood strips into the wall cavity, centering them behind the left and right edges of the hole.
- Drive 1-1/4 inch drywall screws through the existing drywall into the wood strips every 4 inches. The wood now acts as an internal cleat.
- Cut a replacement piece of 1/2-inch gypsum board to the exact dimensions of the hole. Screw it into the exposed center of the wood cleats.
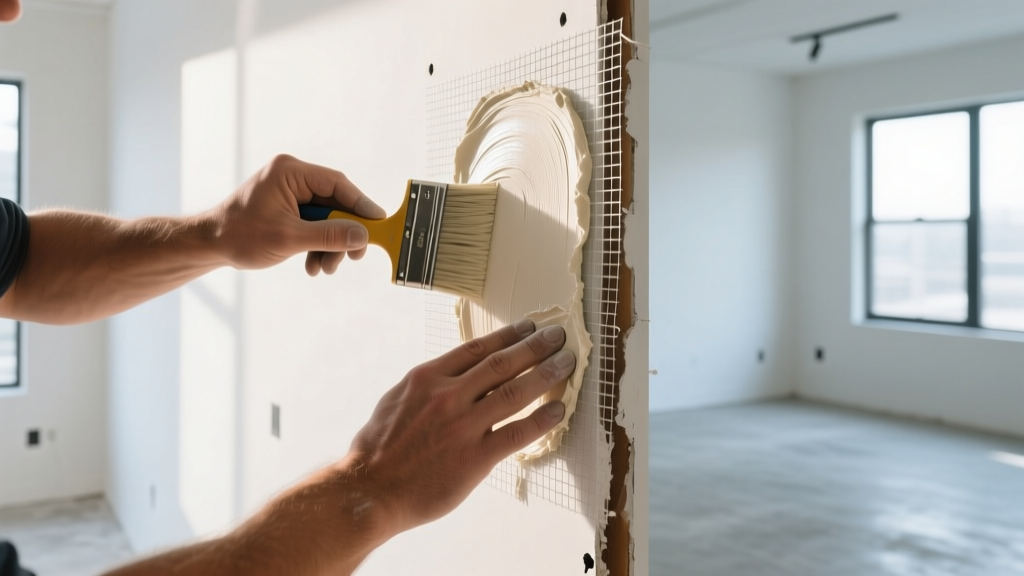
- Tape all four seams using paper tape and setting-type compound, followed by two topcoats of lightweight drying compound.
Sanding and Finishing: Achieving a Level 4 Surface
The difference between a visible patch and an invisible repair lies in the sanding technique. Amateurs often over-sand the center of the patch, creating a depression that catches light. Professionals use a technique called 'feathering' during the application phase to minimize sanding.
- First Sand (120-Grit): Use a pole sander with 120-grit aluminum oxide mesh screens to knock down high spots and ridges left by the taping knife. Do not sand down to the paper tape.
- Second Sand (150-Grit): Switch to a 150-grit screen to blend the edges of the joint compound into the surrounding gypsum paper face.
- Skim Coating: If the patch is in a high-gloss lighting area (like a hallway with wall sconces), apply a micro-thin skim coat of USG Sheetrock Brand UltraLightweight All-Purpose compound thinned with a small amount of water. This fills the microscopic pores of the replacement paper face, preventing 'flashing' (where the patch absorbs paint differently than the original wall).
Troubleshooting Common Repair Failures
Even experienced installers encounter finishing anomalies. Here is how to diagnose and correct the three most common gypsum board repair failures.
Flashing and Photographing
Symptom: The repair is physically smooth, but under directional lighting or when painted with semi-gloss paint, the patch is visible as a dull or shiny spot.
Cause: The porosity of the joint compound and the replacement drywall paper differs from the factory-painted surrounding wall.
Fix: You must prime the repair with a PVA (Polyvinyl Acetate) drywall primer sealer before applying architectural paint. PVA equalizes the porosity across the patch and the surrounding wall.
Ridging at Ceiling Perimeters
Symptom: A raised ridge appears where the ceiling gypsum board meets the wall, often cracking the tape.
Cause: Truss uplift. In winter, the top chords of roof trusses dry out and arch upward, pulling the ceiling drywall with them, while the partition walls remain stationary.
Fix: For new repairs, decouple the ceiling. Do not screw the ceiling drywall to the truss within 16 inches of the wall. Rely on the wall drywall to support the edge of the ceiling panel, allowing the truss to lift independently without cracking the joint.
Blistering Tape
Symptom: Paper or mesh tape bubbles away from the gypsum board surface after the compound dries.
Cause: Insufficient compound beneath the tape (starved joint), or using mesh tape with a high-shrinkage drying compound.
Fix: Cut out the blistered section with a utility knife. Apply a fresh, generous bed of setting-type compound and firmly embed a new piece of paper tape, squeezing out the excess mud with a 6-inch taping knife.
Written by
Elena RodriguezElena Rodriguez is a civil engineer and technical writer specializing in concrete technology, masonry systems, and ASTM/ACI compliance. She earned her B.S. in Civil Engineering from Texas A&M University and spent a decade at a materials testing laboratory, performing over 2,000 concrete compressive strength tests and masonry prism evaluations. Elena is an ACI-certified Field Testing Technician (Grade I) and a member of ASTM Committee C12 on Natural Building Stone. She currently consults on forensic engineering cases involving concrete failures and moisture intrusion. Based in San Antonio, TX, Elena is a proud member of the Society of Women Engineers (SWE) and coaches her daughter's FIRST Robotics team.
More from Elena Rodriguez
View all
Walls & Panels
Cost Analysis: Light Gauge Steel Framing Advantages and Disadvantages
Evaluate light gauge steel framing advantages and disadvantages through a strict cost analysis lens, comparing material, labor, and lifecycle expenses.
Aug 4, 2026

Walls & Panels
Gypsum Board Types: Exact Specifications, Thickness & Dimensions
Compare standard, Type X, and moisture-resistant gypsum board types. Get exact specifications, thicknesses, dimensions, and ASTM standards for your project.
Aug 4, 2026

Fire Resistance
Best Fire-Resistant Outdoor Decking Materials: 2026 Buyer Guide
Discover the best fire-resistant outdoor decking materials for 2026. Compare Class A PVC, aluminum, and hardwood options for WUI compliance and safety.
Aug 4, 2026