Gypsum Board Joint Tape Techniques for Flawless Level 5 Finishes
Master gypsum board joint tape application with advanced embedding techniques, structural comparisons, and troubleshooting for flawless Level 5 drywall finishes.

The Physics of Drywall Seams: Why Tape Selection Dictates Longevity
Drywall finishing is fundamentally an exercise in managing structural movement. When framing lumber dries from a 19% moisture content down to an interior equilibrium of 8%, the resulting shrinkage exerts immense shear force on gypsum board joints. The Gypsum Association's GA-216 standard explicitly notes that joint treatment systems must accommodate this dimensional instability. The gypsum board joint tape is not merely a cosmetic bridge; it is a structural reinforcement matrix designed to distribute tensile stress across the seam. Selecting the wrong tape or applying it with improper embedment depth guarantees eventual ridge formation, edge-fracturing, or catastrophic seam failure under cyclical HVAC loading.
Achieving a Level 5 finish requires the tape to become entirely monolithic with the gypsum core and paper facing. This monolithic bond relies on the mechanical interlocking of the joint compound into the porous fibers of the tape, combined with the capillary suction of the drywall edge. Understanding the exact mechanics of this bond separates professional finishers from amateur patchers.
Paper vs. Fiberglass Mesh: A Structural Comparison Matrix
The debate between paper and fiberglass mesh tape often devolves into subjective preference, but the material science dictates specific use cases. Fiberglass mesh offers superior application speed but lacks the longitudinal tensile strength of paper. Below is a technical comparison based on ASTM C475 testing parameters.
| Material Property | Paper Tape (e.g., USG Sheetrock) | Fiberglass Mesh (e.g., FibaTape) | Composite/PVC (e.g., Strait-Flex) |
|---|---|---|---|
| Longitudinal Tensile Strength | High (Resists shear cracking) | Low (Prone to longitudinal splitting) | Very High (Rigid structural bridge) |
| Moisture Resistance | Moderate (Degrades if chronically wet) | High (Inert fiberglass) | Very High (PVC/Laminate) |
| Required Embedment Compound | Drying-type (All-Purpose) or Setting | Setting-type ONLY (e.g., Durabond 90) | Setting-type or Heavy All-Purpose |
| Application Speed | Moderate (Requires buttering) | Fast (Self-adhesive backing) | Fast (Pre-creased, no folding) |
| Average Cost (500 ft roll) | $8.00 - $12.00 | $15.00 - $22.00 | $25.00+ (100 ft rolls for corners) |
Step-by-Step Embedding: The 3-Pass Trowel Method
Improper embedding is the primary cause of tape blisters and photographic ridging. The goal is to achieve a uniform 1/16" to 1/8" layer of compound beneath the tape, forcing out all trapped air while maintaining the structural integrity of the paper fibers. Follow this precise 3-pass method for flat butt and tapered joints.
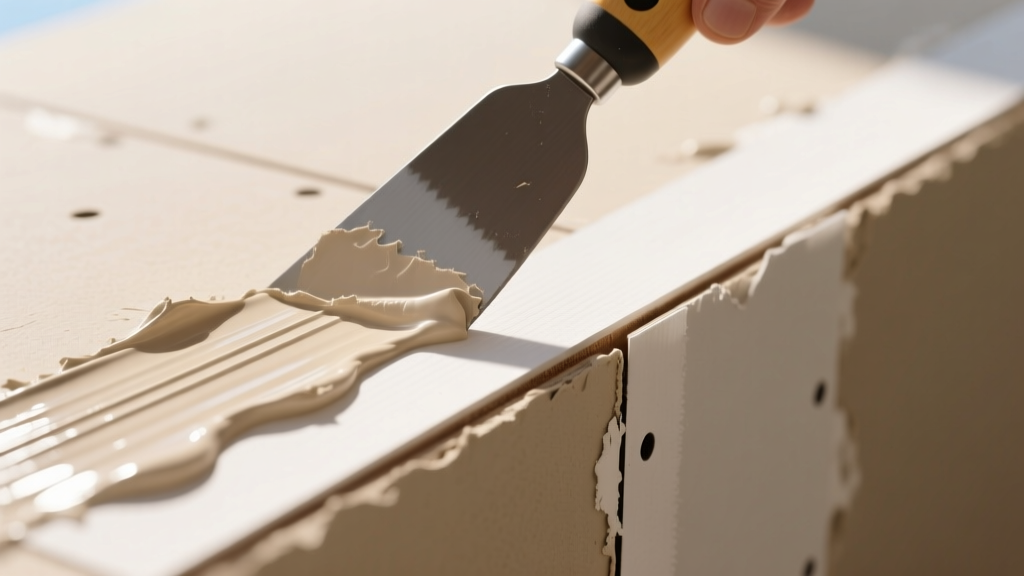
- The Buttering Pass: Apply a continuous, 3/8" thick bed of All-Purpose joint compound down the center of the joint using a 6" taping knife. Do not over-water the compound; it should hold a stiff peak. Over-thinning destroys the adhesive polymers in the mud.
- The Bedding Pass: Lay the gypsum board joint tape into the wet bed, keeping it centered. Using a 10" or 12" taping knife held at a strict 45-degree angle, pull the knife down the tape with approximately 15 pounds of downward pressure. This squeezes the compound through the micro-perforations in the paper, creating a mechanical lock. You should see small 'bleed-through' dots of mud on the face of the tape.
- The Skimming Pass: Immediately follow with a light, 15-degree angle skim pass to remove excess compound from the face of the tape. The tape should be visible through a paper-thin layer of mud. Leave the edges un-feathered for the second coat; premature feathering causes edge-lifting.
Novice finishers often dip paper tape in a bucket of water before embedding to 'make it stick better.' This is a critical error. Pre-wetting saturates the paper fibers, preventing the joint compound from penetrating the tape matrix. As the trapped moisture attempts to evaporate, it creates vapor pockets that manifest as permanent blisters. Always embed dry tape into a properly hydrated, factory-mixed compound.
Navigating Inside and Outside Corners with Pre-Creased Tape
Inside corners are highly susceptible to cracking due to the bi-directional movement of intersecting wall planes. Traditional paper tape requires on-site folding, which often results in micro-fractures along the crease and uneven mud distribution in the corner apex.
For production environments and high-end residential work, transition to composite pre-creased tapes like Strait-Flex Perfect-90 or Strait-Flex Original. These products feature a rigid PVC or laminated center hinge that maintains a perfect 90-degree angle while the flexible flanges conform to minor framing irregularities.
- Application Technique: Apply a heavy 1/2" bead of compound to both sides of the corner. Fold the composite tape and press it into the apex. Use a corner trowel or a flexible 6" knife to embed the flanges, pulling away from the corner to avoid tearing the hinge.
- Outside Corners: Do not use standard flat tape for outside corners. Utilize metal corner bead (crimped or nail-on) or paper-faced metal bead (e.g., Trim-Tex Magic Corner) for impact resistance. Paper-faced beads are embedded using the exact same buttering technique as flat seams, providing a superior, rust-proof finish edge.
Troubleshooting Common Tape Failures
When a seam fails, the root cause is almost always traceable to the initial taping phase. Use this diagnostic framework to identify and correct errors before the primer goes on.
Symptom: Tape Blisters (Air Pockets)
- Cause: Insufficient compound under the tape, excessive knife pressure squeezing out all the mud, or pre-wetting the tape.
- Fix: Slice the blister open with a utility knife, inject setting-type compound using a syringe or flexible putty knife, and squeegee flat. Do not attempt to patch over a blister with topping compound; it will telegraph through the paint.
Symptom: Photographic Ridging (Visible Seam Humps)
- Cause: Applying the second and third coats before the first coat has fully dried, trapping moisture that expands the gypsum core. Alternatively, failing to maintain a 1/8" gap between boards during hanging, forcing the tape to bridge a tight, zero-tolerance joint that pushes outward.
- Fix: Sand the ridge down to the tape face. Apply a wide, thin coat of lightweight topping compound (e.g., USG UltraLight) extending 24" to 30" on either side of the joint to artificially flatten the plane and fool the eye.
Symptom: Edge Lifting (Tape Peeling at the Margins)
- Cause: The edges of the tape were not fully embedded, or the drywall facing paper was heavily dusted with drywall routing debris, preventing chemical adhesion.
- Fix: Score the lifted edge, clean the dust with a damp sponge, and re-embed using a high-tack setting compound. Feather the repair out at least 12" laterally.
Material Costs and Coverage Rates for 2026 Projects
Accurate estimating requires understanding the coverage rates and material costs associated with different taping systems. Based on current 2026 supply chain data, here is a baseline for material costs per 1,000 square feet of drywall finishing (assuming standard 4x8 or 4x12 boards with approximately 1,100 linear feet of seams and corners).
According to the USG Installation Guides, a standard 1,000 sq ft layout requires approximately 2.5 to 3 gallons of taping compound, 1.5 gallons of topping compound, and roughly 1,200 linear feet of tape to account for waste and overlaps.
- Paper Tape System: $15 - $25 in tape costs per 1,000 sq ft. (Requires higher skill level, lower material cost).
- Fiberglass Mesh System: $35 - $50 in tape costs per 1,000 sq ft. (Requires more expensive setting-type compounds for the embedment coat, raising total chemical costs by roughly 15%).
- Composite Corner Tape: $80 - $120 per 1,000 sq ft (assuming 300 linear feet of inside corners). While the upfront material cost is 4x higher than folded paper, the labor savings of 30-40% on corner finishing easily justifies the expense in commercial and high-volume residential builds.
Mastering the application of gypsum board joint tape requires respecting the material limits of both the tape and the compound. By matching the correct tape profile to the specific joint geometry and strictly adhering to proper embedment pressures, finishers can eliminate callbacks and deliver monolithic, Level 5 surfaces that withstand years of structural and environmental stress.
For further reading on industry-approved tolerances and finishing levels, consult the Northwest Wall and Ceiling Bureau technical resources, which provide exhaustive guidelines on lighting conditions and paint sheens that dictate the required level of tape concealment.
Written by
Sarah WhitfieldSarah Whitfield is a chartered quantity surveyor (MRICS) and construction cost analyst with 15 years of experience in material pricing, procurement strategy, and project budgeting. She earned her degree in Construction Management from the University of Reading (UK) and has worked on projects ranging from $2M custom homes to $180M mixed-use developments across North America and Europe. Sarah currently leads cost estimating for BuildMat Insight, maintaining a proprietary database of 4,000+ material price points updated quarterly. She is a frequent contributor to RSMeans cost data panels and has presented at the International Cost Engineering Council (ICEC) congress. Based in Denver, CO, Sarah is an avid trail runner and volunteer mentor for Women in Construction.
More from Sarah Whitfield
View all
Wood & Lumber
What Are the Different Types of Wood? A Builder's Guide
Compare structural softwoods, finish hardwoods, and engineered lumber. Analyze Janka ratings, MOE values, and 2026 pricing for construction.
Aug 4, 2026

Walls & Panels
Steel Framing vs Wood Framing: Corrosion and Moisture Defense
Compare steel framing vs wood framing for moisture resistance. Learn about galvanized coatings, condensation risks, and corrosion protection strategies.
Jul 21, 2026

Stone & Masonry
How to Cut Stone Veneer: Wet Saw vs Grinder Comparison
Compare the best tools for cutting stone veneer. We review wet saws, angle grinders, and chop saws to help you achieve clean, chip-free cuts.
Jul 21, 2026