Installing Gypsum Board for Ceiling: Pro Fastening & Framing Guide
Master the installation of gypsum board for ceiling with pro framing spacing, fastener schedules, and sag-prevention techniques for flawless finishes.

The Physics of Overhead Sag: Material Selection
Gravity is the primary adversary when installing gypsum board for ceiling applications. Unlike vertical wall assemblies, overhead panels are subjected to continuous downward deflection, making material selection and framing tolerances critical. The industry has largely shifted away from standard heavy 1/2-inch panels in favor of advanced lightweight formulations and 5/8-inch fire-rated boards to combat sagging.
Panel Weight and Framing Capacity Matrix
| Panel Type | Thickness | Weight (lbs/sq ft) | Max Joist Spacing | Sag Resistance |
|---|---|---|---|---|
| Standard Core | 1/2 in. | 1.60 | 16 in. o.c. | Moderate |
| Lightweight Core (e.g., USG UltraLight) | 1/2 in. | 1.45 | 24 in. o.c. | High |
| Standard Core | 5/8 in. | 2.20 | 24 in. o.c. | Very High |
| Type X Fire-Rated | 5/8 in. | 2.25 | 24 in. o.c. | Very High |
According to the Gypsum Association, utilizing 1/2-inch lightweight gypsum board for ceiling installations allows for 24-inch on-center framing while reducing the dead load on the structure by nearly 25% compared to standard 1/2-inch panels. This reduces installer fatigue and lowers the risk of fastener pops caused by heavy panel creep over time.
Joist Spacing, Tolerances, and Furring
The most common cause of visible ceiling ridges and shadows is poor framing alignment. Before hanging any gypsum board for ceiling use, the framing plane must be verified.
Verifying the Framing Plane
Joists must be aligned within 1/8-inch of the target plane. Use a rotary laser level or a taut string line stretched corner-to-corner to identify high and low joists. High joists must be planed down, while low joists require furring.
Resilient and Furring Channels
When joists are severely out of plane, or when acoustic decoupling is required (such as in multi-family residential builds), install 25-gauge galvanized steel hat channels or resilient channels. Space these channels 16 inches on-center, perpendicular to the joists, and attach them using 1-5/8-inch Type S screws. This creates a true, level substrate and isolates the drywall from structural floor vibrations that cause fastener back-out.
The Adhesive Advantage: Eliminating Fastener Pops
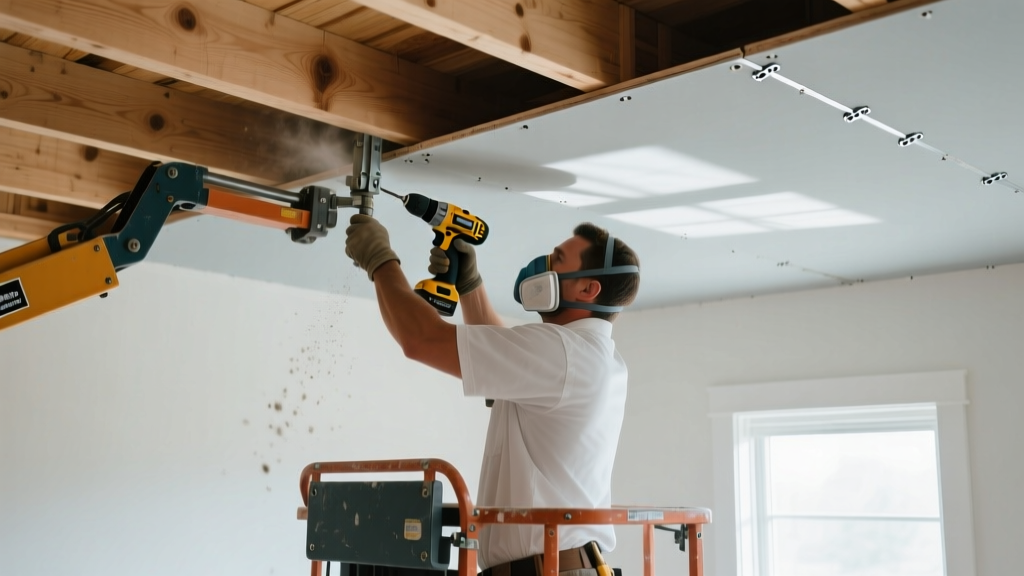
Relying solely on mechanical fasteners for overhead installations is an outdated practice. Modern professional installers use construction adhesive to bond the panel directly to the framing. This continuous bond distributes the panel's weight across the entire joist surface rather than concentrating it at individual screw points.
Pro Application Technique
Apply a continuous 3/8-inch bead of ASTM C1059-compliant drywall adhesive (such as OSI Drywall Adhesive or USG Sheetrock Brand Ceiling Adhesive) to the face of each joist. Keep the bead at least 6 inches away from panel end joints to prevent adhesive squeeze-out from interfering with the taping process. Using adhesive reduces the required field fasteners by up to 75% and virtually eliminates nail and screw pops.
The Fastener Schedule: Screws, Spacing, and Driving Depth
Nails are obsolete for ceiling applications due to their smooth shanks and poor withdrawal resistance. Always use drywall screws. For wood framing, use Type W (coarse-thread) screws; for steel framing or steel furring channels, use Type S (fine-thread) screws.
- 1/2-inch board: Use 1-1/4-inch screws.
- 5/8-inch board: Use 1-5/8-inch screws.
- Edge Spacing: Maximum 7 inches on-center along the perimeter.
- Field Spacing (No Adhesive): Maximum 12 inches on-center.
- Field Spacing (With Adhesive): Maximum 16 inches on-center.
The 'Dimple' Rule for Driving Depth
The screw head must penetrate the paper face and create a shallow dimple in the gypsum core without breaking the paper. If the paper is torn, the fastener loses its holding power and must be abandoned, with a new screw driven 2 inches away. Overdriven screws compromise the structural integrity of the ceiling assembly, while underdriven screws will tear the finishing paper during taping.
Step-by-Step Hanging Sequence for Large Ceilings
Proper sequencing minimizes waste and ensures joints are staggered correctly, which is vital for preventing continuous crack lines across the ceiling span.
- Layout and Lift: Measure the ceiling and plan the layout to ensure end joints are staggered by at least 24 inches between adjacent rows. Use a mechanical drywall lift to raise the panel flush against the joists. Never use a T-brace to hold a panel while fastening; it creates uneven pressure and causes immediate sagging.
- Adhesive and Positioning: Apply the adhesive bead to the joists immediately before lifting the panel to prevent the adhesive from skinning over.
- Center-Out Fastening: Begin driving screws in the center of the panel and work outward toward the edges. This forces any trapped air or slight panel bowing out to the perimeter, ensuring a flat finish.
- End Joint Management: Always stagger end joints. End joints are tapered on the factory edges, but if two end joints meet on the same joist, they must be backed by a minimum 6-inch wide plywood or metal backing strip to prevent differential movement and subsequent cracking.
Troubleshooting Common Ceiling Failures
Even with proper materials, environmental factors and structural movement can cause defects. Understanding these failure modes allows for proactive mitigation during the installation of gypsum board for ceiling systems.
Ridging at Panel Joints
Cause: Ridging (a visible raised line at the joint) occurs when framing lumber shrinks or expands due to moisture fluctuations, pushing the panel edges upward. It is exacerbated by installing drywall before the building's HVAC system is operational and the lumber has reached equilibrium moisture content (EMC).
Fix: Delay installation until the building is climate-controlled. If ridging occurs, it must be floated out using a 12-inch or 14-inch trowel to apply a wide, gradual taper of joint compound, rather than attempting to sand the ridge down.
Truss Uplift Cracking
In homes with engineered roof trusses, the bottom chord can bow upward in the winter due to temperature differentials between the insulated ceiling space and the cold attic. If the gypsum board for ceiling is rigidly fastened to the bottom chord near the interior partition walls, the drywall will pull away from the wall ceiling intersection, causing a severe horizontal crack.
The Solution: Implement 'floating' interior corners. Do not fasten the ceiling drywall within 16 inches of the interior partition walls. Instead, allow the wall drywall to extend up and support the edge of the ceiling panel. This creates a hinge that accommodates truss movement without tearing the tape joint.
Moisture and Fire Considerations for Overhead Assemblies
While standard and lightweight panels dominate general living spaces, specific environments require specialized overhead boards. In bathrooms and laundry rooms, moisture-resistant (MR) or glass-mat gypsum panels must be used if the ceiling is subjected to high humidity, though cement board is preferred for direct shower enclosures. For garages and multi-family separation ceilings, 5/8-inch Type X fire-rated gypsum board is mandated by building codes to provide a 1-hour fire-resistance rating per ASTM E119 standards. Always consult the USG product specifications or local building codes to verify the required assembly rating for your specific overhead application.
Final Inspection Before Finishing
Before the taping crew begins, conduct a rigorous fastener inspection. Run a bare hand lightly over all screw dimples to ensure none are protruding. Verify that all cut edges are backed by framing or blocking. Proper installation of the gypsum board for ceiling dictates the success of the Level 4 or Level 5 finish; no amount of joint compound can hide a poorly framed, sagging, or improperly fastened substrate.
Written by
Priya KapoorPriya Kapoor is a real estate market analyst and construction economics researcher with expertise in housing affordability, development feasibility, and infrastructure investment. She holds a Master of Regional Planning from Cornell University and previously worked as a senior analyst at CBRE's Investment Properties group, where she modeled returns for $4B in mixed-use development pipelines. Priya now runs an independent research practice advising developers, municipalities, and REITs on construction cost forecasting and market timing. She publishes the quarterly "BuildMat Market Pulse" report tracking material price indices across 12 commodity categories. Based in Austin, TX, Priya serves on the board of Habitat for Humanity Austin and is a marathon runner.
More from Priya Kapoor
View all
Construction Cost
Cost to Build a 1600 Sq Ft Home in 2026: Full Breakdown
Accurate 2026 cost to build a 1600 sq ft home—material, labor, and regional pricing breakdowns included. Plan your budget with real-time estimates.
Aug 11, 2026

Wood & Lumber
Name the Types of Wood for Pressure Treatment and Preservation
Learn how to name the types of wood best suited for pressure treatment. Compare species treatability, chemical retention levels, and 2026 preservation costs.
Aug 4, 2026

Stone & Masonry
Stone Veneer Suppliers Lindenhurst: 2026 Cost Analysis
Analyze 2026 stone veneer costs in Lindenhurst, NY. Compare local supplier pricing, delivery fees, and Suffolk County installation labor rates.
Aug 4, 2026