Is Gypsum Board Non-Combustible? Fire-Rated Installation Techniques
Discover if gypsum board is non-combustible and learn critical Type X and Type C fire-rated drywall installation techniques to pass building inspections.

The Core Chemistry: Is Gypsum Board Non-Combustible?
When architects and contractors ask, "is gypsum board non combustible?", the answer requires a technical distinction between the core material and the finished assembly. The gypsum core itself—calcium sulfate dihydrate (CaSO4·2H2O)—is fundamentally non-combustible. It contains approximately 21% chemically combined water by weight. When exposed to fire, this water undergoes calcination, converting to steam at 212°F (100°C) and actively absorbing heat, which delays the transfer of thermal energy to the structural framing behind it.
However, the paper facers encasing the core are combustible, typically igniting around 450°F. Because the paper burns away and the calcined core becomes fragile and prone to cracking, standard gypsum board cannot maintain structural integrity in a prolonged fire. This is why building codes do not classify standard drywall as a standalone non-combustible finish. Instead, fire-rated assemblies rely on Type X and Type C gypsum boards, which integrate glass fibers and vermiculite into the core to hold the calcined gypsum together after the paper facers burn off, preserving the thermal barrier.
Material Selection Matrix: Standard vs. Type X vs. Type C
Selecting the correct board is the first step in a compliant fire-rated installation. As of 2026, material costs have stabilized, but choosing the wrong board will result in failed inspections and costly tear-downs. According to the Gypsum Association, the core formulations dictate the assembly's ultimate fire endurance.
| Feature | Standard Gypsum | Type X (Firecode) | Type C (Enhanced) |
|---|---|---|---|
| Core Additives | None | Glass fibers | Glass fibers + Vermiculite |
| Standard Thickness | 1/2" | 5/8" | 1/2" or 5/8" |
| Typical Fire Rating | N/A (Unrated) | 1 Hour | 1 to 2 Hours |
| 2026 Avg. Cost (per sq. ft.) | $0.45 - $0.50 | $0.65 - $0.75 | $0.85 - $1.05 |
| Primary Application | Interior partitions | Corridor walls, stairwells | Shaft walls, area separation |
Precision Installation Protocols for Fire-Rated Assemblies
Purchasing Type X or Type C gypsum board does not automatically grant you a fire rating. The rating belongs to the entire assembly—including the framing, fasteners, joint treatment, and board orientation. Deviating from tested designs (such as UL or ULC directories) voids the rating. Below are the strict installation techniques required to maintain fire resistance.
Framing and Fastener Spacing
In a standard non-rated wall, drywall screws can be spaced up to 16 inches on center (o.c.) on walls and 12 inches o.c. on ceilings. Fire-rated assemblies demand much higher fastener density to prevent the board from pulling away from the studs as the wood chars or steel warps under extreme heat.
- Wall Studs (Wood or Steel): Fasteners must be spaced a maximum of 7 inches o.c. along the edges and 7 inches o.c. in the field for 1-hour rated assemblies (e.g., UL Design U305).
- Ceiling Joists: Fasteners must be spaced 12 inches o.c. in the field and 8 inches o.c. on edges. For 2-hour ceiling assemblies, two layers of 5/8" Type X are required, with the base layer fastened at 24" o.c. and the face layer at 12" o.c., staggered by at least 24 inches.
- Fastener Type: Use only code-approved, bugle-head drywall screws. Minimum length must be 1-1/4" for single-layer 5/8" board, penetrating the framing by at least 5/8". Do not use nails in fire-rated assemblies unless explicitly specified in the tested design.
Joint Treatment and Taping Protocols
Fire and hot gases will exploit the weakest points in a wall: the joints. Leaving joints untaped or improperly finished compromises the thermal barrier.
- Taping: All joints must be taped with standard paper tape or fiberglass mesh tape (if approved by the specific UL design). Paper tape is generally preferred in fire-rated assemblies for its inherent char-resistance compared to some meltable synthetic meshes.
- Compound Selection: While standard drying-type joint compound is acceptable for basic 1-hour ratings, high-endurance 2-hour assemblies often mandate setting-type compounds (e.g., 45-minute or 90-minute durabond). Setting compounds undergo a chemical crystallization process that provides superior heat resistance and structural adhesion compared to air-drying compounds.
- Application: A minimum of three coats of joint compound is required, feathering the edges to at least 10 inches wide to ensure a seamless, gap-free seal over the fasteners and tapered edges.
Managing Penetrations: The Weakest Link in Fire Defense
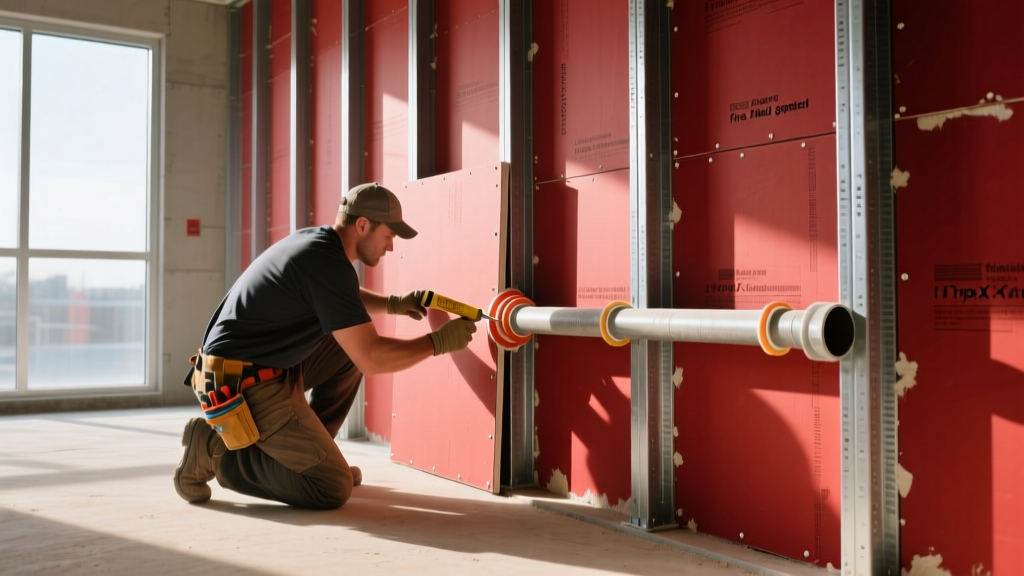
A perfectly installed fire-rated wall is rendered useless if electrical, plumbing, or HVAC penetrations are not properly sealed. When a pipe or conduit melts or shifts during a fire, it leaves a hole that allows deadly smoke and flames to bypass the drywall barrier.
- Electrical Boxes: Boxes on opposite sides of a fire-rated wall must be separated by a minimum of 24 inches horizontally. If they must be closer, they require intumescent fire putty pads (e.g., 3M Fire Barrier Putty Pads) wrapped around the back of the box.
- Pipe Penetrations: Metallic pipes require an approved firestop sealant. Plastic pipes (PVC/CPVC), which melt rapidly, require an intumescent firestop collar or wrap strip that expands violently when heated, crushing the melting pipe shut to seal the opening.
- Sealant Depth: When using liquid firestop sealants (like 3M Fire Barrier Sealant FD 150+), the depth of the sealant must match the depth of the drywall (e.g., 5/8" deep for 5/8" Type X board). Do not just smear a thin layer over the surface.
Troubleshooting Common Fire-Rating Installation Failures
Building inspectors frequently reject fire-rated assemblies due to subtle installation errors. Review this troubleshooting checklist before scheduling your final inspection:
| Observed Failure | Root Cause | Required Correction |
|---|---|---|
| Board pulling away from bottom track | Gap at floor exceeds maximum allowance (usually 3/4") | Install a continuous bead of fire-rated acoustic sealant or add a 1x wood blocking at the base. |
| Screw heads breaking the paper face | Over-driving screws during hanging | Add a secondary screw 2 inches away from the blown-out fastener. Do not rely on joint compound to fill a broken core. |
| Visible light through outlet boxes | Missing fire putty pads or unsealed conduit knockouts | Apply intumescent putty pads and seal all unused box knockouts with firestop caulk. |
| Control joints lacking fire protection | Standard vinyl control joints used in rated shaft walls | Use specifically tested, fire-rated metal expansion/control joints backed by mineral wool. |
Mastering the installation of fire-rated gypsum board requires moving beyond basic drywall hanging. By understanding the calcination process, strictly adhering to tested fastener patterns, and rigorously sealing every penetration, contractors ensure their assemblies perform exactly as engineered when subjected to the extreme conditions of an ASTM E119 fire test.
Written by
James ThorntonJames Thornton is a construction industry veteran with 25 years of hands-on experience in wood framing, lumber grading, and residential building codes. He started as a framing carpenter in rural Oregon, earned his ICC Residential Building Inspector certification, and eventually became a senior plan reviewer for the City of Portland Bureau of Development Services. James holds a B.S. in Wood Science & Technology from Oregon State University and is a certified lumber grader through the West Coast Lumber Inspection Bureau (WCLIB). He has inspected over 3,000 residential construction sites and authored the city's internal guide on advanced framing techniques (2x6 at 24" O.C.). James lives in Bend, OR, where he builds custom timber-frame cabins and competes in lumberjack sports.
More from James Thornton
View all
Insulation
Best Home Insulation Materials: Complete 2026 Guide
Compare top home insulation materials for 2026. Find R-values, installed costs per square foot, and best uses for fiberglass, spray foam, and mineral wool.
Aug 4, 2026

Sustainable Building
Certify Your Green Building Material for LEED and WELL
Step-by-step guide to certifying a green building material for LEED v5 and WELL v2. Master EPDs, HPDs, and VOC limits for 2026 project specifications.
Aug 4, 2026

Stone & Masonry
Veneer Stacked Stone Panels: Interior Design & Style Showcase
Discover how veneer stacked stone panels transform interiors. Explore modern design profiles, material pairings, and technical installation specs.
Aug 4, 2026