Pro Installation Techniques for Fiberglass Faced Gypsum Board
Master the installation of fiberglass faced gypsum board with pro techniques for cutting, fastening, and finishing exterior and moisture-prone walls.

Material Handling and Storage Protocols
Fiberglass faced gypsum board—commonly specified under brand names like Georgia-Pacific DensGlass, USG Fiberock, and National Gypsum Gold Bond eXP—replaces traditional paper facers with embedded fiberglass mats. This structural change provides superior moisture, mold, and fire resistance, making it the default choice for exterior sheathing, tile backers, and high-humidity interior zones. However, the non-porous, alkaline nature of the fiberglass mat demands specific installation techniques that differ significantly from standard paper-faced drywall.
Before installation begins, proper acclimation is critical. Store panels flat on a raised pallet in a dry, enclosed environment. While the fiberglass mat itself is highly moisture-resistant, the gypsum core can still absorb ambient humidity, leading to edge swelling or fastener pops post-installation. Maintain the storage area above 40°F (4°C). As of early 2026, a 4x8 sheet of 5/8-inch Type X fiberglass faced sheathing typically ranges from $38 to $52, making proper storage essential to avoid costly material waste.
Safety and PPE Requirements
Cutting and sanding fiberglass faced gypsum board releases microscopic glass fibers and silica dust. Standard drywall masks are insufficient. Installers must wear NIOSH-approved N95 respirators (or P100 for heavy routing), ANSI Z87.1-rated sealed safety goggles, and long-sleeved clothing to prevent contact dermatitis. Tape cuffs to gloves when cutting overhead to prevent fibers from falling into sleeves.
Cutting and Routing Techniques
Standard score-and-snap methods work adequately for 1/2-inch panels, but they often crush the gypsum core and fray the fiberglass mat on 5/8-inch panels, compromising the structural integrity of the edge.
- Score-and-Snap (1/2-inch panels): Use a heavy-duty utility knife with a fresh carbide blade. Score deeply through the fiberglass mat and into the core. Snap the board away from the cut, then slice the back mat. Do not saw back and forth, as this shreds the mat.
- Routing (5/8-inch panels and complex cuts): For clean edges, especially around electrical boxes or window bucks, use a high-speed rotary router equipped with a single-flute, carbide-tipped drywall bit. Single-flute bits clear gypsum dust faster, preventing the bit from gumming up and burning the fiberglass mat. According to guidelines from the Gypsum Association, routed edges provide the most uniform surface for subsequent joint taping.
- Cutouts: Use a drywall saw with aggressive, coarse teeth (around 6-8 teeth per inch) to punch through the fiberglass mat without tearing it. Fine-tooth saws will clog immediately.
Fastener Selection and Spacing Matrix
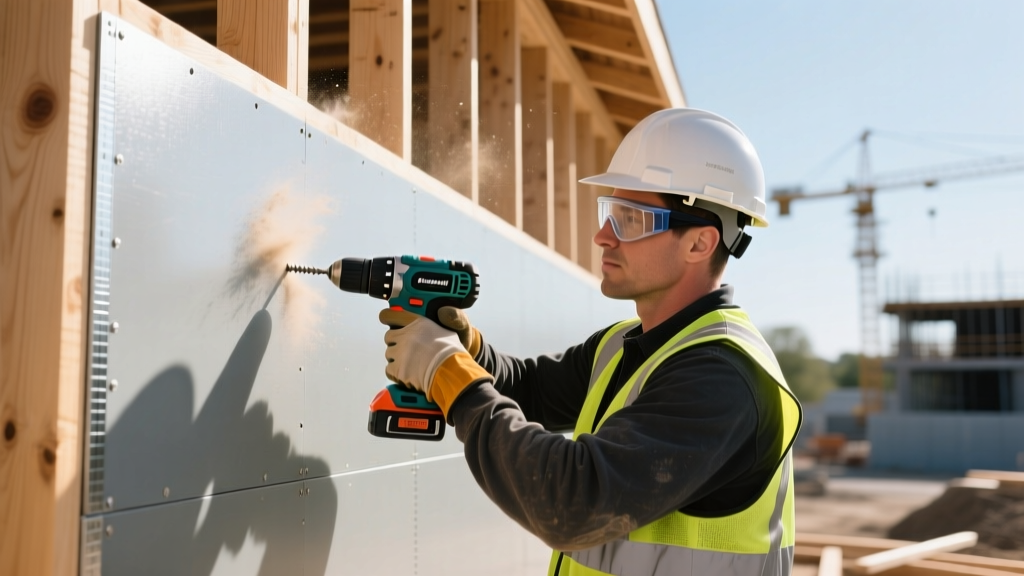
Because fiberglass faced gypsum board is frequently used in exterior sheathing and wet areas, fastener corrosion is a primary failure point. Standard phosphate-coated drywall screws will rust, bleed through the finish, and eventually lose their grip. You must use hot-dipped galvanized, ceramic-coated, or stainless steel bugle-head screws.
For wood framing, use coarse-thread screws; for light-gauge steel framing, use fine-thread S-type screws. The screw head must penetrate the fiberglass mat and dimple the gypsum core without breaking the surface of the mat. If the mat is torn by the screw head, the holding power is drastically reduced, and the fastener must be re-driven 2 inches away.
| Application | Framing Type | Edge Spacing (o.c.) | Field Spacing (o.c.) | Edge Clearance |
|---|---|---|---|---|
| Exterior Sheathing (Walls) | Wood Studs | 8 inches | 12 inches | 3/8 inch gap |
| Exterior Sheathing (Walls) | Steel Studs | 8 inches | 12 inches | 3/8 inch gap |
| Interior Walls / Tile Backer | Wood Studs | 8 inches | 12 inches | 1/8 inch gap |
| Ceilings (Interior) | Wood Joists | 8 inches | 12 inches | 1/8 inch gap |
Note: The 3/8-inch gap for exterior sheathing accommodates thermal expansion and structural deflection. This gap must be sealed with a compatible exterior sealant or covered by a fluid-applied weather-resistive barrier (WRB) before cladding is applied.
Joint Treatment and Finishing the Fiberglass Mat
The most common installation failure occurs when contractors attempt to finish fiberglass faced gypsum board using standard paper drywall tape and pre-mixed drying compounds. The alkaline environment of the gypsum core and the non-porous nature of the fiberglass mat will cause paper tape to delaminate and drying compounds to lose adhesion.
Required Materials for Joint Treatment
- Alkali-Resistant Fiberglass Mesh Tape: Products like FibaTape or manufacturer-specific joint tapes (e.g., DensGlass Joint Tape) are mandatory. These tapes feature a specialized coating that prevents degradation from the gypsum's alkalinity.
- Setting-Type Joint Compound: Use a chemical-setting compound (e.g., Durabond 45, Easy Sand 45, or specialized exterior joint treatments). Setting compounds cure via chemical reaction rather than evaporation, creating a bond that is impervious to the moisture and alkalinity of the board. Pre-mixed drying compounds should only be used for the final skim coat in interior, climate-controlled applications.
Pro Tip: Exterior Sheathing Joints
If the fiberglass faced board is being used as exterior sheathing behind a rainscreen or WRB, do not use standard joint compound. Instead, treat the joints with the specific exterior sealant or mesh-and-cementitious-tape system recommended by the WRB manufacturer to maintain the continuous drainage plane. Consult the National Gypsum eXP installation guidelines for exact compatibility matrices with fluid-applied barriers.
Diagnosing Common Installation Failures
Even experienced crews make mistakes when transitioning from paper-faced to fiberglass-faced products. Here is a troubleshooting framework for the most frequent field issues:
- Symptom: Screw heads tearing through the fiberglass mat.
Cause: The drill clutch is set too high, or the wrong screw type is being used. Fix: Adjust the clutch to stop driving the moment the bugle head dimples the mat. Ensure you are not using self-drilling screws on wood framing, as their aggressive threads can grab and tear the mat before the head seats. - Symptom: Joint tape blistering or delaminating after 48 hours.
Cause: Use of standard paper tape or all-purpose pre-mixed compound over a damp fiberglass surface. Fix: Strip the failed joint. Wipe the mat with a damp (not wet) sponge to remove dust, apply alkali-resistant mesh tape, and embed it with a setting-type compound mixed to a thick, peanut-butter consistency. - Symptom: Edge swelling on installed exterior sheathing.
Cause: Panels were installed tight against each other without the required 3/8-inch expansion gap, or the boards were stored on wet ground prior to installation. Fix: If swelling is minor, it can be sanded flush before WRB application. If severe, the affected edges must be routed out to create the proper gap, and the board must be re-secured.
Interior vs. Exterior Application Nuances
While the core material is similar, the installation approach diverges based on the environment. For interior applications like commercial elevator shafts or stairwells (where USG and other manufacturers specify Type X for fire ratings), the board is finished to a Level 4 or Level 5 smoothness using setting compounds and a final skim coat.
For exterior applications, the board is strictly a substrate. The focus shifts from cosmetic finishing to structural rigidity and moisture management. In exterior scenarios, blocking must be installed behind all horizontal and vertical joints to prevent wind-load deflection, which can crack the WRB and compromise the building envelope. Always verify the maximum allowable unsupported edge span in the manufacturer's current span tables, as these can vary between 1/2-inch and 5/8-inch panel thicknesses.
Mastering the installation of fiberglass faced gypsum board requires abandoning standard drywall habits. By selecting corrosion-resistant fasteners, adhering to strict spacing matrices, and utilizing alkali-resistant taping systems, contractors ensure the assembly delivers the promised fire, mold, and weather resistance over the lifespan of the structure.
Written by
Marcus ChenMarcus Chen is a licensed structural engineer (PE) and building materials analyst with over 12 years of experience across residential, commercial, and industrial construction. He holds a Master of Science in Civil Engineering from UC Berkeley and spent six years at Thornton Tomasetti before transitioning to independent consulting and technical writing. Marcus specializes in material selection for seismic-prone regions, concrete reinforcement strategies, and lifecycle cost analysis. His work has been cited by the American Concrete Institute (ACI) and the Structural Engineers Association of California (SEAOC). When he is not on a job site or at his desk, you will find him hiking the Sierra Nevada or restoring a 1920s craftsman bungalow in Oakland, CA.
More from Marcus Chen
View all
Construction Cost
How Much Did the Eiffel Tower Cost to Build?
How much did the Eiffel Tower cost to build in 1889? We adjust for inflation and compare its budget to modern skyscraper construction.
Aug 4, 2026

Fire Resistance
What Is a Fire Resistant Material? Testing & Certification Guide
Discover what is a fire resistant material through ASTM and UL testing. Learn how fire ratings, certifications, and assemblies work in construction.
Aug 4, 2026

Construction Cost
How Much Did the Burj Khalifa Cost to Build?
How much did the Burj Khalifa cost to build? We break down the $1.5B project and extract 5 money-saving strategies for your next build.
Jul 30, 2026