Pro Gypsum Board Drywall Installation Techniques for Seamless Joints
Master pro gypsum board drywall installation techniques. Learn framing prep, screw spacing, staggered joints, and taping methods for flawless finishes.

Framing Tolerances: The Hidden Prerequisite
Achieving a flawless Level 4 or Level 5 finish on gypsum board drywall begins long before the first panel is lifted. The structural substrate must meet strict deflection and alignment criteria. According to the Gypsum Association's GA-216 guidelines, framing members must not deflect more than L/360 under full design loads. Furthermore, any framing misalignment exceeding 1/8 inch in an 8-foot span will telegraph through the finished surface, creating visible ridges or depressions that no amount of joint compound can permanently hide.
For interior non-load-bearing partitions, 25-gauge or 20-gauge steel studs spaced 16 inches on center (o.c.) are standard. When sound transmission class (STC) ratings are required, install resilient channels perpendicular to the framing at 24 inches o.c. to decouple the gypsum board drywall from the structural frame, effectively breaking the acoustic path.
Fastener Mechanics and Precision Spacing
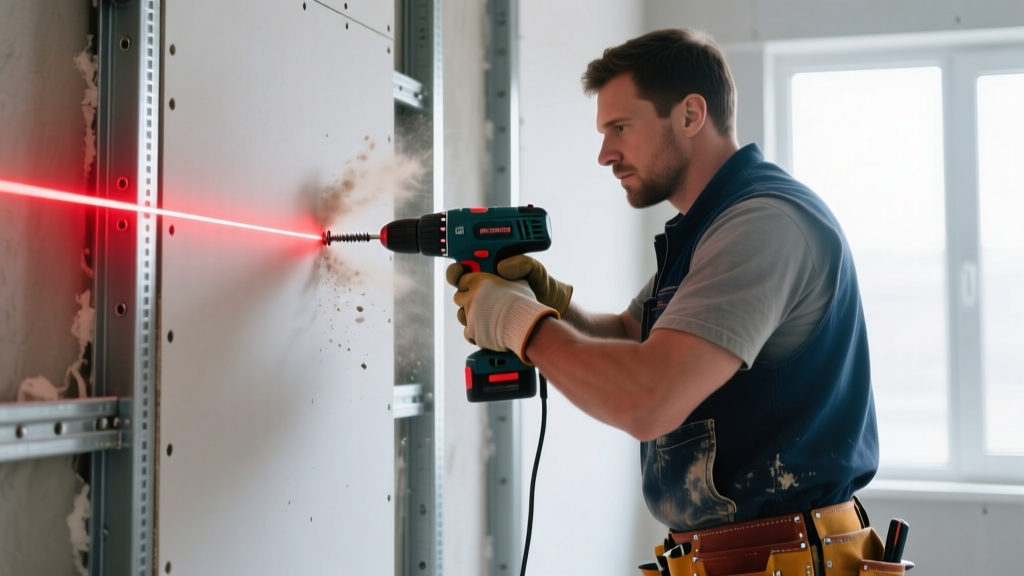
Selecting the correct fastener and adhering to precise spacing schedules is non-negotiable for structural integrity and fire resistance. Using a screw that is too long can penetrate electrical wiring or plumbing, while a screw that is too short will fail to achieve the required pull-through resistance.
| Substrate Type | Board Thickness | Fastener Specification | Edge Spacing | Field Spacing |
|---|---|---|---|---|
| Wood Studs | 1/2 inch | #6 or #8 Coarse-Thread (Type W), 1-1/4' | 8 inches o.c. | 16 inches o.c. |
| Wood Studs | 5/8 inch | #8 Coarse-Thread (Type W), 1-5/8' | 8 inches o.c. | 12 inches o.c. |
| Metal Studs (Light Gauge) | 1/2 inch | #6 Fine-Thread (Type S), 1 inch | 12 inches o.c. | 24 inches o.c. |
| Metal Studs (Light Gauge) | 5/8 inch | #6 Fine-Thread (Type S), 1-1/4' | 12 inches o.c. | 24 inches o.c. |
When driving screws, the head must dimple the paper face exactly 1/32 to 1/16 of an inch deep. If the paper facing is broken by the screw head, the fastener loses its holding power and must be abandoned, with a new screw driven 2 inches away from the failed location. Collated screw guns with adjustable depth-sensitive nose cones are mandatory for maintaining this tolerance across hundreds of fasteners.
Strategic Panel Layout and Joint Staggering
Panel layout dictates the longevity of the installation. End joints (butt joints) are inherently weaker and more prone to ridging than tapered factory edges. To distribute stress and prevent continuous crack lines, end joints must be staggered.
'End joints of gypsum board drywall should be staggered by a minimum of 24 inches. Avoid aligning end joints on opposite sides of a partition, and never place a horizontal end joint directly above or below a window or door opening.' — USG Drywall Construction Guide
For high-stress areas like the corners of doors and windows, never use a single rectangular panel that terminates at the corner. Instead, cut the panel in an 'L' shape so the seam bypasses the corner entirely. This eliminates the inevitable diagonal stress cracks that form when the building settles or when doors are slammed repeatedly.
The Three-Coat Taping and Mudding Protocol
The finishing process relies on the chemical and mechanical properties of joint compounds. Relying solely on air-drying all-purpose compound for every step is a common amateur mistake that leads to excessive shrinkage and sanding fatigue.
- Step 1: Prefilling and Taping. Fill all gaps exceeding 1/8 inch and all butt joints with a high-strength, setting-type compound (e.g., USG Durabond 90). Setting compounds undergo a chemical crystallization process, resulting in near-zero shrinkage and rock-hard structural integrity. Embed paper tape into a bed of all-purpose joint compound over tapered edges, using a 6-inch taping knife to squeeze out excess mud from the center outward.
- Step 2: The Fill Coat. Once the tape coat is bone dry, apply a second coat using a lightweight topping or all-purpose compound. Use a 10-inch knife to feather the edges. The goal here is to fill the recessed taper of the factory edge and cover the tape completely. Do not attempt to achieve final smoothness in this coat.
- Step 3: The Finish Coat. Apply the final skim coat using a 12-inch or 14-inch finishing knife. Thin the topping compound slightly with water to a mayonnaise-like consistency. Apply firm pressure to the outside edge of the knife to feather the transition into the bare paper face to a microscopic edge. This coat requires minimal sanding if applied with proper blade tension.
Diagnosing and Preventing Common Failures
Even experienced crews encounter finishing defects. Understanding the root cause allows for immediate correction rather than superficial patching.
| Symptom | Root Cause | Corrective Action |
|---|---|---|
| Joint Ridging (raised seam) | Lumber shrinkage or framing deflection pushing panels together. | Install a floating interior corner detail; use setting-type compound for the first coat to resist compression. |
| Tape Blisters | Insufficient compound under the tape or applying compound over a dusty surface. | Slit the blister, inject thin all-purpose compound, and press flat. Wipe panels with a damp sponge before taping. |
| Screw Pops | Board was not pulled tight against the stud before driving the screw, or lumber dried and shrank. | Drive a new screw 2 inches away, countersink properly, and patch with setting-type compound. |
| Joint Photographing | Difference in porosity between the gypsum paper face and the joint compound absorbing paint differently. | Apply a PVA drywall sealer or a Level 5 skim coat over the entire surface before painting. |
Dust Mitigation and Silica Compliance
Sanding gypsum board drywall generates massive amounts of fine particulate matter. Under OSHA's respirable crystalline silica standards, dry sanding joint compound requires strict engineering controls. While gypsum itself contains low silica, the perlite and mica aggregates in some joint compounds can trigger regulatory thresholds.
To maintain compliance and ensure a clean job site, utilize pole sanders equipped with HEPA-filtered vacuum shrouds. Alternatively, transition to wet-sanding techniques using a damp cellulose sponge for the final finish coat. Wet sponging not only eliminates airborne dust but also burnishes the compound, creating a denser, more paint-ready surface that minimizes primer absorption.
Written by
Marcus ChenMarcus Chen is a licensed structural engineer (PE) and building materials analyst with over 12 years of experience across residential, commercial, and industrial construction. He holds a Master of Science in Civil Engineering from UC Berkeley and spent six years at Thornton Tomasetti before transitioning to independent consulting and technical writing. Marcus specializes in material selection for seismic-prone regions, concrete reinforcement strategies, and lifecycle cost analysis. His work has been cited by the American Concrete Institute (ACI) and the Structural Engineers Association of California (SEAOC). When he is not on a job site or at his desk, you will find him hiking the Sierra Nevada or restoring a 1920s craftsman bungalow in Oakland, CA.
More from Marcus Chen
View all
Construction Cost
How Much Did the Eiffel Tower Cost to Build?
How much did the Eiffel Tower cost to build in 1889? We adjust for inflation and compare its budget to modern skyscraper construction.
Aug 4, 2026

Fire Resistance
What Is a Fire Resistant Material? Testing & Certification Guide
Discover what is a fire resistant material through ASTM and UL testing. Learn how fire ratings, certifications, and assemblies work in construction.
Aug 4, 2026

Construction Cost
How Much Did the Burj Khalifa Cost to Build?
How much did the Burj Khalifa cost to build? We break down the $1.5B project and extract 5 money-saving strategies for your next build.
Jul 30, 2026