Fixing Gypsum Board Reveal Cracks, Bowing, and Mud Intrusion
Learn how to troubleshoot and repair common gypsum board reveal issues, including edge cracking, mud intrusion, and profile misalignment.

The Anatomy of Gypsum Board Reveal Failures
Gypsum board reveals—often referred to as shadow lines, Fry reglets, or reveal beads—are critical architectural details that provide a crisp, tapeless transition between drywall panels, ceilings, and adjacent materials. Unlike standard taped joints, reveals rely on metal or vinyl trim profiles to create a deliberate 1/4-inch to 3/4-inch gap. While visually striking, these profiles are highly susceptible to specific failure modes. Structural deflection, improper framing backing, and poor finishing techniques frequently lead to edge cracking, mud intrusion, and profile bowing.
According to the Gypsum Association's GA-216 standards, perimeter edges and reveal transitions must accommodate structural movement without transferring stress to the gypsum core or the finishing compound. When these tolerances are ignored during installation, the repair process requires specialized techniques that differ vastly from standard drywall patching.
Diagnostic Matrix: Identifying Your Reveal Failure
Before mixing any compound, accurately diagnose the failure mode. Applying standard joint tape over a reveal edge will ruin the shadow line and guarantee a callback. Use this diagnostic framework to identify the root cause.
| Symptom | Root Cause | Required Repair Strategy |
|---|---|---|
| Hairline cracks parallel to the reveal edge | Structural deflection; rigid all-purpose mud used instead of setting-type compound. | V-groove crack, fill with setting compound, skim with flexible finishing mud. |
| Dried joint compound locked inside the reveal channel | Missing tear-away strip during taping; careless mud application. | Mechanical extraction using a 5-in-1 tool; solvent softening for vinyl profiles. |
| Wavy or bowing reveal line | Missing 1x2 or 1x3 wood backing behind the drywall edge; screws placed too far apart. | Local drywall removal, install sistered backing blocks, re-secure profile. |
| Rust stains bleeding through paint | Use of non-anodized steel trim in high-humidity areas; water-based primer reaction. | Stain-blocking shellac primer; replace trim with extruded aluminum or PVC if severe. |
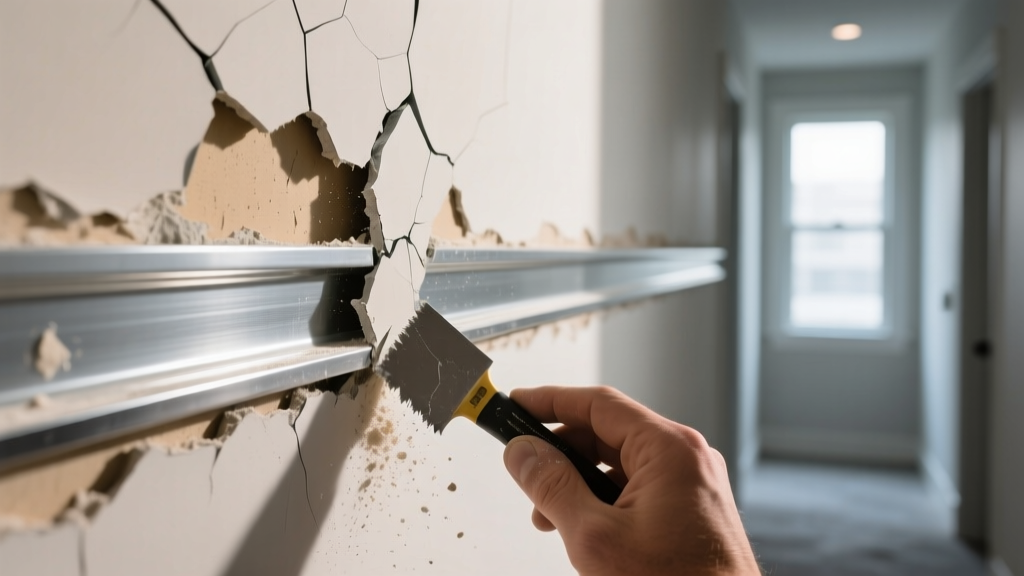
Step-by-Step Repair: Fixing Edge Cracking and Blowouts
Edge cracking along a reveal is almost always caused by the use of drying-type compounds (like standard all-purpose mud) which shrink and pull away from the metal or vinyl flange. To achieve a permanent repair, you must transition to chemical-setting compounds.
1. Preparation and V-Grooving
Use a Hyde 6-in-1 tool or a specialized carbide V-groove cutter to open the hairline crack. Do not simply scrape the surface; you must expose the raw gypsum core or the trim flange beneath. Remove all loose paper and debris with a stiff bristle brush.
2. The Setting-Type Fill
Mix a small batch of USG Sheetrock Durabond 90 or an equivalent high-strength setting-type compound. Durabond 90 provides a compressive strength of over 2,500 psi and exhibits virtually zero shrinkage. Force the compound deep into the V-groove using a 4-inch stiff taping knife. Overfill the gap slightly, as setting compounds do not shrink like drying compounds. Allow it to cure completely (approximately 90 minutes for Durabond 90 at 70°F).
3. Skimming and Feathering
Once the Durabond is rock hard, scrape down any high spots with a 6-inch taping knife held at a 45-degree angle. Apply a final skim coat using a low-shrink, easy-sanding setting compound like USG Easy Sand 45. Feather the edges out at least 8 inches from the reveal flange to blend the repair into the existing field. Sand lightly with 150-grit aluminum oxide sandpaper—never use coarse 80-grit, which will gouge the gypsum paper face.
Rescuing Mud Intrusion in the Reveal Gap
The defining feature of a shadow line is the dark, empty void it creates. When joint compound spills into the 1/2-inch or 3/4-inch channel and dries, it destroys the architectural intent. As noted in the AWCI Technical Manual, maintaining clean reglet channels is a primary indicator of Level 5 finishing quality.
If you are working with extruded aluminum reveals (such as Fry Reglet Shadowline), do not attempt to soften dried mud with wet sponges. Prolonged moisture exposure can cause oxidation or white rust on un-anodized aluminum edges. Use mechanical extraction or a specialized drywall mud softener gel instead.
The Mechanical Extraction Method
- Score the Edges: Use a sharp utility knife to score the dried mud exactly where it meets the inner lip of the reveal profile. This prevents tearing the adjacent drywall paper when prying.
- Undercut the Mass: Insert the pointed tip of a 5-in-1 tool or a stiff putty knife ground to a narrow profile into the channel. Work parallel to the reveal line, gently prying the dried mud block away from the back of the channel.
- Detail Sanding: Wrap a piece of 120-grit sandpaper around a custom-cut wooden dowel that matches the exact width of the reveal gap. Run the dowel through the channel to remove micro-residue and restore the sharp inner corner.
Correcting Profile Misalignment and Bowing
A wavy reveal line is a glaring visual defect, especially when illuminated by natural light or wall-washing LED fixtures. Bowing occurs when the drywall edge lacks continuous solid backing, allowing the panel to flex when the reveal trim is fastened or when pressure is applied.
The Sistered Backing Repair Technique
If the reveal bows inward or outward by more than 1/8-inch over a 4-foot span, surface skimming will not fix the issue. You must reinforce the framing.
- Cut a 12-inch section of the gypsum board out directly behind the bowed reveal using a drywall router or oscillating multi-tool.
- Cut a 1x2 or 1x3 pine backing block to fit inside the wall cavity, spanning at least 6 inches past the cutout on both sides.
- Secure the backing block to the existing stud using 2-inch construction adhesive and 2-1/2-inch coarse-thread drywall screws driven through the adjacent intact drywall.
- Re-secure the loose reveal trim flange to the new wood backing using 1-inch pan-head lath screws, spacing them every 4 inches to pull the profile perfectly straight.
- Patch the cutout with a new piece of gypsum board, tape the butt joints, and re-finish to Level 4 or 5.
Material Selection for High-Movement and High-Moisture Areas
When repairing a severely damaged reveal, you may need to replace the trim entirely. Selecting the wrong material for the environment guarantees a repeat failure. Use this comparison matrix to choose the correct replacement profile.
| Profile Material | Cost (per 10ft stick) | Flexibility & Impact Resistance | Best Application Scenario |
|---|---|---|---|
| Extruded Aluminum (e.g., Fry Reglet) | $18.00 - $28.00 | Rigid; dents upon sharp impact but holds straight lines perfectly. | Commercial corridors, high-end residential, ceiling-to-wall transitions. |
| Rigid PVC / Vinyl (e.g., Trim-Tex) | $6.00 - $12.00 | Highly flexible; bounces back from blunt impacts without permanent deformation. | Curved walls, high-traffic areas, hospital corridors, budget-conscious repairs. |
| Roll-Formed Zinc/Galvanized | $8.00 - $14.00 | Moderate rigidity; prone to kinking if bent incorrectly during install. | Standard interior partitions, non-humidity controlled zones. |
For repairs involving curved walls or areas prone to impact (like hospital gurney zones or school hallways), rigid PVC profiles like the Trim-Tex Tear Away Bead or their specific vinyl reveal lines are superior. Vinyl expands and contracts at a rate closer to the gypsum panel itself, reducing the likelihood of edge cracking during seasonal HVAC humidity swings.
Pro-Tip: The Tear-Away Strip Advantage
When replacing a damaged reveal, prioritize profiles that feature a protective tear-away strip. This rigid plastic flap covers the reveal gap during the taping and mudding process, completely eliminating mud intrusion. The strip is snapped off only after the final sanding and right before priming. If your existing damaged trim lacks this feature, upgrading to a tear-away profile will save hours of mechanical extraction during future renovations.
Priming and Painting the Repaired Reveal
The final step in a reveal repair is often where contractors make fatal errors. Standard high-build drywall primers (like PVA) are designed to fill micro-pores. If sprayed or rolled heavily into a reveal gap, the primer will build up on the inner flange, softening the sharp 90-degree shadow line.
Always mask the inner channel of the reveal with high-quality automotive-grade fine-line tape before applying primer to the wall field. Use an acrylic drywall sealer rather than a PVA primer for the surrounding repair area, as acrylic sealers provide a harder, more washable surface that resists the burnishing effect often seen when cleaning dust out of shadow line gaps. Once the paint is fully cured (minimum 72 hours for most architectural acrylics), carefully remove the fine-line tape at a 45-degree angle to preserve the razor-sharp edge of the gypsum board reveal.
Written by
Sarah WhitfieldSarah Whitfield is a chartered quantity surveyor (MRICS) and construction cost analyst with 15 years of experience in material pricing, procurement strategy, and project budgeting. She earned her degree in Construction Management from the University of Reading (UK) and has worked on projects ranging from $2M custom homes to $180M mixed-use developments across North America and Europe. Sarah currently leads cost estimating for BuildMat Insight, maintaining a proprietary database of 4,000+ material price points updated quarterly. She is a frequent contributor to RSMeans cost data panels and has presented at the International Cost Engineering Council (ICEC) congress. Based in Denver, CO, Sarah is an avid trail runner and volunteer mentor for Women in Construction.
More from Sarah Whitfield
View all
Wood & Lumber
What Are the Different Types of Wood? A Builder's Guide
Compare structural softwoods, finish hardwoods, and engineered lumber. Analyze Janka ratings, MOE values, and 2026 pricing for construction.
Aug 4, 2026

Walls & Panels
Steel Framing vs Wood Framing: Corrosion and Moisture Defense
Compare steel framing vs wood framing for moisture resistance. Learn about galvanized coatings, condensation risks, and corrosion protection strategies.
Jul 21, 2026

Stone & Masonry
How to Cut Stone Veneer: Wet Saw vs Grinder Comparison
Compare the best tools for cutting stone veneer. We review wet saws, angle grinders, and chop saws to help you achieve clean, chip-free cuts.
Jul 21, 2026