Troubleshooting Gold Bond Gypsum Board: Fixes for Cracks & Moisture
Expert guide to troubleshooting and repairing Gold Bond gypsum board. Learn how to fix moisture damage, seam cracks, and fire-rating compromises.

Diagnostic Matrix: Identifying Gold Bond Failure Modes
National Gypsum’s Gold Bond brand manufactures specialized gypsum boards engineered for distinct environmental and structural demands. When these boards fail, the repair protocol must match the specific product line to maintain warranties and building code compliance. Misdiagnosing the root cause often leads to recurring damage. Use the diagnostic matrix below to map your symptoms to the correct repair strategy.
| Observed Symptom | Root Cause | Repair Strategy | Required Material |
|---|---|---|---|
| Hairline seam cracks | Truss uplift or structural deflection | Route V-groove, fill with setting compound | ProForm All Purpose Joint Compound |
| Paper bubbling or delamination | Prolonged moisture exposure or improper primer | Cut out damaged core, patch or replace panel | Gold Bond XP Moisture/Mold-Resistant |
| Fastener pops along studs | Lumber shrinkage or improper screw depth | Dimple and drive secondary screw 2 inches away | ProForm Topping Compound |
| Compromised fire-rating at penetrations | Unsealed HVAC or electrical cutouts | Intumescent firestop sealing and patching | Gold Bond Fire-Shield (Type X) + Firestop |
Troubleshooting Moisture and Mold on Gold Bond XP
Gold Bond XP Moisture/Mold-Resistant panels feature a treated core and a moisture-resistant green facer. However, "moisture-resistant" does not mean "waterproof." If standing water or continuous condensation saturates the board for more than 48 hours, the gypsum core will degrade structurally, even if the treated facer prevents mold growth.
Assessing Water Intrusion Damage
Press firmly against the suspected area. If the board feels spongy, yields to pressure, or if the green facer is peeling away from the core, the structural integrity is compromised. According to the EPA guidelines on mold cleanup, porous materials that remain wet for over 48 hours and show signs of core degradation must be removed and replaced, as mold spores can colonize the gypsum matrix beneath the facer.
Step-by-Step XP Board Replacement Protocol
- Isolate the Damage: Use a stud finder to locate the framing. Mark a rectangular cutout that extends at least 12 inches beyond the visible water stain in all directions, centering the cut on the studs.
- Score and Snap: Score the face paper with a utility knife. Snap the gypsum core backward and cut the backing paper to remove the damaged section cleanly.
- Install Blocking: If the cutout edges do not land perfectly on a stud, install 1x4 wood furring strips horizontally behind the existing drywall to serve as nailing blocks for the patch.
- Cut the Replacement Patch: Cut a new piece of Gold Bond XP to exact dimensions. Fasten it using 1-1/4 inch Type W coarse-thread drywall screws spaced every 8 inches along the perimeter.
- Tape and Finish: Apply fiberglass mesh tape over the seams. Never use standard paper tape on XP boards in wet areas. Embed the mesh using a setting-type compound like ProForm Quick Set, which is chemically resistant to moisture during the curing phase.
Fixing Seam Cracks and Fastener Pops in Fire-Shield Assemblies
Gold Bond Fire-Shield (Type X) boards are 5/8-inch thick panels reinforced with glass fibers to achieve 1-hour and 2-hour fire-resistance ratings, commonly used in UL Design U419 and similar assemblies. Repairing these boards requires strict adherence to Gypsum Association GA-216 standards to ensure the fire rating is not voided.
Why Fire-Rated Assemblies Fail
Cracks in Fire-Shield boards typically occur at the joints due to building settlement or truss uplift. Fastener pops happen when the framing lumber dries and shrinks, pushing the screw head through the compound. In a fire-rated assembly, any crack that exposes the joint tape or penetrates the gypsum core creates a direct pathway for superheated gases, effectively reducing the assembly's fire rating to zero at that weak point.
The Setting-Type Compound Repair Method
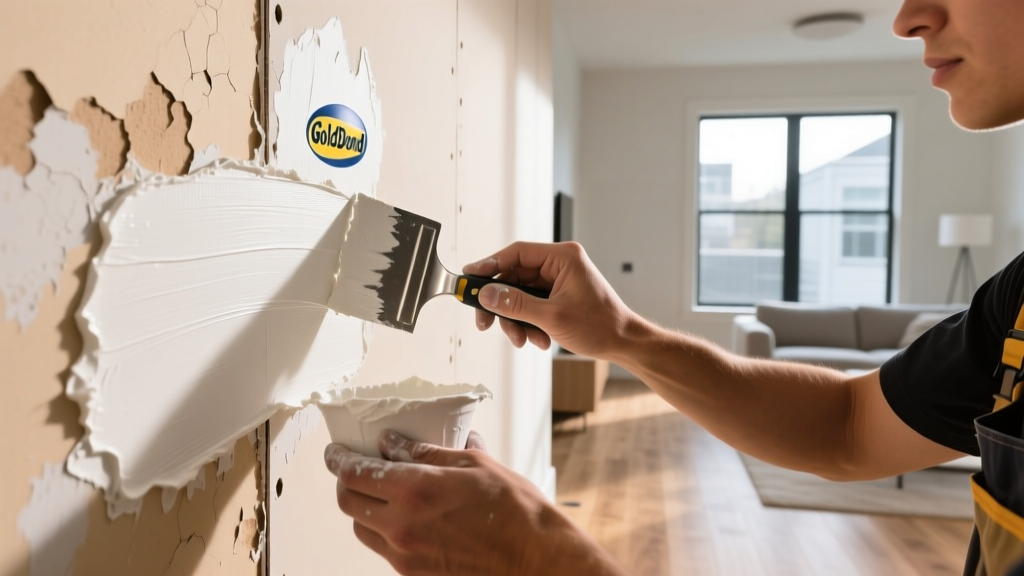
To repair a cracked seam in a Fire-Shield assembly, you cannot simply skim-coat the crack. You must rebuild the joint treatment system:
- Route the Crack: Use a utility knife or a specialized routing tool to carve a 1/4-inch V-groove along the entire length of the crack. This removes loose compound and creates a mechanical key for the new material.
- Pre-fill the Groove: Pack the V-groove tightly with a setting-type joint compound. Setting compounds undergo a chemical crystallization process, making them significantly harder and more resistant to shrinking than air-drying compounds.
- Re-tape the Joint: If the original tape is blistered or torn, cut it out completely. Apply a fresh layer of ProForm All Purpose Joint Compound and embed new paper tape, smoothing it with a 6-inch taping knife.
- Apply Broad Coats: Fire-rated joints require a minimum of three coats of compound. Apply a 10-inch wide second coat, followed by a 12-inch wide topping coat using ProForm Lite to minimize sanding and feather the edges seamlessly into the surrounding field.
Repairing Impact Damage in High-Traffic Zones
Commercial corridors and hospital hallways frequently utilize Gold Bond Hi-Abuse or Hi-Impact boards. While Hi-Abuse relies on a heavy-duty face paper to resist surface abrasion, Hi-Impact features a fiberglass mesh embedded directly into the gypsum core to resist penetration from carts and gurneys.
Patching Hi-Impact Penetrations
When an object punctures a Hi-Impact board, the internal fiberglass mesh frays and bunches up. A standard drywall patch will fail because it lacks the structural backing of the mesh.
"When repairing Gold Bond Hi-Impact, the structural integrity of the embedded mesh must be replicated. We recommend using a backing board that overlaps the puncture by at least 6 inches on all sides, secured with construction adhesive and mechanical fasteners, before applying the final joint compound layers." — National Gypsum Technical Services
Cut a clean square around the puncture. Insert a 6-inch wide strip of 1/2-inch plywood or a scrap piece of Hi-Impact board behind the hole as a backer. Secure the backer to the existing drywall using drywall screws. Cut your replacement Hi-Impact patch, screw it to the backer, and finish the seams with three coats of compound, ensuring the final surface can withstand the same impact loads as the original installation.
Common Repair Mistakes That Void Warranties
- Mismatching Thickness: Patching a 5/8-inch Fire-Shield ceiling with 1/2-inch standard board to save weight. This instantly voids the UL fire rating.
- Over-Sanding the Facer: Sanding through the green facer on Gold Bond XP boards exposes the untreated core, nullifying the mold-resistant properties.
- Using the Wrong Screws: Using fine-thread Type S screws on wood framing instead of coarse-thread Type W screws, leading to insufficient pull-through resistance and eventual fastener pops.
FAQ: Gold Bond Maintenance and Repair
Can I use standard joint compound on Gold Bond XP boards?
Yes, for the final finishing coats in dry areas. However, for the taping and first coat in moisture-prone areas (like bathrooms), always use a setting-type compound. Standard air-drying compounds can re-emulsify if exposed to high humidity before they are fully sealed with primer and paint.
How do I repair a small dent in Gold Bond Fire-Shield without compromising the fire rating?
If the dent has not broken the face paper or exposed the core, it is purely cosmetic. You can fill it with a lightweight spackling or topping compound. The fire rating relies on the continuous, unbroken layer of gypsum and face paper; superficial dents that leave the paper intact do not compromise the assembly's thermal barrier.
Where can I find the specific UL design for my Gold Bond wall assembly?
National Gypsum maintains a comprehensive database of tested assemblies. You can cross-reference your specific framing type, insulation, and board thickness against the Gold Bond product catalog or the UL Product iQ database to ensure your repair matches the original tested design parameters.
Written by
Sarah WhitfieldSarah Whitfield is a chartered quantity surveyor (MRICS) and construction cost analyst with 15 years of experience in material pricing, procurement strategy, and project budgeting. She earned her degree in Construction Management from the University of Reading (UK) and has worked on projects ranging from $2M custom homes to $180M mixed-use developments across North America and Europe. Sarah currently leads cost estimating for BuildMat Insight, maintaining a proprietary database of 4,000+ material price points updated quarterly. She is a frequent contributor to RSMeans cost data panels and has presented at the International Cost Engineering Council (ICEC) congress. Based in Denver, CO, Sarah is an avid trail runner and volunteer mentor for Women in Construction.
More from Sarah Whitfield
View all
Wood & Lumber
What Are the Different Types of Wood? A Builder's Guide
Compare structural softwoods, finish hardwoods, and engineered lumber. Analyze Janka ratings, MOE values, and 2026 pricing for construction.
Aug 4, 2026

Walls & Panels
Steel Framing vs Wood Framing: Corrosion and Moisture Defense
Compare steel framing vs wood framing for moisture resistance. Learn about galvanized coatings, condensation risks, and corrosion protection strategies.
Jul 21, 2026

Stone & Masonry
How to Cut Stone Veneer: Wet Saw vs Grinder Comparison
Compare the best tools for cutting stone veneer. We review wet saws, angle grinders, and chop saws to help you achieve clean, chip-free cuts.
Jul 21, 2026