Troubleshooting Moisture Resistant Gypsum Board Failures
Learn how to diagnose and repair moisture resistant gypsum board failures, including mold growth, sagging, and joint compound degradation in humid areas.

Diagnosing the Root Cause of Moisture Damage
Moisture resistant gypsum board (MRGB) is engineered with a water-repellent core and specialized facing to withstand high-humidity environments. However, it is frequently misunderstood by DIYers and general contractors alike, leading to catastrophic failures in bathrooms, laundry rooms, and commercial kitchens. When troubleshooting damaged MRGB, the first step is identifying whether the failure stems from material misuse, environmental overload, or improper installation techniques.
According to the Gypsum Association's GA-216 guidelines, moisture-resistant panels must not be installed where they will be exposed to direct water impingement or continuous high humidity before the building's HVAC system is fully operational. If your board is failing, use a pinless moisture meter to test the gypsum core. Readings above 15% moisture content indicate that the board's internal desiccants are saturated, compromising its structural integrity and requiring immediate remediation.
Moisture resistant gypsum board is not waterproof. It is designed to resist ambient humidity and occasional condensation. Installing paper-faced green board directly behind shower tiles without a liquid-applied waterproofing membrane (like RedGard) or a sheet membrane (like Schluter Kerdi) violates modern building codes and guarantees eventual core saturation and mold growth.
Common Failure Modes and Repair Protocols
1. Paper-Facing Delamination and Mold Growth
Traditional "green board" utilizes a heavy paper facing treated with water-resistant chemicals. While the gypsum core contains wax or silicone emulsions to repel water, the paper facing remains organic. In environments where relative humidity consistently exceeds 65%, the starches in the paper facing become a food source for mold spores. If you observe black or green spotting on the surface, or if the paper is bubbling and delaminating from the core, the board is compromised.
The Fix: Do not attempt to bleach or paint over mold-damaged paper. You must cut out the affected sections and replace them with fiberglass-mat faced gypsum panels, such as Georgia-Pacific DensArmor Plus or USG Securock. Fiberglass mats are inorganic and provide zero nutritional value to mold, complying with the stringent ASTM D3273 mold-resistance standard.
2. Fastener Popping and Board Sagging
Sagging is a prevalent issue when 1/2-inch MRGB is installed on ceiling joists spaced 24 inches on-center (OC) in high-humidity zones. The added weight of ambient moisture absorption causes the gypsum core to bow between the joists, leading to fastener pops and visible ridges at the seams.
The Fix: For ceiling repairs in damp areas, you must either reduce the framing spacing to 16 inches OC or upgrade to 5/8-inch thick moisture-resistant board. When re-securing the board, use 1-1/4-inch Type S coarse-thread drywall screws for wood framing, or 1-1/8-inch Type S fine-thread screws for light-gauge steel. Fasteners must be spaced a maximum of 8 inches apart on ceilings and 12 inches on walls to counteract the expansion forces of humid air.
3. Joint Compound Degradation and Seam Cracking
A frequent repair scenario involves cracked seams and crumbling mud in bathrooms. This occurs when contractors use standard air-drying all-purpose joint compound in high-humidity areas. Air-drying compounds rely on evaporation to cure; in a humid bathroom, they remain soft, re-emulsify when exposed to steam, and fail to bond the tape to the board.
The Fix: Scrape out all failing air-drying compound. For the repair, exclusively use setting-type joint compounds (e.g., USG Durabond 45 or Sheetrock Easy Sand 90). Setting compounds cure via a chemical reaction (calcium sulfate hemihydrate converting to dihydrate), making them impervious to ambient humidity and significantly harder than air-drying alternatives.
Material Selection Matrix for Humid Environments
Selecting the correct replacement material is critical. Use this matrix to determine the appropriate board for your specific repair scenario:
| Board Type | Facing Material | Best Application | Limitations |
|---|---|---|---|
| Standard MR (Green Board) | Treated Paper | Powder rooms, non-shower bathroom walls | Cannot be used in continuous wet areas; paper can mold |
| Fiberglass-Mat MR | Fiberglass Mat | Commercial kitchens, high-humidity ceilings | Higher cost; requires sharp blades to cut cleanly |
| Glass-Mat Water-Resistant | Coated Fiberglass | Tile backer in showers (behind membrane) | Must be paired with liquid/sheet waterproofing |
| Cement Board | Portland Cement / Mesh | Direct tile surrounds, steam showers | Heavy, difficult to cut; not for general wall finishing |
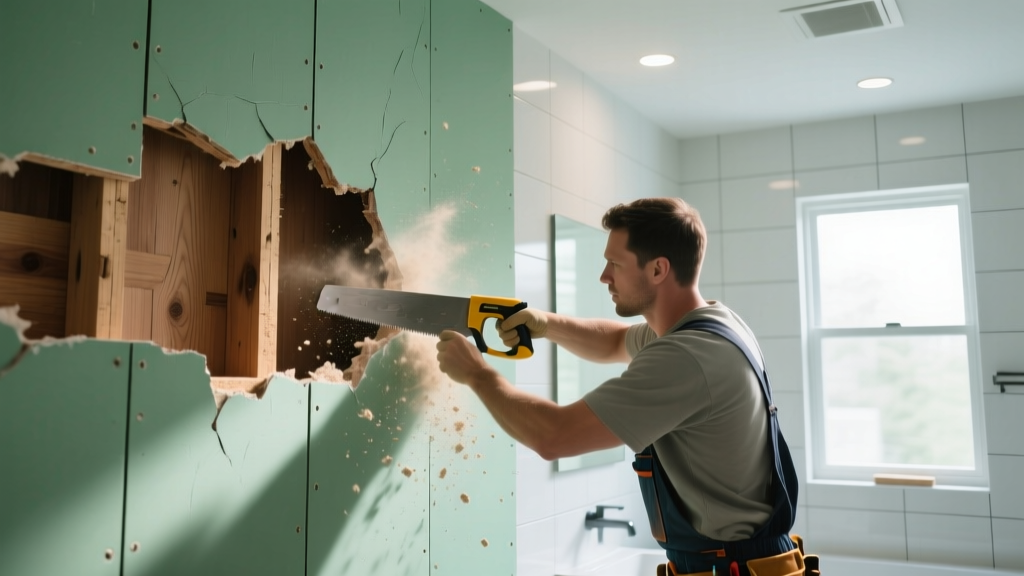
Step-by-Step Patching Procedure for Water-Damaged MRGB
When excising and replacing damaged sections of moisture resistant gypsum board, follow this precise protocol to ensure the repair matches the moisture performance of the surrounding field.
Step 1: Isolate and Excavate
- Use a thermal imaging camera or pinless moisture meter to map the exact perimeter of the damp gypsum core.
- Mark a cutting line at least 2 inches beyond the visible damage, ensuring the edges land squarely on the center of a wall stud or ceiling joist.
- Score the board with a utility knife and snap the core. Avoid using a reciprocating saw blindly, as this can puncture hidden plumbing or vapor barriers.
Step 2: Treat the Substrate and Cavity
Before installing the new patch, the exposed wood or steel framing must be treated. The EPA's mold remediation guidelines emphasize that moisture-damaged porous materials must be cleaned and treated to prevent regrowth. Apply a borate-based fungicide and wood preservative (such as Bora-Care) to the exposed studs. Allow the framing to dry completely—verify with a moisture meter reading below 12%—before proceeding.
Step 3: Install the Patch and Tape
- Cut your replacement fiberglass-mat MRGB panel to fit the opening, leaving a strict 1/8-inch gap around the perimeter to allow for expansion.
- Secure the patch using corrosion-resistant, hot-dipped galvanized drywall screws. Standard phosphate-coated screws will rust in high-humidity environments, causing unsightly brown bleed-through on the finished surface.
- Apply self-adhesive fiberglass mesh tape over all seams. Do not use paper tape, as it relies on organic adhesives and can harbor mold if moisture penetrates the topcoat.
- Embed the tape using a setting-type joint compound (e.g., Durabond 45). Apply three thin coats, sanding lightly between coats with 150-grit silicon carbide sandpaper.
Environmental Testing and Preventative Measures
Understanding the building science behind moisture movement is crucial for long-term durability. As detailed in research by Building Science Corporation, materials in high-humidity zones must be able to dry to at least one side. When repairing MRGB, never trap moisture by applying impermeable vinyl wallcoverings or epoxy paints directly over the repaired gypsum surface. These coatings prevent the board from drying inward if a minor plumbing leak occurs, leading to hidden core saturation.
Once the joint compound is fully cured and sanded, seal the repair with a high-quality, mold-inhibiting acrylic primer (such as Zinsser Perma-White or Kilz Mold & Mildew). Standard PVA drywall primer is insufficient for damp areas, as it remains water-soluble and will blister if exposed to heavy steam. Ensure the primer is rated for high-humidity environments before applying your final semi-gloss or satin topcoat.
By correctly identifying the failure mechanism, upgrading to fiberglass-faced materials where appropriate, and utilizing chemical-setting compounds and galvanized fasteners, you can restore the structural and moisture-resistant integrity of the assembly. Proper troubleshooting ensures the repaired section will perform equivalently to the original installation under the rigorous demands of modern building codes.
Written by
Priya KapoorPriya Kapoor is a real estate market analyst and construction economics researcher with expertise in housing affordability, development feasibility, and infrastructure investment. She holds a Master of Regional Planning from Cornell University and previously worked as a senior analyst at CBRE's Investment Properties group, where she modeled returns for $4B in mixed-use development pipelines. Priya now runs an independent research practice advising developers, municipalities, and REITs on construction cost forecasting and market timing. She publishes the quarterly "BuildMat Market Pulse" report tracking material price indices across 12 commodity categories. Based in Austin, TX, Priya serves on the board of Habitat for Humanity Austin and is a marathon runner.
More from Priya Kapoor
View all
Construction Cost
Cost to Build a 1600 Sq Ft Home in 2026: Full Breakdown
Accurate 2026 cost to build a 1600 sq ft home—material, labor, and regional pricing breakdowns included. Plan your budget with real-time estimates.
Aug 11, 2026

Wood & Lumber
Name the Types of Wood for Pressure Treatment and Preservation
Learn how to name the types of wood best suited for pressure treatment. Compare species treatability, chemical retention levels, and 2026 preservation costs.
Aug 4, 2026

Stone & Masonry
Stone Veneer Suppliers Lindenhurst: 2026 Cost Analysis
Analyze 2026 stone veneer costs in Lindenhurst, NY. Compare local supplier pricing, delivery fees, and Suffolk County installation labor rates.
Aug 4, 2026