1/4 Gypsum Board Guide: Curved Walls, Skimming & Specs
Master 1/4 gypsum board applications. Learn framing specs, bending techniques for curved walls, double-layer skimming costs, and top product picks.

The Structural Reality of 1/4-Inch Gypsum Board
Quarter-inch gypsum board (6.35mm) is a highly specialized building material engineered for scenarios where standard 1/2-inch or 5/8-inch panels fail. It is not a substitute for standard wallboard; deploying it on flat, 24-inch on-center (O.C.) framed walls will result in immediate sagging and structural failure. Instead, 1/4-inch drywall serves three distinct architectural and renovation purposes: executing tight-radius curved walls, double-layering over damaged existing surfaces without demolition, and outfitting weight-sensitive structures like mobile homes and recreational vehicles.
Understanding the mechanical limitations and precise installation requirements of this material is critical. According to the Gypsum Association's GA-216 application guidelines, reducing the core thickness drastically alters the panel's load-bearing capacity, fastener schedule, and acoustic properties. This guide details the exact specifications, product selections, and installation frameworks required for 1/4-inch gypsum board in modern construction.
Technical Specifications and Framing Requirements
The physical properties of 1/4-inch board dictate strict framing tolerances. Because the gypsum core is thin, the paper facers bear a disproportionate amount of the tensile stress. If the underlying framing exceeds maximum spacing, the board will bow between the joists or studs under its own weight or minor impact.
| Specification | Standard 1/4" Board | Flexible 1/4" Board |
|---|---|---|
| Core Thickness | 0.25 in (6.35 mm) | 0.25 in (6.35 mm) |
| Weight (4x8 Sheet) | ~38 lbs (1.2 lbs/sq ft) | ~38 lbs (1.2 lbs/sq ft) |
| Max Wall Framing Spacing | 16 in O.C. | 16 in O.C. (often 12 in for tight curves) |
| Max Ceiling Framing | 12 in O.C. (Base layer only) | 12 in O.C. (Base layer only) |
| Min Bending Radius (Dry) | 10 ft (parallel to framing) | 2 ft 6 in (perpendicular to framing) |
| Required Fastener Length | 1-1/4" (Wood) / 1" (Steel) | 1-1/4" (Wood) / 1" (Steel) |
Primary Applications: Where 1/4" Drywall Excels
1. Curved Walls, Arches, and Radiused Bulkheads
Standard 1/2-inch drywall can be scored and snapped for gentle curves, but it cannot accommodate radii tighter than 10 feet without fracturing the core. For architectural features like curved stairwell bulkheads, arched doorways, or circular reception desks, 1/4-inch board is mandatory. When installed with the long dimension perpendicular to the curved framing, specialized flexible panels can wrap around a radius as tight as 30 inches. For even tighter radii, installers must utilize a wet-bending technique or laminate two layers of 1/4-inch board together over the curved substrate.
2. Double-Layering and Skimming Over Existing Surfaces
In commercial renovations and historical restorations, demolishing existing plaster or damaged drywall generates massive debris removal costs and exposes hazardous materials like lead paint or asbestos. Applying a fresh layer of 1/4-inch gypsum board directly over the existing wall (often called "skimming" or "capping") provides a pristine nailable surface. When paired with a viscoelastic damping compound like Green Glue between the old and new layers, this double-layer technique significantly improves the Sound Transmission Class (STC) rating of the partition, turning a standard STC 33 wall into an STC 45+ acoustic barrier.
3. Mobile Homes and RV Outfitting
Manufactured housing and luxury motorhomes operate under strict weight limitations. Standard 5/8-inch Type X board adds approximately 2.3 lbs per square foot, which can push a mobile home over its chassis weight rating. The 1.2 lbs/sq ft profile of 1/4-inch board provides a fire-resistant, paintable interior finish while keeping gross vehicle weight within Department of Transportation (DOT) towing limits.
Top Product Lines for 1/4" Applications
Not all 1/4-inch panels are manufactured equally. The composition of the gypsum core and the tensile strength of the paper facer determine how well the board handles bending stress. Based on current 2026 market availability, these are the primary options:
- USG Sheetrock Flexible Gypsum Panels: The industry standard for curved applications. Engineered with a specialized core and high-tensile facers, USG Flex panels allow for 30-inch radii without pre-wetting. They are more expensive than standard board but eliminate the labor cost and drying time associated with wet-bending.
- USG Sheetrock UltraLight 1/4" Regular: Best suited for double-layering over flat existing walls. The lightweight core reduces installer fatigue when lifting sheets overhead for ceiling capping, though it lacks the flexural strength for tight curves.
- CertainTeed Regular 1/4" Gypsum Board: A reliable, cost-effective option for mobile home renovations and broad, sweeping arches (10+ foot radii). It features a standard tapered edge for easy finishing when used as a single layer.
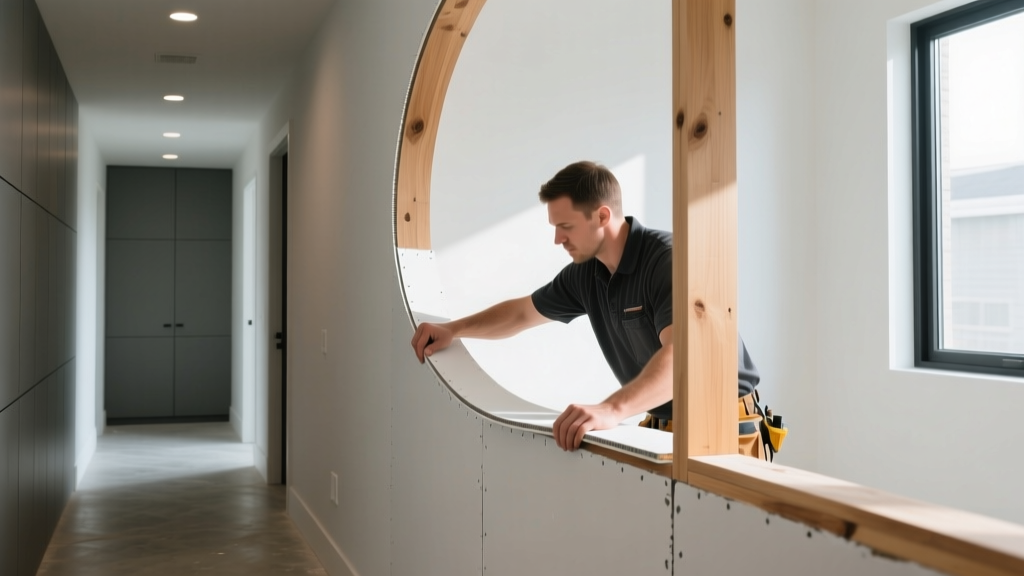
Step-by-Step Installation: Wet-Bending Standard 1/4" Board
When flexible panels are unavailable or the budget restricts their use, standard 1/4-inch board can be wet-bent to achieve tighter radii. This process temporarily softens the gypsum core and relaxes the paper facers.
- Prepare the Substrate: Ensure the curved framing (typically 1/2" plywood strips or closely spaced 2x2 studs) is perfectly plumb and spaced no more than 6 inches O.C. for tight curves.
- Score the Back Paper: Using a utility knife, lightly score the back paper of the gypsum board every 2 inches along the length of the panel. Do not cut into the gypsum core; only sever the paper tension.
- Apply Moisture: Lay the panel flat. Using a large cellulose sponge and clean water, thoroughly dampen the scored back side. Allow the water to penetrate for 15 to 20 minutes. The board should feel pliable but not disintegrating.
- Position and Fasten: Lift the panel to the curved frame. Starting from the center of the curve and working outward, secure the board using 1-1/4" drywall screws spaced 4 inches O.C. along every stud.
- Force Drying: Because the trapped moisture can cause mold or degrade wood framing, deploy industrial dehumidifiers and high-velocity air movers immediately after installation to force-dry the core within 24 hours.
Cost Breakdown: Material and Labor Estimates
The economics of 1/4-inch gypsum board differ significantly from standard drywall. While the raw material is slightly cheaper per sheet, the labor intensity—driven by tighter framing requirements, double-layering, or complex bending—increases the overall installed cost.
| Cost Component | Standard 1/2" Wall (Baseline) | 1/4" Double-Layer Skimming | 1/4" Curved Wall (Flex Board) |
|---|---|---|---|
| Material Cost (per sq ft) | $0.45 - $0.55 | $0.80 - $1.10 (incl. adhesive) | $1.20 - $1.60 (Flex panels) |
| Framing Cost (per linear ft) | $2.50 (16" O.C.) | $0.00 (Existing wall) | $8.00 - $12.00 (Curved ply/stud) |
| Labor & Finishing (per sq ft) | $1.50 - $2.00 | $2.20 - $2.80 | $4.50 - $6.00 |
| Total Installed Cost (per sq ft) | $4.45 - $5.05 | $3.00 - $3.90 | $13.70 - $19.60 |
Common Failure Modes and How to Avoid Them
Deploying 1/4-inch board outside its engineered parameters leads to predictable, costly failures. Recognizing these edge cases during the planning phase prevents expensive tear-outs.
Cause: Installing 1/4-inch board as a single-layer ceiling finish on 16" or 24" O.C. joists. The thin core lacks the rigidity to span these distances, leading to visible 'pillowing' between joists within weeks of installation.
Fix: 1/4-inch board must never be used as a single-layer ceiling finish. It is only permitted on ceilings as a base layer beneath a 1/2" or 5/8" face layer, or on framing spaced strictly at 12" O.C. or less.
Cause: Over-driving screws. Because the core is only 1/4" thick, standard drywall dimpling tools often drive the screw head completely through the paper facer, destroying the holding power.
Fix: Adjust the clutch on your drywall screw gun to a lower torque setting. Use 1-1/4" coarse-thread screws for wood and ensure the screw head sits exactly flush with the paper surface, breaking the paper dimple but never cutting it.
Cause: Taping and mudding the butt joints of 1/4-inch board on a tight curve. The natural tension of the bent board will push the joint compound out, causing hairline cracks along the seams.
Fix: Whenever possible, orient the board so the long, tapered factory edges run horizontally across the curve. Avoid vertical butt joints on the apex of the curve. If butt joints are unavoidable, use high-tensile fiberglass mesh tape and setting-type joint compound (e.g., Durabond 45) rather than standard pre-mixed mud.
Summary: Specifying 1/4-Inch Gypsum Board
Quarter-inch gypsum board is a problem-solving material. It bridges the gap between rigid structural wallboard and flexible substrates like bendable plywood or MDF. By strictly adhering to the 16-inch O.C. wall and 12-inch O.C. ceiling framing limits, utilizing flexible panels for radii under 10 feet, and employing proper wet-bending or lamination techniques for tighter curves, contractors can execute complex architectural designs without compromising the integrity of the finish. Always consult the specific manufacturer's submittal sheets, such as those provided by CertainTeed and USG, to verify the exact fastener schedules and bending radii for the specific product line purchased for your project.
Written by
Elena RodriguezElena Rodriguez is a civil engineer and technical writer specializing in concrete technology, masonry systems, and ASTM/ACI compliance. She earned her B.S. in Civil Engineering from Texas A&M University and spent a decade at a materials testing laboratory, performing over 2,000 concrete compressive strength tests and masonry prism evaluations. Elena is an ACI-certified Field Testing Technician (Grade I) and a member of ASTM Committee C12 on Natural Building Stone. She currently consults on forensic engineering cases involving concrete failures and moisture intrusion. Based in San Antonio, TX, Elena is a proud member of the Society of Women Engineers (SWE) and coaches her daughter's FIRST Robotics team.
More from Elena Rodriguez
View all
Walls & Panels
Cost Analysis: Light Gauge Steel Framing Advantages and Disadvantages
Evaluate light gauge steel framing advantages and disadvantages through a strict cost analysis lens, comparing material, labor, and lifecycle expenses.
Aug 4, 2026

Walls & Panels
Gypsum Board Types: Exact Specifications, Thickness & Dimensions
Compare standard, Type X, and moisture-resistant gypsum board types. Get exact specifications, thicknesses, dimensions, and ASTM standards for your project.
Aug 4, 2026

Fire Resistance
Best Fire-Resistant Outdoor Decking Materials: 2026 Buyer Guide
Discover the best fire-resistant outdoor decking materials for 2026. Compare Class A PVC, aluminum, and hardwood options for WUI compliance and safety.
Aug 4, 2026